Chimney Flashing Maintenance: Preventing Leaks at Roof Penetrations
By Housey · Last reviewed 11th of May 2026

Chimney Flashing Maintenance: Preventing Leaks at Roof Penetrations
Chimney flashings are among the most vulnerable points on any pitched roof, and in UK properties — where Victorian and Edwardian chimney stacks remain common — a failed flashing is one of the leading causes of internal water damage. Most homeowners only discover the problem when damp patches appear on upstairs ceilings or bedroom walls, by which time water may have been tracking through the roof structure for months.
Key points
- Lead sheet to BS EN 12588 is the standard material for chimney flashings in UK new build and repair work; Code 3 (1.32 mm) is the minimum thickness for soakers, while Code 4 (1.80 mm) is recommended for cover flashings and longevity.
- A chimney flashing system comprises three main elements: step flashings woven into tile courses alongside the chimney, counter (cover) flashings dressed into a raggle joint cut into the masonry, and a back gutter or soakers behind the stack.
- Chimney flashing repair or like-for-like replacement generally qualifies as maintenance and does not require a building regulations application, though structural alteration to the chimney itself may need building control notification.
- Pointing failure and freeze-thaw movement in the raggle joint are the most common causes of chimney flashing failure in UK properties — not the lead sheet itself, which correctly specified can last 50–80 years.
- A RICS Home Survey Level 2 or Level 3 will flag defective chimney flashings as a condition rating 2 or 3 item, which can affect mortgage valuations and buyer renegotiation leverage.
What chimney flashing does and why it fails
A chimney flashing seals the junction between a masonry chimney stack and the surrounding roof covering. Without it, rainwater driven by wind — particularly from the exposed back face of the chimney — channels directly behind the tile or slate courses and into the roof space. In the UK climate, where driving rain from the south-west is common, this junction is under near-constant stress.
Failure rarely comes from the lead sheet itself deteriorating. The most common failure modes in UK properties are:
- Raggle joint failure: The counter flashing is dressed into a horizontal groove (raggle) cut into the chimney mortar. As mortar carbonates and weathers it contracts, causing the flashing to lift and breaking the seal.
- Freeze-thaw movement: Water in hairline cracks within the mortar expands on freezing, progressively widening the gap between the flashing and the masonry.
- Incorrect original installation: Overlaps too short, no soakers installed, or flashings tack-pointed rather than properly dressed into a cut raggle.
- Differential movement: The chimney stack and roof structure move independently over time; rigid sealants such as silicone or mortar crack, while correctly installed lead flexes without failing.
Types of chimney flashing used in UK homes
Flashing element | Location | Function | Common failure sign |
|---|---|---|---|
Step flashings / soakers | Alongside both sides of the chimney, woven under each tile course | Prevents water tracking between tile courses and chimney masonry | Damp patch on side wall below chimney; staining under eaves |
Counter (cover) flashing | Seated in raggle joint, lapping over step flashings | Weatherproofs the top of the step flashing assembly | Flashing lifted away from masonry; visible gap at top edge |
Back gutter | Rear face of chimney, above tile level | Collects water running down the back face of the stack | Damp patch on ceiling just upslope of chimney |
Apron (front) flashing | Front face of chimney, below tile level | Prevents water entering at the low-side junction | Damp patch on ceiling just downslope of chimney |
Knowing which element has failed helps you describe the problem accurately when obtaining quotes from a contractor.
Red flags: signs your chimney flashing needs attention
The following signs indicate you should arrange a professional inspection without delay:
- Damp patches on ceilings or walls near the chimney breast, particularly after heavy rain or driving wind.
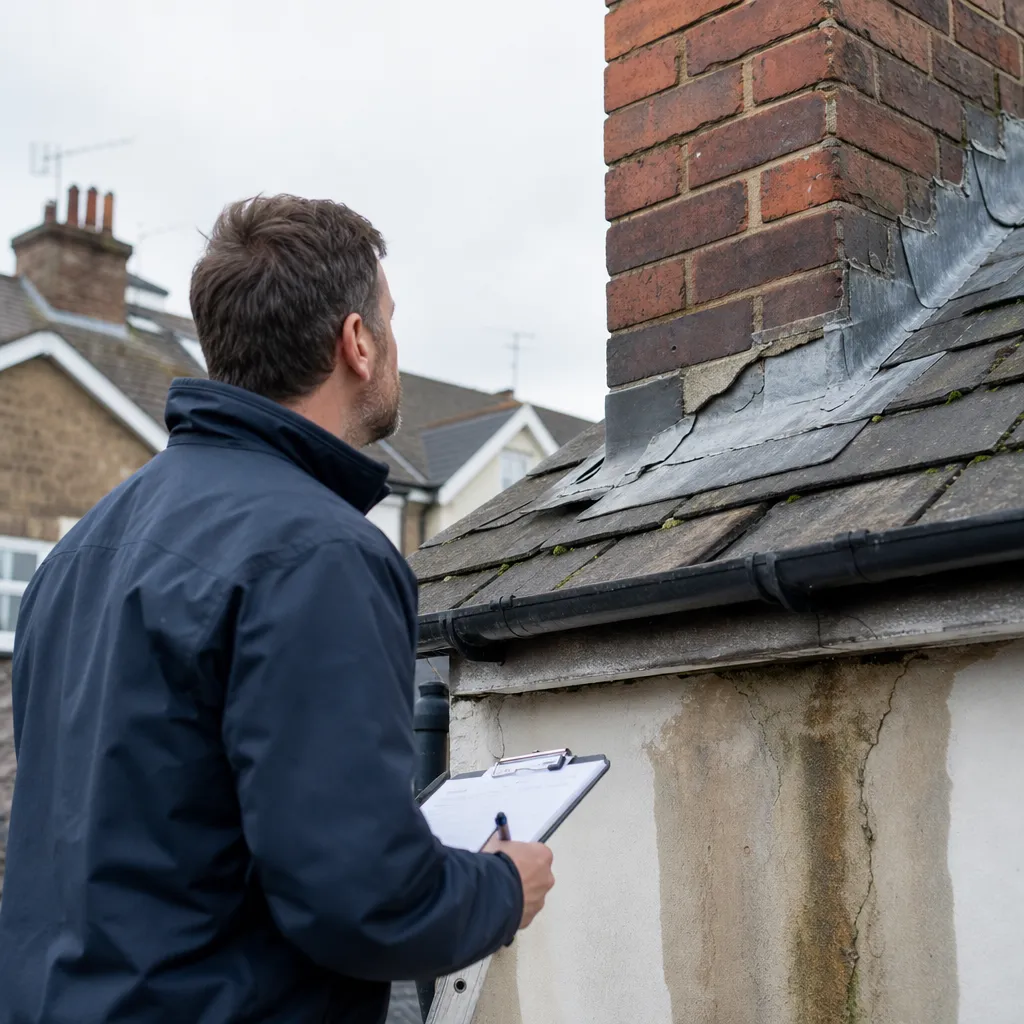
- Visible gap between flashing and masonry — check from ground level with binoculars, or from inside the loft.
- Staining or efflorescence on the chimney breast internally, suggesting prolonged moisture movement through the masonry.
- Flaking or lifting lead visible along the roof slope adjacent to the chimney.
- Loose or crumbling mortar in the raggle joint — a precursor to flashing failure even before any internal leak appears.
- Silicone or mastic patching visible on an existing flashing — a temporary fix that typically fails within a few years and may mask a deeper underlying problem.
- Damp smell or mould in a top-floor room directly beneath a chimney stack.
If you can access your loft safely without going onto the roof slope, look for daylight, water staining on rafters, or moisture on the sarking felt around the chimney base.
Chimney flashing repair options
Repoint the raggle joint
If the lead flashing itself is sound but the raggle joint mortar has failed, a roofer can rake out and repoint the joint with mortar, lead wedges, and appropriate sealant. This is typically the least expensive repair. Indicative cost: £150–£400 depending on access and flashing run length. Indicative UK costs, last reviewed 2026-05-11. Quotes vary by region, access difficulty, and scaffold requirements.
Like-for-like lead replacement
Where the lead is under-gauge, incorrectly installed, or physically damaged, stripping and relaying to current specification is the correct remedy. A competent contractor should use Code 4 lead (BS EN 12588) for stepped flashings and dress the counter flashing into a newly cut or re-raked raggle joint. Indicative cost for a typical semi-detached chimney stack: £400–£900, excluding scaffold. Indicative UK costs, last reviewed 2026-05-11. Obtain at least two quotes.
Do not patch with silicone
Silicone and bituminous mastics are a temporary measure only. They typically fail within 2–5 years in UK weather conditions and can trap moisture behind the flashing, accelerating mortar decay and making the underlying problem progressively worse.
Homeowner maintenance checklist
Carry out this checklist after sustained heavy rain and as part of an annual roof inspection:
When to get professional help
Always instruct a qualified, insured roofing contractor for chimney flashing work above single-storey height. Working at height without appropriate equipment is dangerous, and correctly dressing lead flashings into a raggle joint requires skill and experience to do properly.
Arrange a professional inspection if:
- You can see an open gap between the flashing and masonry from ground level.
- You have damp on internal ceilings or walls near the chimney after rainfall.
- A RICS survey flagged chimney flashings as a condition 2 or 3 defect.
- The chimney has not been inspected or maintained in over 10 years.
- You are preparing to sell — failed flashings are a common buyer renegotiation point.
- There is visible moss or lichen growth on the stack, which can indicate sustained moisture retention.
A competent contractor should provide a written quote itemising materials, lead specification (code number), and any associated pointing or brickwork work required.
How Housey can help
Housey can connect you with vetted qualified local roofers experienced in lead chimney flashing work across the UK. Submit a brief description of the problem and your property location to receive quotes from up to four contractors — so you can compare specification and approach, not just price.
Frequently asked questions
How long should chimney flashings last?
Lead flashings to BS EN 12588 Code 4, correctly installed with proper raggle joints and adequate allowance for thermal movement, typically last 50 to 80 years. Shorter lifespan usually reflects incorrect original installation — undersized lead, mortar bedding instead of a cut raggle, or flashings tacked rather than properly dressed — rather than the material failing.
Does chimney flashing repair need building regulations approval?
Like-for-like repair or replacement is generally classed as maintenance and does not require a building regulations application. If the work involves structural alterations to the chimney, changes to the flue liner, or significant masonry repairs, building control notification may be required. Check with your local authority if uncertain.
Can I inspect chimney flashings myself?
You can carry out a visual inspection from ground level with binoculars, or check the loft space without accessing the roof slope. Do not climb onto the roof without proper scaffold or access equipment. Falls from roofs cause serious injuries and fatalities in the UK every year, and domestic ladders are not safe for working at chimney height.
What is the difference between a soaker and a step flashing?
Soakers are small individual pieces of lead placed under each tile course alongside the chimney to prevent lateral water tracking beneath the tiles. Step flashings are larger, overlapping pieces dressed into the mortar courses of the chimney. Used together as a system they form a complete weatherproof junction; neither element alone provides adequate protection.
Why does my ceiling get damp near the chimney only in heavy rain?
Driving rain exerts far greater lateral pressure on flashing junctions than light vertical rain. A partially failed flashing — with a small gap or deteriorated mastic repair — may only leak under wind-driven conditions. This does not indicate a minor problem; a partial failure will typically worsen over time and should be inspected and repaired promptly.
Sources and further reading
- Lead Sheet Association — Technical Resources — Lead Sheet Association
- BS EN 12588 — Lead and lead alloys for building applications — BSI
- BS 6915 — Design and construction of fully supported lead sheet roof coverings — BSI
- GOV.UK — Building Regulations Approved Documents — GOV.UK
- RICS Home Survey Standard — RICS
Useful next reads
 Improvement & Build
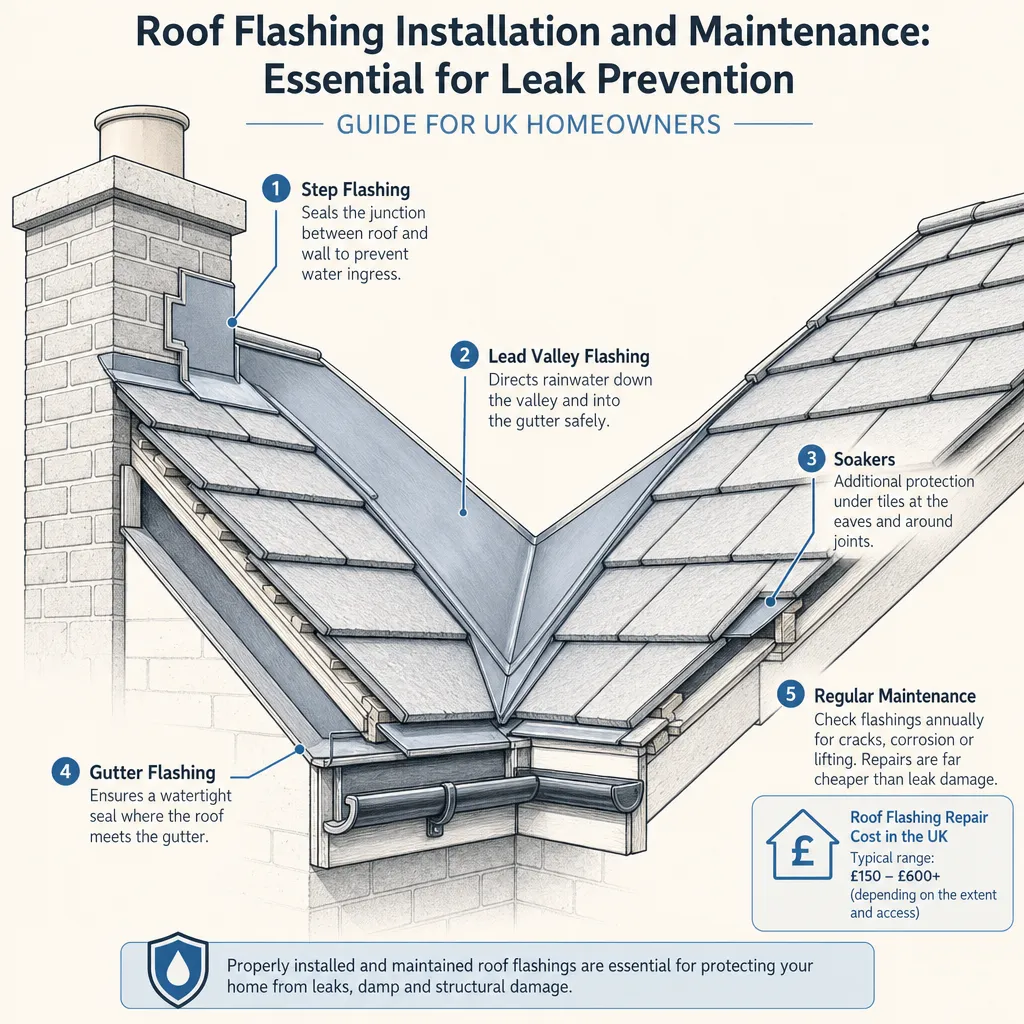
Roof Flashing Installation and Maintenance: Essential for Leak Prevention
Roof flashings seal every junction between the roof covering and an adjoining surface.
 Improvement & Build
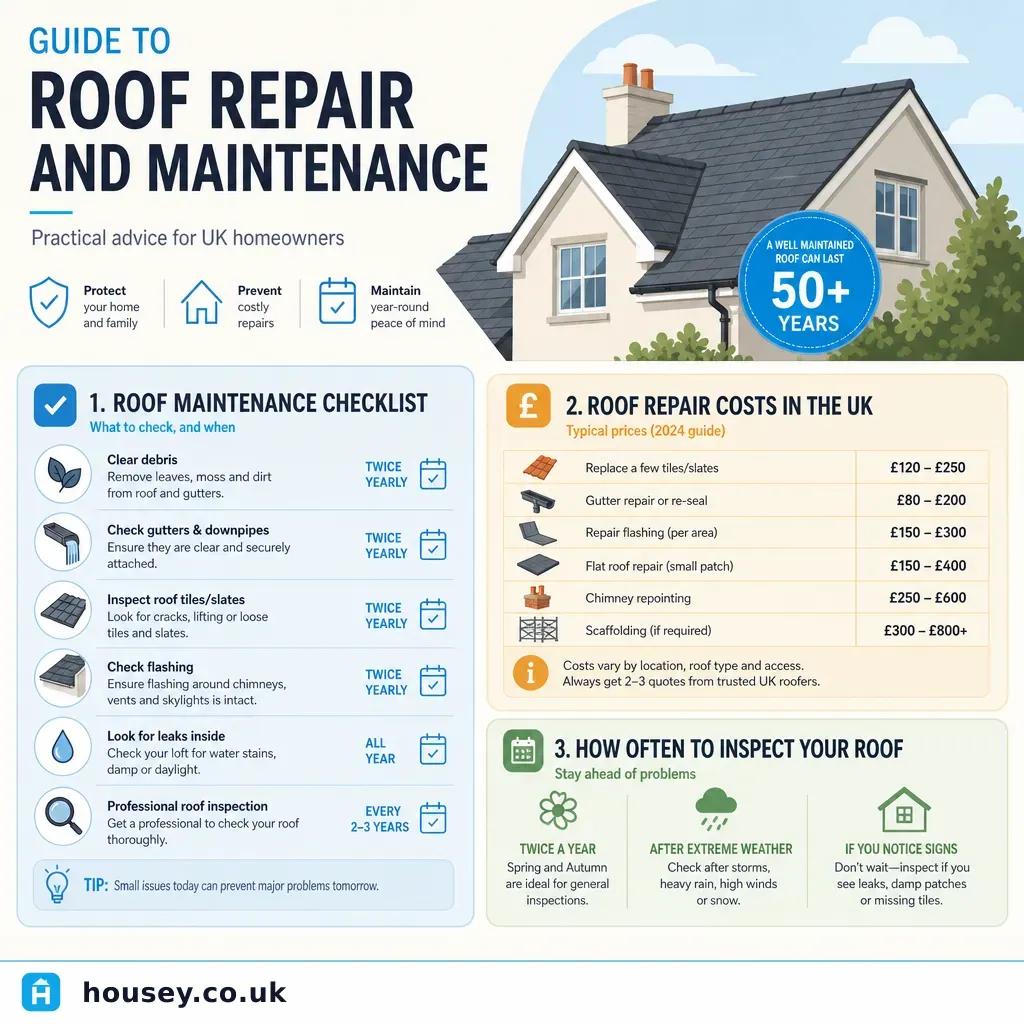
Guide to Roof Repair and Maintenance
Regular roof inspections every 3–5 years, prompt repair of damaged tiles and failed flashings, and annual gutter clearance are the core of effective UK roof maintenance.
 Improvement & Build
Why incorrect roof repairs lead to masonry water damage
Poorly executed roof repairs — including failed flashing, incorrect mortar on chimney stacks, and unrestored weathering details — allow water to track behind masonry, causing damp patches, spalling, and timber decay, often months after the original work.
 Improvement & Build
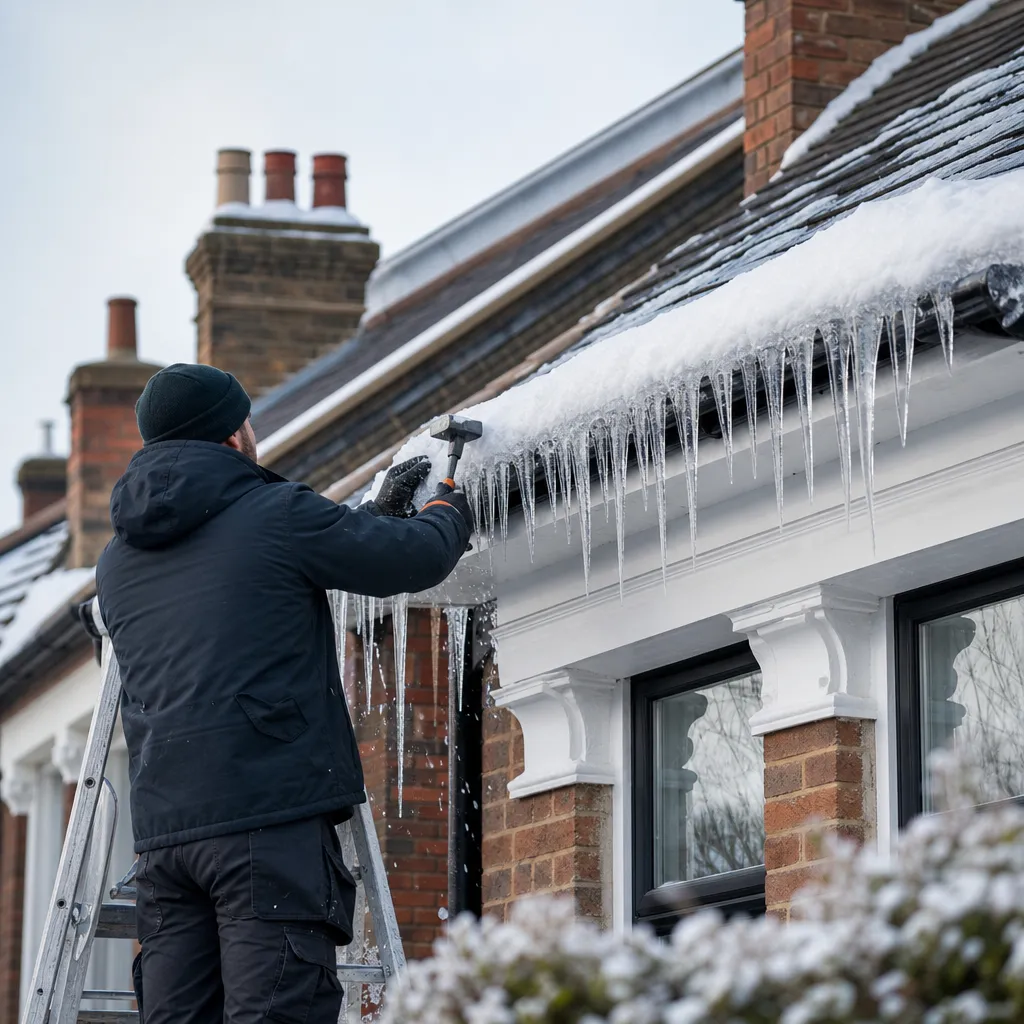
Ice Dam Removal and Roof Protection Services
Ice dams form when heat escaping through a poorly insulated roof melts snow, which refreezes at the colder eaves.
 Improvement & Build
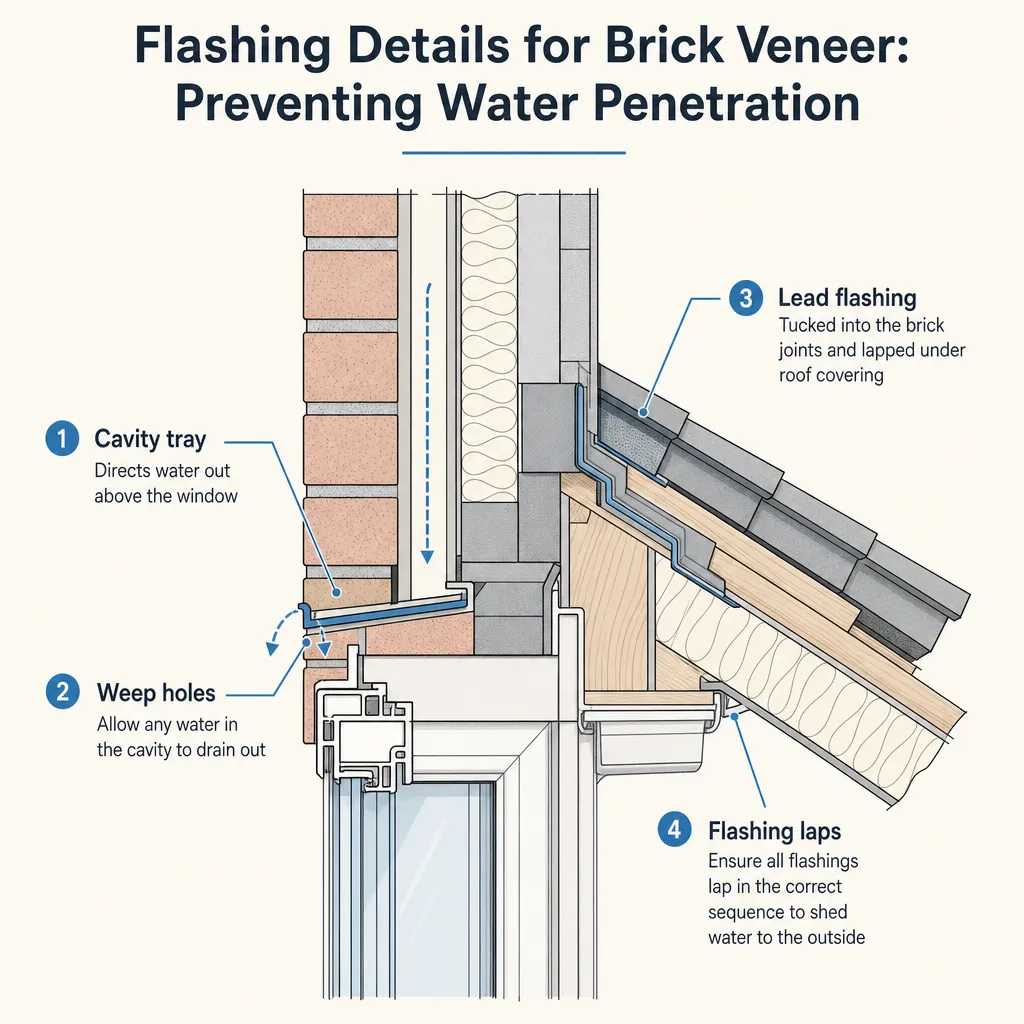
Flashing Details for Brick Veneer: Preventing Water Penetration
Brick veneer facades are designed to allow water into the cavity and drain it away through cavity trays and weep holes before it reaches the inner leaf.