Concrete Edging for Gardens: Installation and Cost
By Housey · Last reviewed 5th of May 2026
Concrete Edging for Gardens: Installation and Cost
Garden edging gives planting beds, lawns, and pathways a clean, defined boundary and helps contain mulch, gravel, and soil where it belongs. Concrete edging — whether precast kerb-style sections or poured in situ — is one of the most durable options available to UK homeowners, and is routinely specified by landscapers for projects where longevity matters more than flexibility or ease of change. It is a practical consideration during garden redesigns, driveway makeovers, and front-garden hard-landscaping schemes.
Key points
- Standard precast concrete edging sections comply with BS EN 1340 (Concrete kerb units — Requirements and test methods) and typically measure 915 mm long × 150 mm tall × 50 mm wide, though dimensions vary by product range.
- Planning permission is not generally required for garden edging under 1 m in height, but new front-garden hard surfaces over 5 m² in England may trigger sustainable drainage requirements under Schedule 2 of the Town and Country Planning (General Permitted Development) (England) Order 2015.
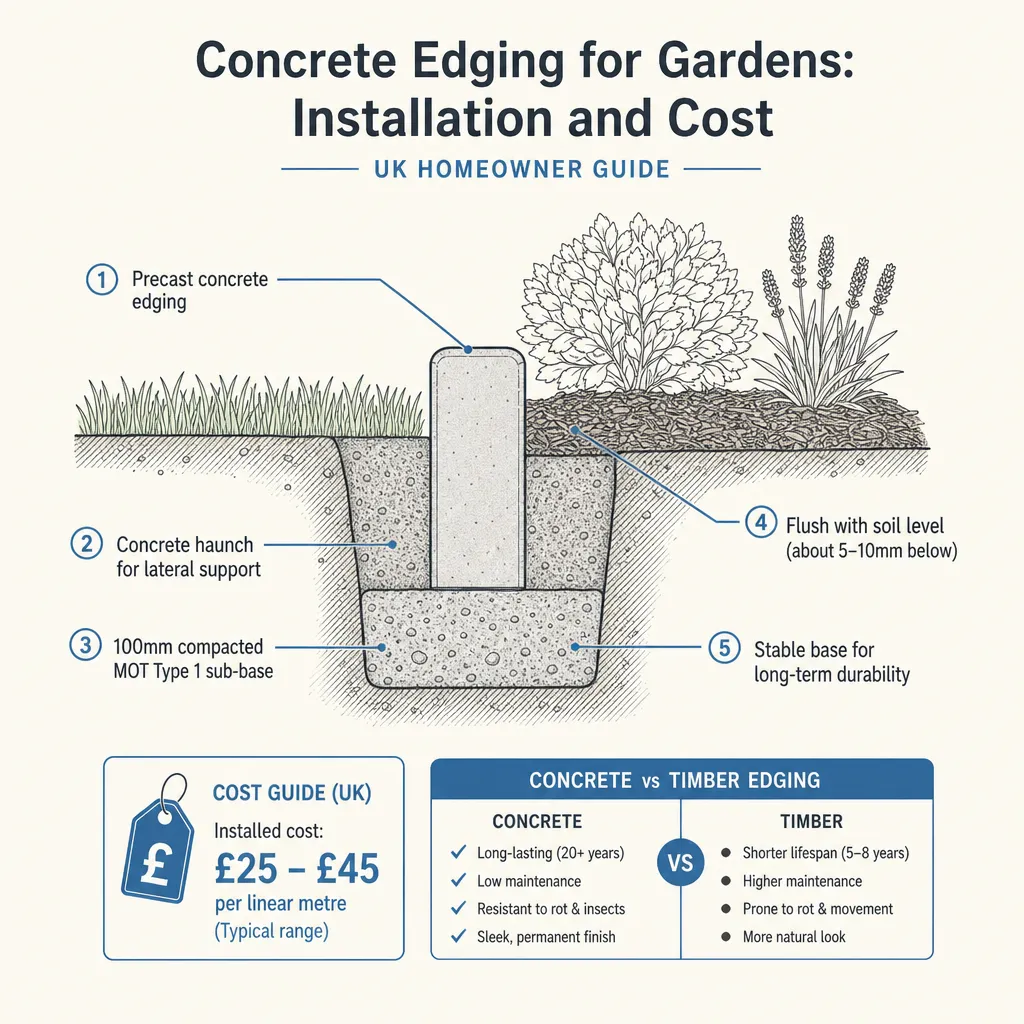
- A compacted sub-base of at least 75 mm of MOT Type 1 hardcore, plus concrete haunching on the rear of each section, is the standard installation method for stable, long-lasting concrete edging.
- Indicative supply-and-install costs for precast concrete garden edging range from £12 to £30 per linear metre, depending on type, ground conditions, and region. (Indicative UK costs, last reviewed 2026-05-05.)
- Check for underground services (gas, water, electricity, drainage) before any excavation — call LSBUD (0800 096 8699) or use the online portal to request a search.
Types of concrete garden edging
Several styles of precast concrete edging are commonly available from UK builders' merchants and landscaping suppliers:
Type | Profile | Best for | Indicative supply cost (per 900 mm section) |
|---|---|---|---|
Flat-top kerb | Square or chamfered top edge | Lawn edges, planting beds, straight runs | £3–£8 |
Bullnose kerb | Rounded top | Pathways, more decorative applications | £4–£10 |
Roll-top edging | Curved profile | Lawn borders, sweeping curved beds | £5–£12 |
Recessed channel edging | Formed drainage channel | Driveways, patios, hard-standing areas | £8–£20 |
Imitation stone concrete | Decorative aggregate or textured finish | Period gardens, premium schemes | £10–£25 |
In-situ poured concrete | Custom profile formed on-site | Irregular curves, bespoke dimensions | Priced per linear metre |
Indicative UK supply costs, last reviewed 2026-05-05. Prices vary by manufacturer, finish, and supplier.
How much does concrete garden edging cost in the UK?
Total installed cost depends on several factors:
- Type of edging selected: Standard precast is the most cost-effective; decorative or in-situ poured edging is more expensive.
- Linear metres required: Most domestic gardens need 15–60 m of edging to define main lawns, beds, and paths.
- Ground preparation: Rocky, heavily compacted, or waterlogged ground requires more excavation labour.
- Region: Labour rates are typically higher in London and the South East than in the Midlands or North.
- Access: Narrow side passages, established planting, or restricted site access may add to preparation time and cost.
Indicative installed cost ranges (supply and labour, last reviewed 2026-05-05):
Scenario | Estimated total cost |
|---|---|
20 m of standard flat-top precast edging, good access, straightforward ground | £280–£550 |
40 m of bullnose edging with minor ground preparation | £600–£1,100 |
30 m of decorative imitation stone edging | £700–£1,400 |
20 m of in-situ poured concrete edging, curved layout | £600–£1,200 |
Costs are indicative and exclude VAT unless stated. Request itemised quotes specifying the same product and base specification for a fair comparison.
How concrete garden edging is installed
A professional landscaper will typically follow these steps:
- Mark out the edge line using a string line for straight runs or a garden hose to establish curves before committing to excavation.
- Excavate a trench — typically 100–150 mm wide and deep enough to seat the edging at the desired finished height above ground level (usually 25–50 mm proud of an adjacent lawn).
- Lay a compacted sub-base of at least 75 mm of MOT Type 1 hardcore or sharp sand, depending on edging type and ground conditions.
- Set the first section in a bed of concrete mix (typically a 6:1 ballast-to-cement ratio), checking level and line.
- Continue laying sections with consistent 10 mm joints, tapping each into position and checking level as the run progresses.
- Haunch with concrete on the rear (non-visible) face of each section to lock it against lateral movement.
- Leave to cure — at least 24–48 hours before any disturbance; full structural strength is reached after approximately 28 days.
- Backfill and reinstate surrounding ground, top-dressing lawn edges where the turf has been disturbed.
In-situ poured concrete edging follows a similar sequence but uses temporary timber or metal formwork to shape the pour, removed after initial set.
Decision guide: which edging option suits your garden?
- Choose precast flat-top or bullnose concrete if you want a durable, low-maintenance boundary for a formal lawn or planting bed at a reasonable cost.
- Choose in-situ poured concrete if you have complex curves, non-standard dimensions, or a continuous channel drain that precast sections cannot accommodate neatly.
- Choose recessed channel edging if the area is also a run-off point from a driveway or patio and drainage management is a priority.
- Choose decorative imitation stone edging if the garden is formal or traditional in character and a plain grey finish would look out of place.
- Choose a different material entirely (steel, brick, or treated timber) if the design is contemporary, you need a particularly slim profile, or budget is tight and longevity is a secondary concern.
- Consult a landscaper before specifying if the edging is adjacent to established trees, forms part of a sustainable drainage scheme, or sits within a larger hard-landscaping project.
Concrete edging vs alternative materials
Material | Lifespan | Maintenance | Indicative installed cost (per linear metre) | Best for | Main limitation |
|---|---|---|---|---|---|
Precast concrete | 20–40 years | Very low | £12–£30 | Formal gardens, long-term durability | Heavy; can crack if base is inadequate |
Treated softwood timber | 5–15 years | Low–moderate | £8–£20 | Informal gardens, curves on a budget | Rots and moves over time |
Corten or galvanised steel | 20–50 years | Very low | £20–£50 | Contemporary, minimalist design | Higher upfront cost |
Brick or natural stone | 20–50+ years | Low | £25–£60 | Traditional or heritage gardens | Skilled labour intensive, slower to install |
Plastic or composite | 10–25 years | Very low | £6–£18 | Tight budgets, curved informal borders | Less robust; can fade or distort |
Indicative UK costs, last reviewed 2026-05-05. Obtain quotes specific to your project.
Homeowner checklist before installation
When to get professional help
Concrete garden edging is practical work that many landscapers handle as part of wider projects or as a standalone job. Professional input is particularly worthwhile if:
- The edging is adjacent to tree roots — a landscaper or arborist can advise on root protection zones and safe excavation depth to avoid damaging established trees.
- Ground conditions are poor — waterlogged soil, made ground, or significant gradient changes mean sub-base specification and drainage details need professional judgement.
- The edging is part of a new driveway or hardstanding — this may require sustainable drainage measures and, in some cases, planning permission for front-garden surfaces.
- The total run is substantial or involves level changes — accurate setting-out across long runs or changes in gradient is harder than it looks, and mistakes are expensive to correct once concrete has cured.
How Housey can help
Housey can connect you with experienced landscapers who can supply, install, and finish concrete garden edging — whether as a standalone job or as part of a wider hard-landscaping project. Request quotes, compare experience, and get your garden looking sharp.
Frequently asked questions
Does concrete garden edging need planning permission in the UK?
In most cases, no. Garden edging is typically low-level work that does not require planning permission. However, if you are forming a new predominantly hard-surfaced front garden over 5 m² in England, sustainable drainage may be required, and planning permission could apply. Check with your local planning authority if you are unsure about your specific situation.
How long does concrete garden edging last?
Precast concrete edging, correctly installed on a compacted sub-base with concrete haunching, can last 20–40 years with minimal maintenance. Longevity is significantly affected by installation quality, ground movement, and frost cycles — edging set on inadequate foundations may lift or tip within a few years of installation.
Can I install concrete garden edging myself?
Precast edging sections are physically heavy and require accurate setting-out, excavation, and concrete haunching to stay in position. DIY installation is possible for straightforward straight runs on stable ground, but getting levels wrong is a common issue. Incorrectly laid edging can shift, tip, or present a trip hazard, so professional installation is worth considering for larger or curved layouts.
What is the difference between precast concrete edging and in-situ poured concrete edging?
Precast concrete edging sections are manufactured off-site in standard dimensions and laid into a prepared trench. In-situ concrete is poured directly into formwork on-site, allowing custom shapes and curves. In-situ work is generally more expensive due to labour and formwork, but offers greater design flexibility for complex or curved garden layouts.
How do I stop concrete garden edging from moving or lifting?
Proper haunching — applying a concrete mix to the rear face of each section after it is set at the correct level — is the primary method for preventing movement. The sub-base must also be adequately compacted before laying. Avoid disturbing the edging for at least 48 hours after installation; concrete reaches full structural strength after approximately 28 days.
Sources and further reading
- Town and Country Planning (General Permitted Development) (England) Order 2015 — legislation.gov.uk
- BS EN 1340: Concrete kerb units — Requirements and test methods — BSI Group
- Planning permission: driveways and vehicle crossovers — Planning Portal
- LSBUD: Check underground services before you dig — LSBUD
- RHS: Garden edging and borders — Royal Horticultural Society
Useful next reads
 Improvement & Build
Building an Outdoor Kitchen: Design, Materials, and Investment
Building an outdoor kitchen in the UK costs roughly £3,000–£25,000 depending on size and materials.
 Improvement & Build
Composite vs. Timber Decking: Performance, Maintenance, and Pricing
Composite decking costs more upfront — typically £120–£220 per m² installed versus £80–£150 for treated softwood — but requires far less maintenance and carries a 25-year warranty.
 Improvement & Build
Concrete Laying for Driveways, Patios, and Paths: Costs and Process
Concrete laying for a UK driveway typically costs £65–£110 per square metre, including sub-base, reinforcement, formwork, and finishing.
 Improvement & Build
Professional Weed Control: Service Options and Cost Factors
Professional weed control in the UK typically involves herbicide treatment, manual removal, or a combination of both.
 Improvement & Build
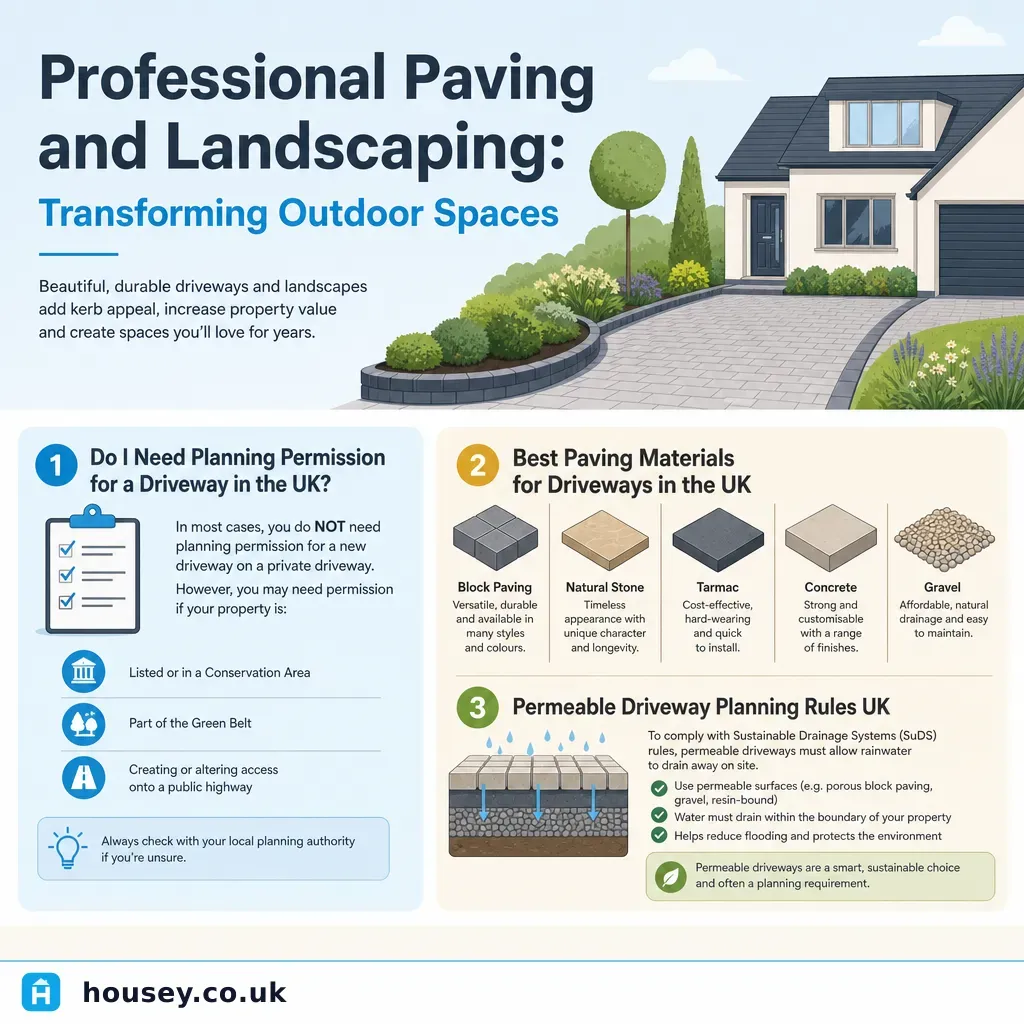
Professional Paving and Landscaping: Transforming Outdoor Spaces
Professional paving and landscaping can transform a garden or driveway, improving kerb appeal and adding usable outdoor space.