Drywall Cracking at Ceiling Joints: Causes and Defect Assessment
By Housey · Last reviewed 11th of May 2026
Drywall Cracking at Ceiling Joints: Causes and Defect Assessment
Cracks at ceiling joints are one of the more common concerns raised during a property survey — and one of the harder defects to assess confidently without knowing a building's history. In UK homes, plasterboard (also known commercially as drywall or drylining board) has been used as a lining system since the 1960s, and joint cracking can appear in new-builds and Victorian terraces alike. The key question for any homeowner or buyer is whether what they are looking at is cosmetic or structural — and the answer depends on pattern, width, and context.
Key points
- Most ceiling joint cracks in plasterboard are caused by thermal movement, seasonal moisture cycling, or joint-compound failure — not structural defects.
- Cracks wider than 5 mm, those with a visible lip (one side raised above the other), stepped cracks following masonry lines, or cracks accompanied by sagging require professional assessment.
- Plasterboard ceiling systems rely on correctly taped and jointed finishes; workmanship failures are common, particularly in properties refurbished rapidly during the 1990s and 2000s.
- Building Regulations Approved Document A sets structural performance requirements for UK buildings; crack patterns can indicate which structural element is under stress, but do not alone confirm a failure.
- A RICS Level 3 Building Survey includes inspection of roof spaces and ceiling structures; a specific defect survey may be more proportionate when one discrete defect is the primary concern.
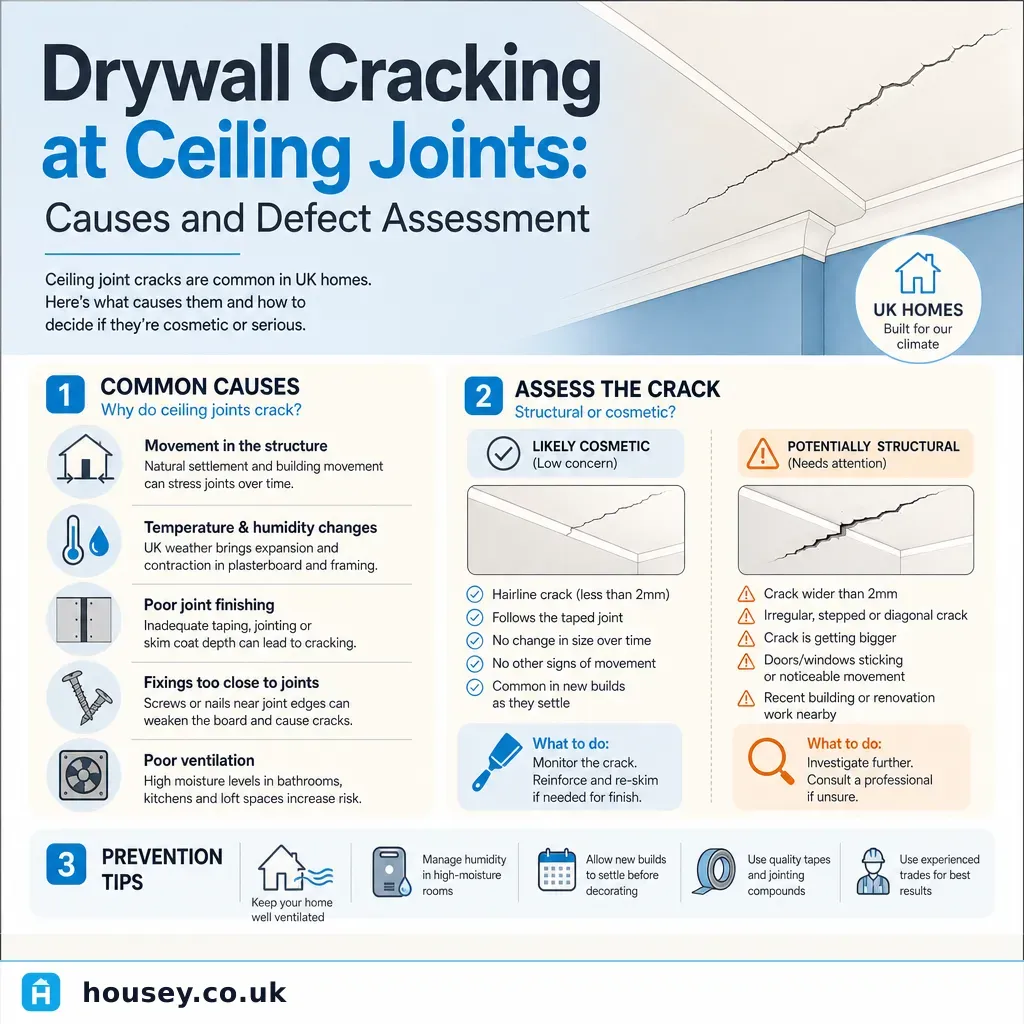
What causes drywall ceiling joints to crack?
Ceiling joint cracks in plasterboard typically arise from one of four causes: thermal movement, settlement, poor workmanship, or joist deflection. Location and pattern usually indicate which is most likely.
Thermal and moisture movement
Plasterboard expands and contracts with temperature and humidity changes. When joints are not correctly taped, filled, and feathered during installation, seasonal cycling causes the joint compound to debond from the board surface. This produces a linear crack running directly along the joint line. It is most common in rooms with significant humidity variation — kitchens, bathrooms, and loft conversions where the ceiling is exposed to large temperature swings between seasons.
Settlement and foundation movement
Differential settlement — where one part of a building moves at a different rate from another — creates stress that concentrates at weak points such as taped joints. This pattern is particularly common in:
- Victorian and Edwardian terraces with shallow strip footings on shrinkable clay soils
- 1930s semi-detached homes in areas with known clay movement or tree root activity
- Properties in areas affected by historical mining or chalk dissolution
Cracks from settlement typically appear across multiple rooms or levels, often with a diagonal or stepped pattern, rather than as a single isolated joint crack.
Poor workmanship or material failure
Incorrect screw spacing, inadequate taping, or the use of undersized board can all produce joint failure that looks visually similar to structural cracking but has nothing to do with the building's structure. Properties with drylining installed quickly during the 1990s and 2000s often exhibit this issue as the original workmanship deteriorates with age.
Joist deflection
If the ceiling joists above the plasterboard have deflected, dried out, or twisted — particularly likely in Victorian properties where unseasoned timber was commonly used — the board surface deforms and the joints open. This is not necessarily a structural emergency, but it does require investigation before any remediation is carried out.
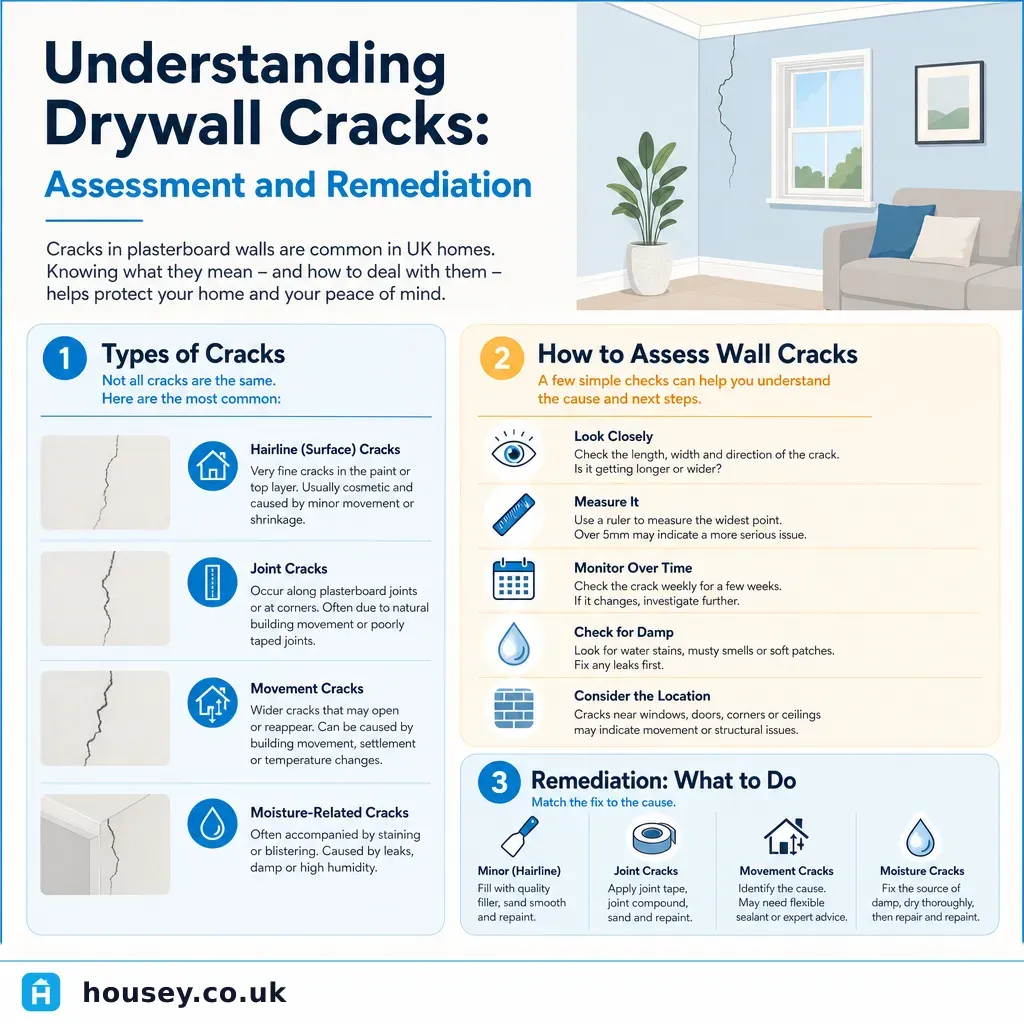
Crack classification: what you are looking at
Crack type | Typical width | Likely cause | Urgency |
|---|---|---|---|
Hairline along joint | < 1 mm | Thermal movement or tape shrinkage | Low — cosmetic repair when stable |
Linear crack at joint | 1–3 mm | Joint compound failure or minor settlement | Moderate — monitor, then repair |
Wide crack with lip | 3–5 mm | Joist deflection or differential settlement | Moderate — professional assessment advised |
Stepped or diagonal crack | Any width | Structural movement | High — seek professional assessment promptly |
Crack with displacement or sagging | Any width | Structural or substrate failure | Urgent — do not delay |
Crack width classifications adapted from BRE Digest 251 (Assessment of damage in low-rise buildings).
How to assess ceiling joint cracks yourself
Before contacting a professional, a structured inspection helps characterise the defect and provides any subsequent surveyor with useful context.
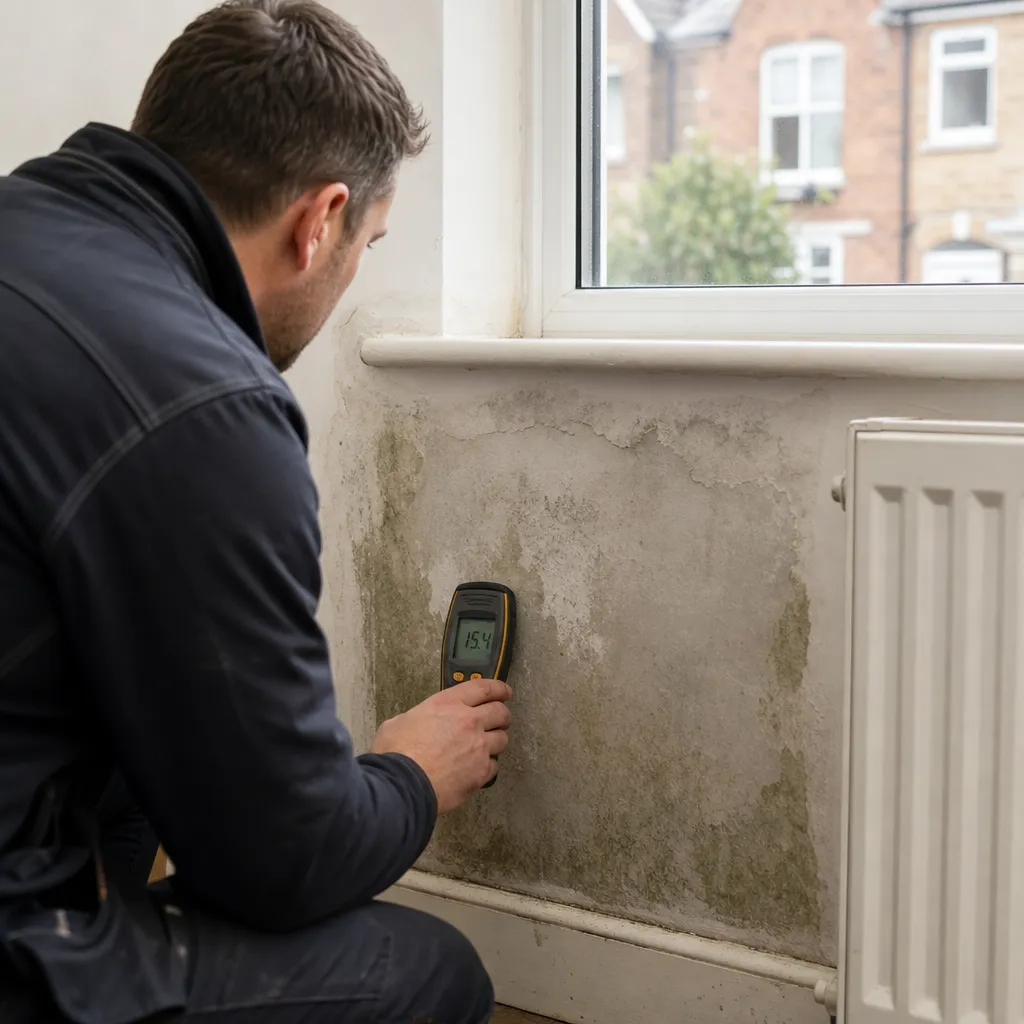
Step 1 — Measure. Estimate the maximum crack width using a crack gauge, feeler gauge, or the edge of a credit card. Note whether the crack has a lip — one side raised above the other.
Step 2 — Map. Mark the crack ends with a pencil and write the date. Review after two to four weeks to establish whether the crack is active (extending) or stable.
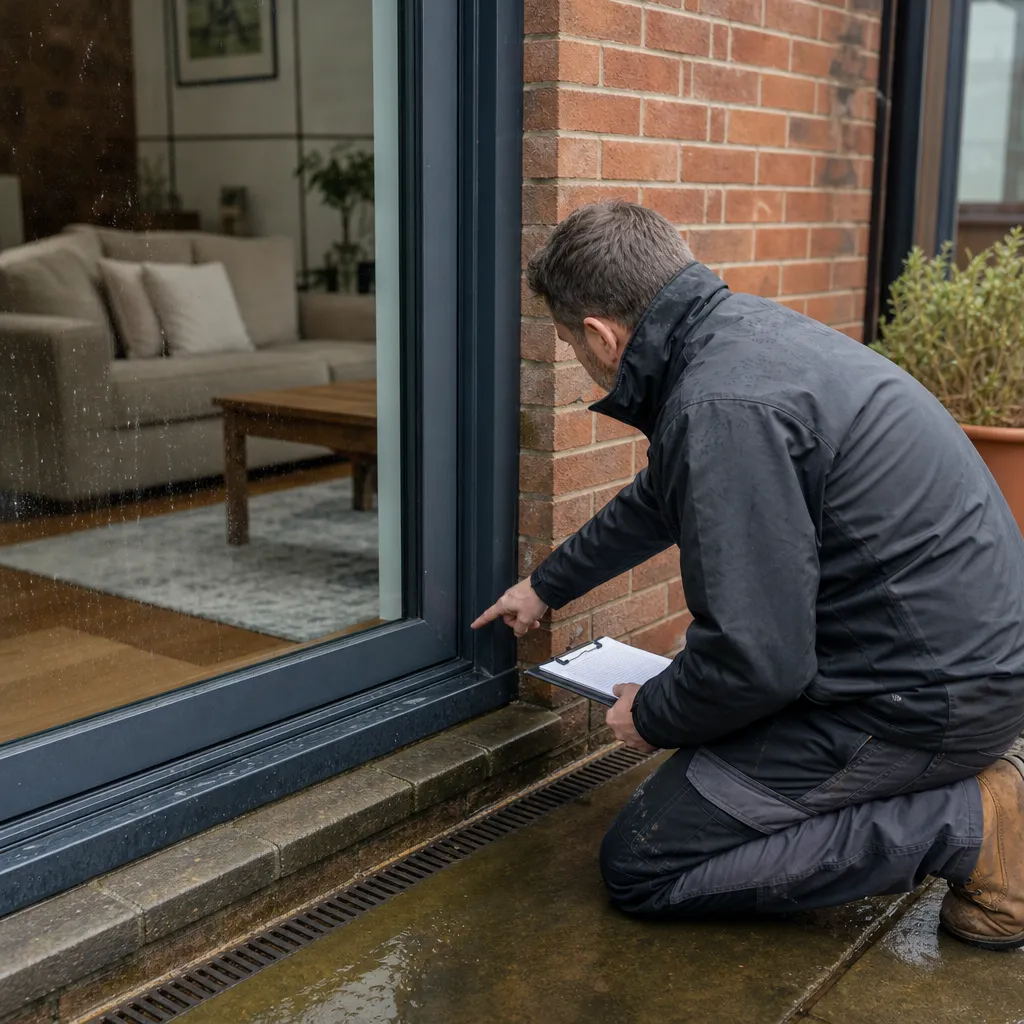
Step 3 — Look for a pattern. Check for corresponding cracks at wall-ceiling junctions, at door or window frames, or on the external facade. A single isolated joint crack is usually cosmetic; a pattern across rooms or levels suggests a building-wide issue.
Step 4 — Consider the context. Note the property's age, construction type, and any known history of subsidence, nearby tree removal, or significant building works next door.
Step 5 — Photograph. Document all cracks with a close-up shot and a wide-angle shot, with a scale reference in frame, before any repair. This evidence is useful if a surveyor is later instructed.
Decision tree: do you need a professional?
- Self-monitor if the crack is hairline, follows a single joint line, has no lip, and there are no other cracks elsewhere in the property.
- Cosmetic repair if monitoring confirms no extension after four weeks and the crack is no wider than 2 mm with no associated sagging or pattern across rooms.
- Instruct a specific defect survey if the crack exceeds 3 mm, has a visible lip, or is accompanied by other cracks, sticking doors, or uneven floors elsewhere.
- Instruct a structural survey or structural engineer if cracks are stepped, diagonal, or accompanied by door or window binding, bulging, or visible displacement of building elements.
- Seek immediate professional help if any section of ceiling is sagging or if there are signs of sudden acute movement.
Common misunderstandings
New cracks always mean structural problems. Most cracks in new-builds appear within the first two years as the structure and finishing materials dry out and bed in. This is expected behaviour for both masonry and timber-frame construction and is rarely structural in origin.
Repainting will fix the issue. Applying paint or filler over an active crack without understanding the cause is at best temporary. If the crack is still moving, the decoration will re-open within months.
Only old houses get ceiling cracks. Properties built in the 2000s with drylining systems are at least as susceptible to cosmetic joint cracking as older buildings. The absence of traditional wet-plaster coats means any joint movement is immediately visible at the surface.
Important limitations
This article provides general information about ceiling crack patterns and assessment approaches for UK homeowners. It does not constitute structural or engineering advice. The significance of any crack depends on the specific construction, soil conditions, building history, and loading — none of which can be assessed from a general guide. If you are purchasing a property or have any doubt about the origin of a crack, instruct a qualified professional before proceeding.
What to ask a qualified professional
Before instructing a surveyor or structural engineer, prepare the following:
- Photographs with a scale reference (a coin or ruler in frame)
- The approximate date the crack was first noticed and whether it has changed since
- The property's age, construction type (masonry, timber frame, or steel frame), and any known history of subsidence, significant building works, or flooding
Questions worth asking at instruction:
- Is a specific defect survey or a full RICS Level 3 Building Survey more appropriate for this situation?
- Will the inspection include access to the void above the ceiling — loft space or the floor structure above?
- What crack-monitoring period, if any, do you recommend before reaching a conclusion?
- Will your report distinguish clearly between cosmetic joint failure and structural cracking?
- If structural movement is suspected, does your scope cover engineering assessment, or will you refer to a structural engineer?
When to get professional help
Seek professional input promptly when:
- Any crack is wider than 5 mm at its widest point
- There is a visible lip or step between adjacent plasterboard sheets
- Multiple cracks appear across different rooms or building levels
- Doors or windows have started to stick, jam, or fail to close properly
- A crack has measurably extended during your monitoring period
- The property is in an area with a history of subsidence, mining, or significant clay shrinkage
- You are approaching exchange of contracts on a property with visible ceiling cracking
How Housey can help
Housey connects UK homeowners with qualified surveyors who can assess ceiling and wall cracking as part of a specific defect survey or a more comprehensive structural survey. Use Housey to compare quotes from vetted local professionals and get a written diagnosis before committing to repair work or a property purchase.
Frequently asked questions
Is a crack at a plasterboard ceiling joint serious?
Most ceiling joint cracks are cosmetic, caused by thermal movement or tape failure rather than structural defect. However, cracks wider than 3–5 mm, those with a visible lip, stepped cracks, or cracks appearing alongside other symptoms in the property should be assessed by a qualified surveyor or structural engineer before being dismissed.
Can I repair ceiling joint cracks myself?
Cosmetic joint cracks confirmed to be stable, narrow, and isolated can usually be repaired with flexible decorator's filler or joint compound, then redecorated. Always confirm the crack is not extending before carrying out decorative repair. Never repair a crack that may have a structural cause without professional assessment first.
How much does a specific defect survey cost in the UK?
Specific defect surveys for ceiling or wall cracking typically cost £200–£500, depending on property size and surveyor. A full RICS Level 3 Building Survey including structural assessment usually costs more. Indicative UK costs, last reviewed 2026-05-11. Always obtain at least two written quotes and confirm what the scope includes.
What is the difference between plasterboard cracking and traditional plaster cracking?
Plasterboard cracking typically occurs at board joints where the tape and filler fails — usually from thermal movement or poor workmanship. Traditional wet plaster cracking in pre-1960s properties follows a map-cracking or crazing pattern caused by the plaster coat shrinking. Causes, repair approaches, and structural implications differ significantly between the two.
Sources and further reading
- BRE Digest 251: Assessment of damage in low-rise buildings — BRE Group
- Approved Document A: Structure — GOV.UK
- RICS Home Survey Standard — RICS
- Subsidence claims: guidance for homeowners — Association of British Insurers
Useful next reads
 Surveys & Inspections
Sagging Lintel Repair Costs and Structural Solutions
A sagging lintel is a structural defect requiring prompt professional assessment.
 Surveys & Inspections
Window Seal Failure: Identifying Water Leaks During Heavy Rain
Water entering through a window during heavy rain usually points to a failed mastic seal, a damaged glazing unit seal, or a poorly fitted frame.
 Surveys & Inspections
Cold and Damp Walls: Diagnosing Condensation and Moisture Issues
Cold, damp walls in UK homes most commonly result from surface condensation, penetrating damp, or rising damp.
 Surveys & Inspections
Water Ingress at Patio Doors: Identifying Cause and Prevention
Water ingress at patio doors usually stems from failed threshold seals, damaged compression gaskets, poor original installation, or a blocked drainage channel in the door frame.
 Surveys & Inspections
Understanding Drywall Cracks: Assessment and Remediation
Drywall cracks in UK homes range from minor cosmetic defects caused by thermal movement or poor workmanship to indicators of structural movement.