Herringbone Drainage System Design and Function
By Housey · Last reviewed 11th of May 2026
Herringbone Drainage System Design and Function
Understanding how water moves beneath a site is rarely top of mind until standing water, waterlogged ground, or a failed foundation dig forces the question. Herringbone drainage is one of the most widely specified subsurface layouts in UK groundworks, encountered on agricultural land, sports pitches, residential gardens, and development plots alike. Getting the design right before groundworks begin can mean the difference between a dry, stable site and one that requires costly remediation.
Key points
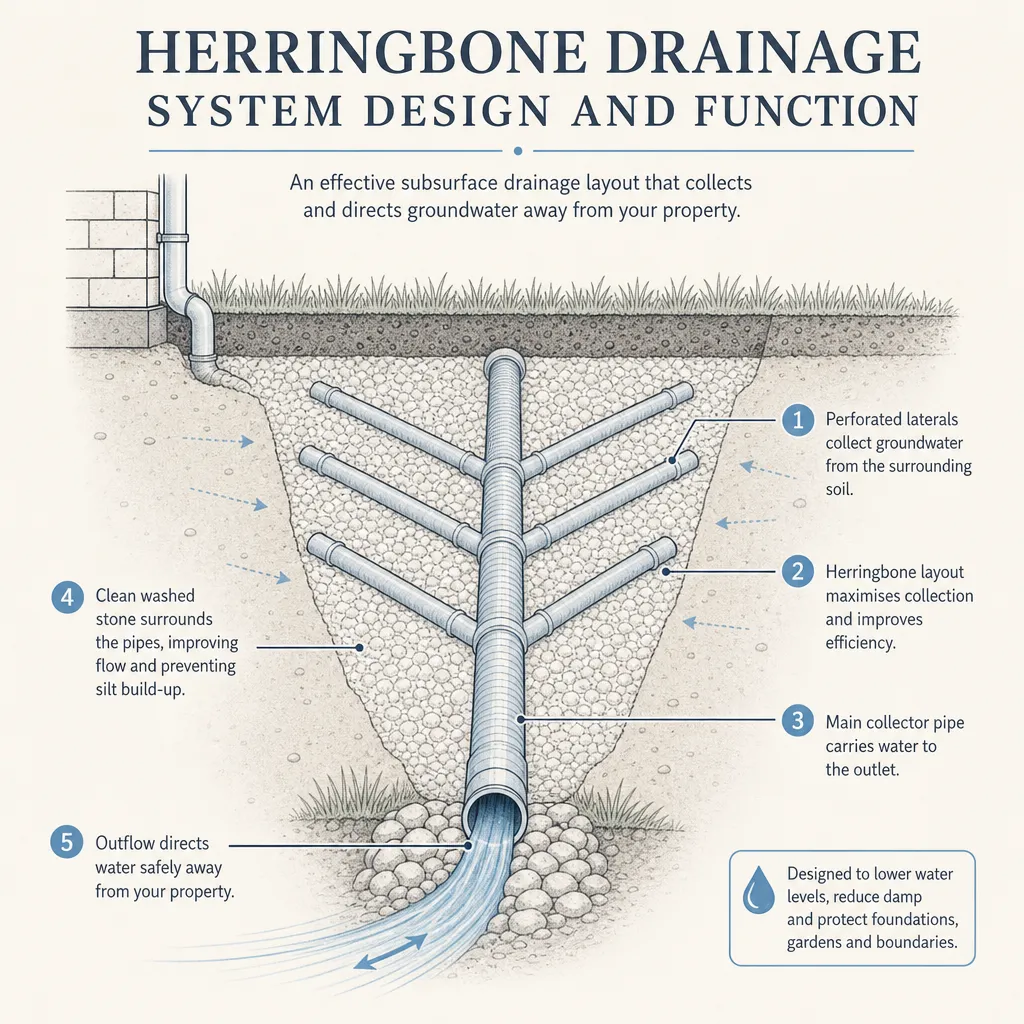
- A herringbone system consists of a central collector drain with lateral branch drains angling off it at roughly 45–60 degrees, closely mirroring the bone structure of a fish.
- Lateral spacing typically ranges from 5 m to 20 m depending on soil permeability; heavier clay soils require closer spacing to remove water effectively.
- Building Regulations Approved Document H (Drainage and waste disposal) governs subsoil drainage requirements on new UK developments.
- Planning conditions on new development sites often require a drainage strategy to be agreed with the Lead Local Flood Authority (LLFA) under sustainable drainage system (SuDS) requirements before groundworks commence.
- Discharge to an ordinary watercourse in England requires LLFA consent under the Flood and Water Management Act 2010; discharge to a main river requires an Environment Agency permit.
What is a herringbone drainage system?
A herringbone layout is a form of subsurface land drainage that uses a single main drain running along the lowest point or natural valley of a site, with smaller lateral drains feeding into it from both sides at an angle — typically between 45 and 60 degrees. Viewed from above, the arrangement closely resembles the skeleton of a herring, which gives the system its name.
Water infiltrates the soil surface, travels through the lateral drains by gravity, converges on the main collector drain, and is eventually discharged to an approved outfall: a watercourse, soakaway, or sewer subject to the relevant consents.
How it compares with other drainage layouts
Layout | Best for | Main limitation | Typical UK use |
|---|---|---|---|
Herringbone | Flat or gently sloping, reasonably uniform land | Less efficient on steeply irregular ground | Agricultural fields, sports pitches, development plots |
Grid/parallel | Consistently sloping land with even soil conditions | Needs precise fall; higher pipework cost | Large flat sites, playing fields |
Random/mole drained | Irregular topography and varied soil types | Performance harder to predict | Natural land, paddocks, sloped gardens |
Single collector drain | Small, narrow, uniform strips | Limited catchment coverage | Small residential gardens, boundary strips |
The herringbone pattern is frequently preferred because it achieves good site coverage without requiring every lateral to terminate at the same gradient, and it simplifies connection to a single main discharge point.
How a herringbone system is designed
A competent drainage designer or civil engineer will assess several factors before specifying a herringbone layout:
Soil permeability — established via percolation testing or a geotechnical investigation. Dense clay soils require closely spaced laterals (perhaps 5–8 m); sandy or loamy soils may allow spacing of 15–20 m.
Topography — the main collector drain should follow the natural valley or lowest contour. Laterals are set to run slightly uphill from the collector to exploit gravity effectively.
Catchment area and rainfall intensity — the total water volume the system must handle, calculated using Met Office design rainfall data for the relevant UK region combined with the site's infiltration rate.
Pipe sizing and gradient — diameters are commonly 100 mm for lateral branches and 150–225 mm for main collectors on larger sites. Minimum gradients of 1:100 to 1:60 are typically specified to maintain self-cleansing velocity.
Outfall — the discharge point must comply with all relevant consents before installation begins, including any required LLFA or Environment Agency approvals.
Installation: what groundworkers do
Once a design is finalised, a drainage contractor will typically:
- Mark out trench lines according to the design layout and survey levels.
- Excavate trenches to the specified depth — usually 600 mm to 1.2 m depending on frost risk, soil type, and surface loading.
- Lay a permeable geotextile membrane in the trench base to prevent silt from migrating into the drainage aggregate.
- Bed perforated pipe (commonly corrugated HDPE or vitrified clay) on clean angular gravel.
- Surround pipe with gravel filter medium, wrap in geotextile, and backfill in controlled layers.
- Connect laterals to the collector using purpose-made junctions, maintaining correct angles and falls throughout.
- Connect the collector to the approved outfall, installing inspection chambers at required intervals.
Which professional do I need?
- Choose a civil engineer if the drainage forms part of a development, requires hydraulic calculations, is subject to a planning condition, or if there is uncertainty about flood risk or soil conditions.
- Choose a drainage contractor for installation once a design is prepared and any required consents are in place.
- Commission a geotechnical investigation if soil type is unknown, if the site has a history of waterlogging, or if it sits on made ground, fill, or contaminated land.
- Engage a chartered drainage engineer (CEng, MICE, or equivalent) where drainage must be formally adopted by a highway authority or sewer undertaker.
Homeowner and developer checklist
Confirm the following before commissioning a herringbone drainage system:
When to get professional help
A herringbone drainage system may look straightforward on paper, but errors in design or installation are difficult and expensive to remedy once the ground is reinstated. Seek professional input when:
- The site is in Environment Agency Flood Zone 2 or 3, or has a recorded history of flooding.
- Soil conditions are unknown, mixed, or include clay layers likely to impede drainage unexpectedly.
- The planned outfall requires formal consent from the LLFA or Environment Agency.
- The drainage must be adopted by a statutory undertaker or highways authority.
- A planning condition requires a drainage strategy report before groundworks can proceed.
How Housey can help
Housey connects homeowners and developers with vetted drainage contractors and civil engineers who can assess your site, prepare a compliant drainage design, and carry out installation. If site conditions are uncertain, a geotechnical investigation can be arranged to establish soil permeability before design work begins.
Frequently asked questions
What is the typical depth for herringbone drainage laterals?
Lateral drains are usually installed at 600 mm to 900 mm depth in most UK applications. Exact depth depends on site loads, frost risk, and whether the system runs beneath a trafficked surface. Agricultural laterals may be shallower (around 500 mm), while those beneath hardstanding should generally be at least 900 mm to reduce the risk of damage.
Does a herringbone drainage system require planning permission?
The drainage system itself rarely requires planning permission, but development projects incorporating new drainage may trigger planning conditions relating to a drainage strategy. Discharge to a watercourse requires LLFA consent; discharge to a main river requires an Environment Agency permit. Always confirm consent requirements before work begins.
How do I know if my site needs herringbone drainage rather than a soakaway?
Soakaways are only viable where percolation tests show sufficient soil permeability — generally a 10-minute half-empty test or better as set out in BRE Digest 365. Where soil is too impermeable or the water table is too high, a drain-to-outfall system such as herringbone is typically required.
How long does a correctly installed herringbone drainage system last?
HDPE or vitrified clay pipe correctly laid in clean angular gravel can last 50 years or more with minimal maintenance. Failure is usually caused by silt ingress, root intrusion, or inadequate filter media. Regular inspection and occasional jetting will extend system life significantly.
Sources and further reading
- Building Regulations Approved Document H — GOV.UK
- Flood and Water Management Act 2010 — legislation.gov.uk
- Sustainable drainage systems (SuDS) guidance — GOV.UK
- Environment Agency: flood risk and watercourse consent — Environment Agency
Useful next reads
 Planning & Pre-Build
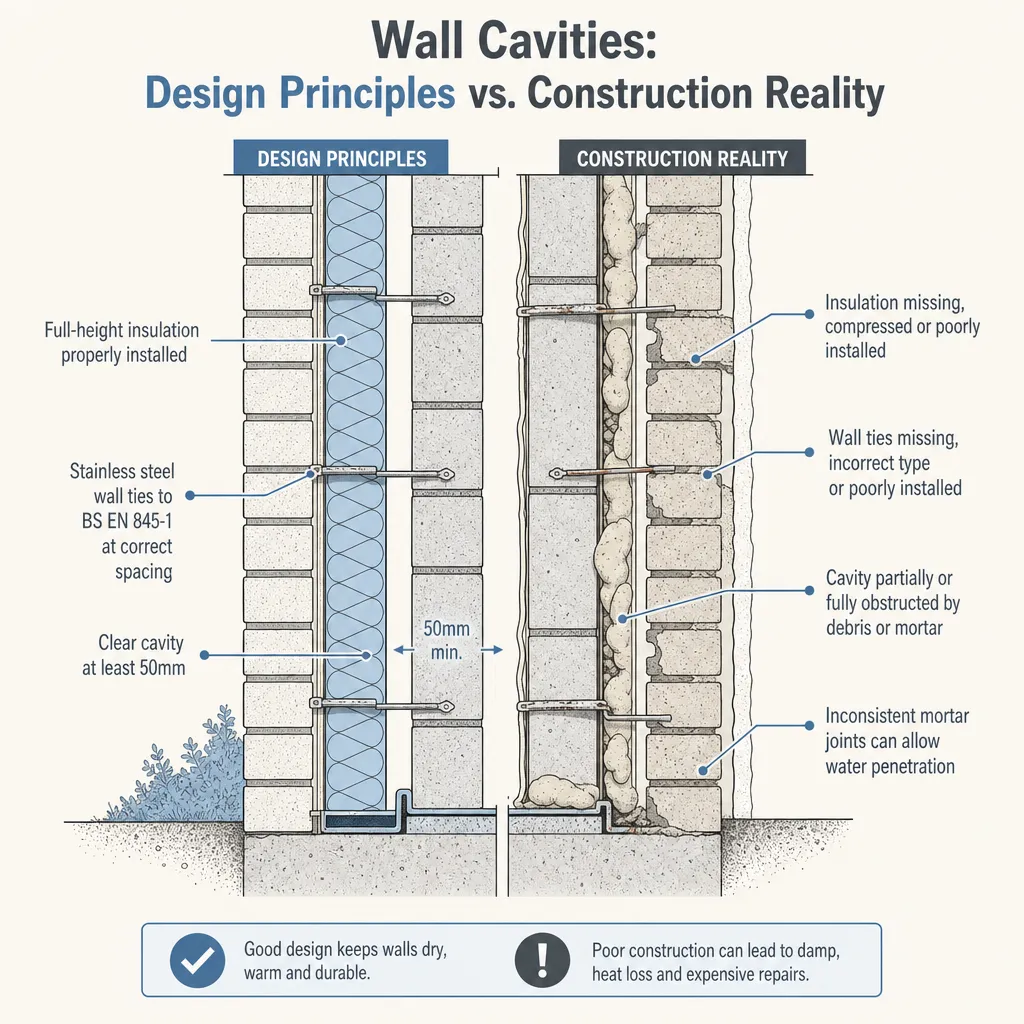
Wall Cavities: Design Principles vs. Construction Reality
A UK cavity wall is designed to resist weather, control heat loss, and structurally link two masonry leaves.
 Planning & Pre-Build
Craftsman Style Homes: Architectural Features and Design Elements
Craftsman style homes are defined by natural materials, low-pitched gabled roofs with wide eaves, covered porches, exposed timber details, and grouped casement windows.
 Planning & Pre-Build
What Does a Structural Engineer Do and When You Need One
A structural engineer analyses and designs the load-bearing elements of a building — foundations, beams, columns, walls, and floors.
 Planning & Pre-Build
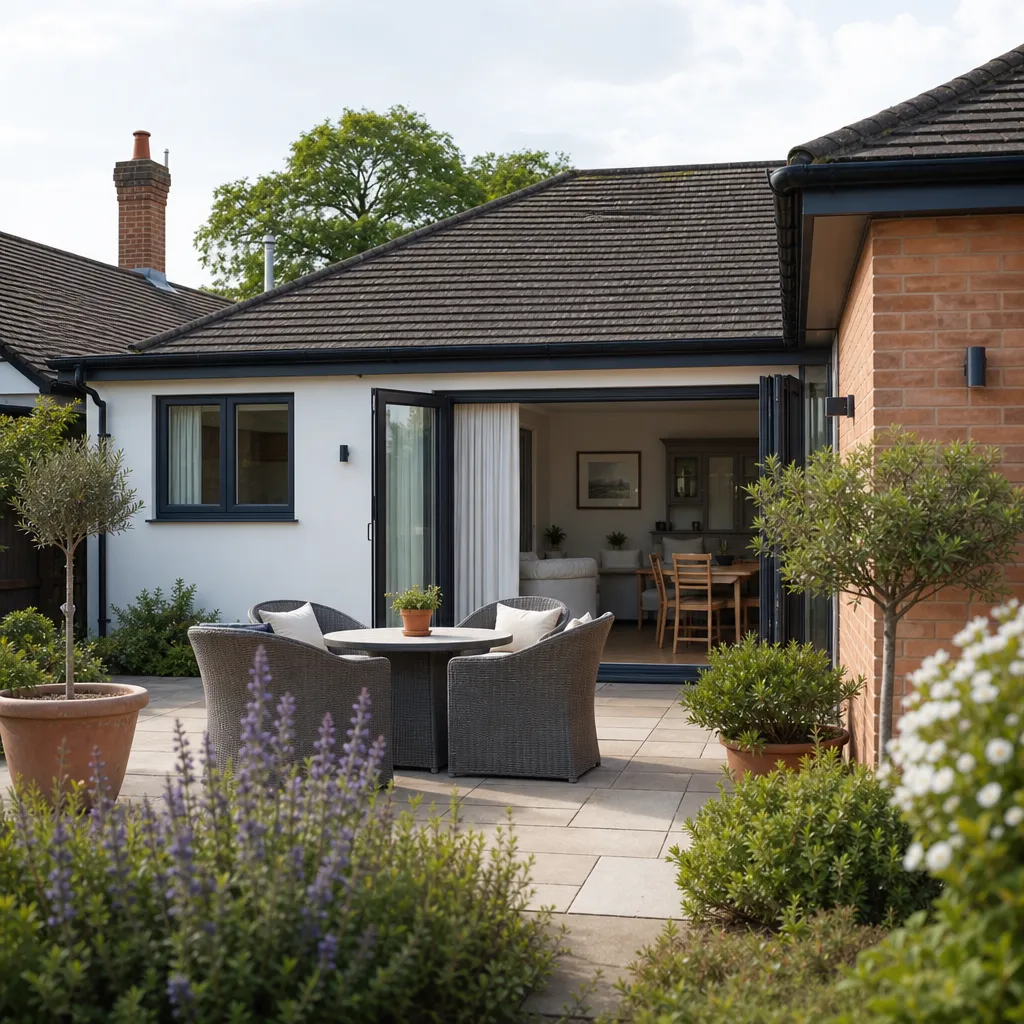
What Is a Patio Home? Understanding This Property Type in the UK
A patio home is a compact, low-maintenance property designed around a private patio or courtyard rather than a traditional lawn garden.
 Planning & Pre-Build
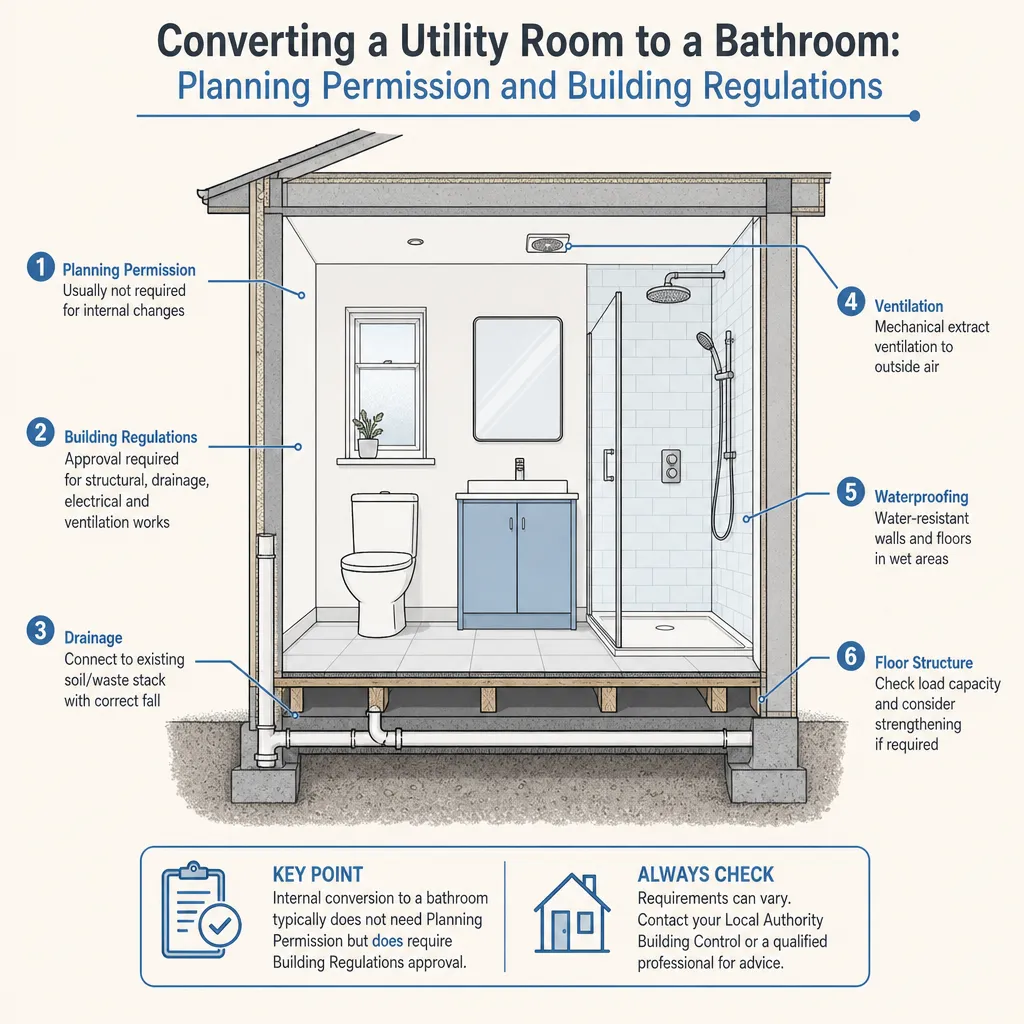
Converting a Utility Room to a Bathroom: Planning Permission and Building Regulations
Converting a utility room to a bathroom in England usually does not require planning permission, as it is an internal alteration.