Installing Peel-And-Stick Wallpaper: Application Techniques
By Housey · Last reviewed 30th of May 2026
Installing Peel-And-Stick Wallpaper: Application Techniques
Peel-and-stick wallpaper has become a practical choice for UK homeowners and renters wanting a decorative wall finish without the commitment or mess of traditional paste-and-paper. It is particularly relevant in rented properties where tenants need landlord permission before making permanent changes, and in older homes with uneven or delicate surfaces where traditional wallpaper can be difficult to remove cleanly. Getting the surface preparation and application technique right makes the difference between a lasting finish and panels that lift within weeks.
Key points
- Most peel-and-stick wallpapers require freshly painted walls to cure for at least 28–30 days before application; applying too soon risks the adhesive lifting the emulsion when the paper is eventually removed.
- Wall surface temperature should be between 13°C and 30°C at the time of application; adhesion fails below this range, which is particularly relevant in unheated UK rooms during winter months.
- With standard UK ceiling heights of 2.4–2.7m, always purchase 10–15% more rolls than your measured wall area to account for pattern repeats, trimming, and waste.
- Most removable peel-and-stick adhesives are rated for 1–3 years before the adhesive compound begins to degrade; bathrooms and kitchens in UK homes significantly reduce this lifespan due to sustained humidity.
- Peel-and-stick wallpaper is not suitable for textured, artex, or unpainted bare plaster surfaces without specialist preparation first.
Is your wall suitable?
The adhesive relies on a smooth, non-porous, consistently dry surface with good paint adhesion. Assess your walls before buying any product:
Wall type | Suitable? | Notes |
|---|---|---|
Smooth emulsion-painted plaster (cured 30+ days) | Yes | Ideal; clean with sugar soap before application |
Freshly painted wall (under 30 days) | No | Emulsion not fully cured; adhesive may lift paint on removal |
Textured or artex surface | No | Insufficient contact area significantly reduces adhesion |
Bare or unpainted plaster | No | Too porous; prime or apply lining paper first |
Gloss-painted surface | No | Too smooth for most adhesives; high peel risk |
Tile or glass (product-dependent) | Sometimes | Check manufacturer specification; use tile-specific products only |
Existing wallpaper layer | Not recommended | Double layer risks peeling both layers on removal |
What not to assume
Most installation failures stem from false assumptions rather than complex technique:
Do not assume all painted walls are ready. Even a recently decorated room may have walls that are too new, too porous, or too cold for the adhesive to bond correctly. The 30-day cure minimum reflects the time emulsion paint takes to fully harden — it is not a rough guideline.
Do not assume it is completely damage-free on removal. The term removable means the adhesive is weaker than wallpaper paste, but paint damage on removal remains possible — particularly on newly painted, low-quality, or very matt-finish surfaces. Always test a small section near a skirting board first.
Do not assume one pass is enough. Bubbles form when panels are applied too quickly or without adequate smoothing. Work from the centre outward with a squeegee in overlapping horizontal passes.
Do not assume humidity does not matter. UK bathrooms and kitchens often have ambient humidity above 60%. Most peel-and-stick products specify a maximum humidity for long-term adhesion; check the product datasheet before using in these rooms.
Do not assume all products are equivalent. Thickness, adhesive strength, and pattern repeat accuracy vary significantly between brands. A higher price point often reflects better adhesive consistency and print registration, which matters when aligning patterns at seams.
Tools and preparation
Gather everything before cutting the first panel:
- Sugar soap and a clean cloth for surface cleaning
- Spirit level or laser level
- Pencil for marking a plumb vertical guide line
- Sharp craft knife or wallpaper scissors
- Smoothing squeegee or plastic scraper (a credit card is an acceptable substitute)
- Tape measure and metal straight edge
- Seam roller
- Spare rolls: at minimum 10–15% over your measured wall area, more for large pattern repeats
Clean the wall with sugar soap diluted per the manufacturer's instructions, rinse with clean water, and allow to dry fully. In a UK home during autumn or winter, this can take several hours in a cool or unheated room.
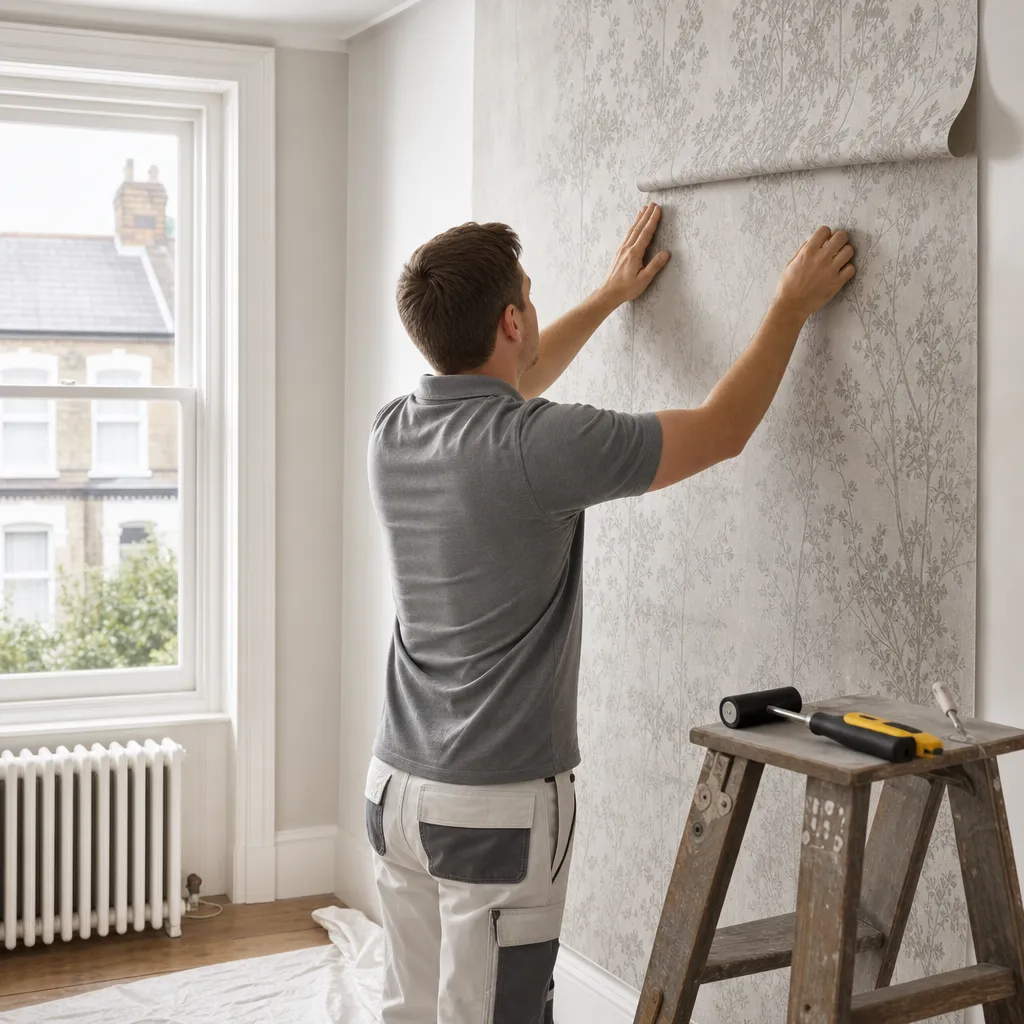
Step-by-step application technique
- Mark a plumb vertical line. UK walls are rarely perfectly square. Use a spirit level to draw a faint pencil line from ceiling to skirting board as your first-panel guide. Do not use the room corner as your reference point.
- Measure and cut the first panel. Allow 5cm extra at top and bottom for trimming after application. For patterned paper, identify the repeat length and pre-cut all panels before starting to ensure consistent alignment across the full wall.
- Peel only the top 20–30cm of backing — not the whole sheet. This lets you position the top edge correctly before committing the rest of the panel to the wall surface.
- Align to your plumb line and press the top edge firmly. Work slowly downward, peeling the backing gradually as you smooth the panel flat. Keep the unpeeled section taut to prevent premature contact with the wall.
- Smooth from centre outward. Use your squeegee or scraper to push air bubbles toward the edges in overlapping horizontal passes. Trapped bubbles under the panel cannot usually be fixed without removing and re-applying the entire panel.
- Trim top and bottom. Use a sharp craft knife against a metal straight edge, or scissors. Replace craft knife blades frequently — a dull blade tears rather than cuts cleanly.
- Butt-join seams precisely. Most peel-and-stick papers are designed for butt-joined seams (edges touching, not overlapping). Align patterns carefully; a slight offset is far less noticeable than a visible gap between panels.
- Press seams with a seam roller. Firm pressure along every seam is the step most often skipped, and the most common cause of edges lifting within weeks of application.
Which finish suits your room?
- Choose peel-and-stick wallpaper for bedrooms, living rooms, hallways, or feature walls in dry conditions on properly prepared walls.
- Choose traditional paste wallpaper if permanence matters, if the wall is textured or uneven, or if you are decorating a persistently high-humidity room.
- Choose paint if the wall surface is unsuitable for any wallpaper, or if you need the fastest and most fully reversible option.
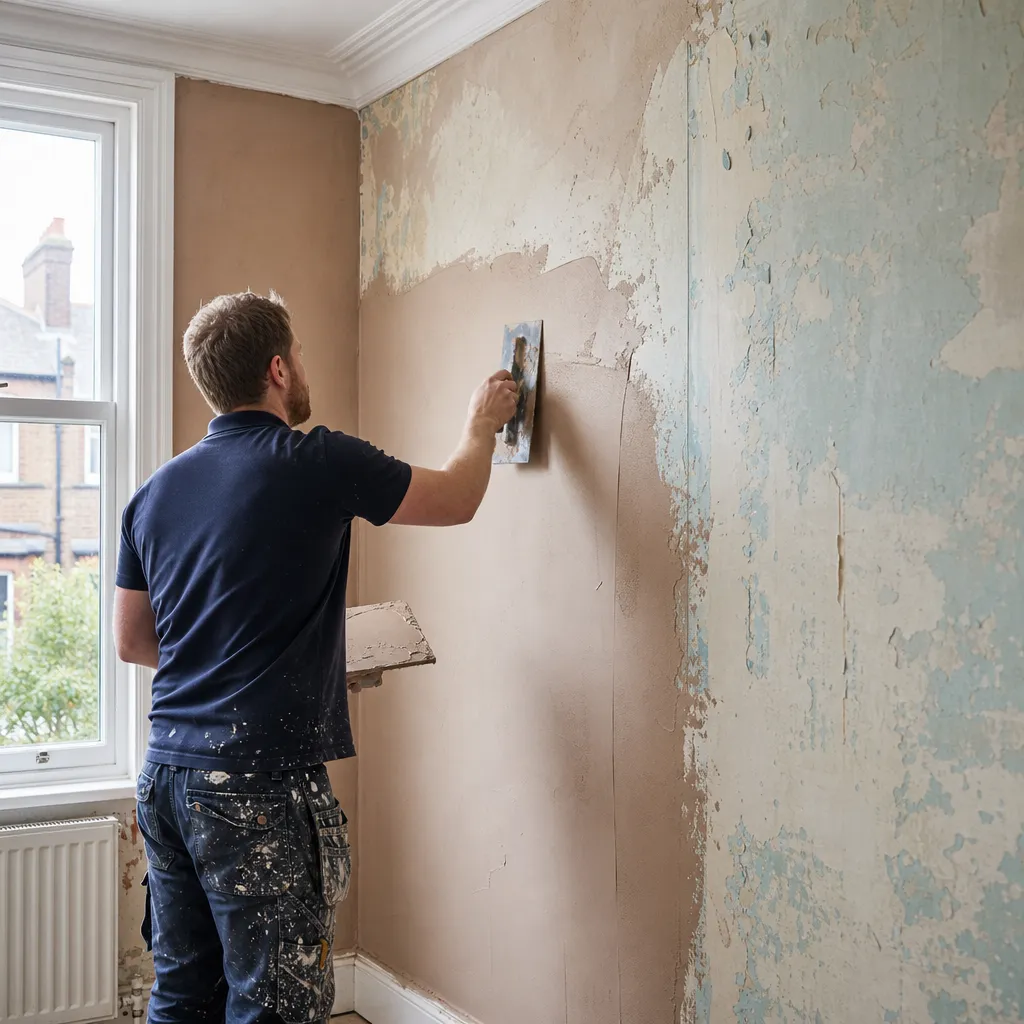
- Consult a decorator if the wall has significant imperfections, old wallpaper residue, staining, or blown plaster that needs professional remediation before any wallcovering is applied.
Homeowner checklist
When to get professional help
Peel-and-stick wallpaper is among the more forgiving DIY decorating tasks, but professional input is worth considering when:
- The wall has significant imperfections, old wallpaper residue, or patches of blown or damp plaster — all of these need professional remediation before any wallcovering is applied.
- You are working in a consistently high-humidity room and are unsure whether your chosen product is rated for sustained moisture exposure.
- The room has complex architectural features — deep chimney breasts, multiple alcoves, or a sloped loft conversion ceiling — that make panel alignment and trimming significantly harder.
- You need a perfect finish for a rental property photography shoot, short-let listing, or show home presentation.
If underlying walls need replastering or significant preparation, that work must be completed and fully dried before any wallpaper is applied.
How Housey can help
For decoration projects that go beyond DIY wallpaper application — including feature wall design, full room makeovers, or properties needing professional surface preparation before any wallcovering — Housey can help you find vetted local decorators and tradespeople in your area through the Housey quote-request service.
Frequently asked questions
Will peel-and-stick wallpaper damage my rented flat's walls?
It is designed to be removed without surface damage, but this depends on paint quality and how long the paper has been in place. Always test a small section first. Check your tenancy agreement — some landlords require written permission even for removable finishes, and any paint damage on removal could be assessed against your deposit under the standard fair wear and tear provisions.
How long does peel-and-stick wallpaper last?
Most products are rated for one to three years under normal indoor conditions. High humidity, UV exposure from direct sunlight, and significant temperature fluctuations all reduce adhesion lifespan. A bathroom application may need replacing annually; a north-facing bedroom wall in a consistently dry environment may comfortably reach three years or beyond before the adhesive begins to degrade.
Can I use peel-and-stick wallpaper on artex?
Not directly. Artex surfaces are too textured for adequate adhesion. You would need to skim the surface smooth, allow full cure and drying, then prime before applying any wallpaper. Note that artex applied before 2000 may contain asbestos — always check with a qualified professional before sanding, scraping, or skimming artex. HSE guidance on artex covers this risk in detail.
How do I remove peel-and-stick wallpaper cleanly?
Warm the surface with a hairdryer to soften the adhesive, then peel slowly from a corner at a low angle of approximately 15°. Pulling at a steep angle increases the risk of paint damage. Any adhesive residue can usually be removed with a slightly damp cloth or mild solvent — follow the manufacturer's specific guidance on residue removal for the product you used.
Sources and further reading
- Private renting: your rights and responsibilities — GOV.UK
- Artex and asbestos guidance — Health and Safety Executive
- Repairs in rented housing — Citizens Advice
Useful next reads
 Improvement & Build
Plastering Over Existing Paint and Wallpaper: Surface Prep and Technique
Whether you can plaster over existing paint or wallpaper depends on surface condition and adhesion.
 Improvement & Build
Skim Coating Interior Walls: Creating Smooth Finishes and Concealing Defects
Skim coating applies a 2–3 mm layer of finish plaster over prepared plasterboard or existing plaster, creating a smooth, paint-ready surface.
 Improvement & Build
Planning kitchen design and renovation projects
Planning a kitchen renovation in the UK typically involves choosing a layout, setting a budget, deciding which contractors you need, and understanding which regulations apply.
 Improvement & Build
Ventless Gas Fireplaces: UK Considerations for Modern Home Heating
In the UK, ventless gas fires are known as flueless gas fires and are permitted only in specific circumstances under Building Regulations Approved Document J and the Gas Safety Regulations 1998.
 Improvement & Build
Preparing Wooden Surfaces: Paint Removal Techniques
The right paint removal method depends on the wood profile and paint type.