Skim Coating Interior Walls: Creating Smooth Finishes and Concealing Defects
By Housey · Last reviewed 18th of May 2026
Skim Coating Interior Walls: Creating Smooth Finishes and Concealing Defects
Skim coating — or finish plastering as it is often called in the trade — is one of the most common tasks undertaken during UK home renovations, new builds, and redecoration projects. Whether you are preparing a newly boarded extension for paint, covering hairline cracks in ageing plaster, or refreshing walls after chasing in cables or pipes, the quality of the skim finish will determine how professional the final decoration looks. Getting it right requires the correct materials, substrate preparation, and technique.
Key points
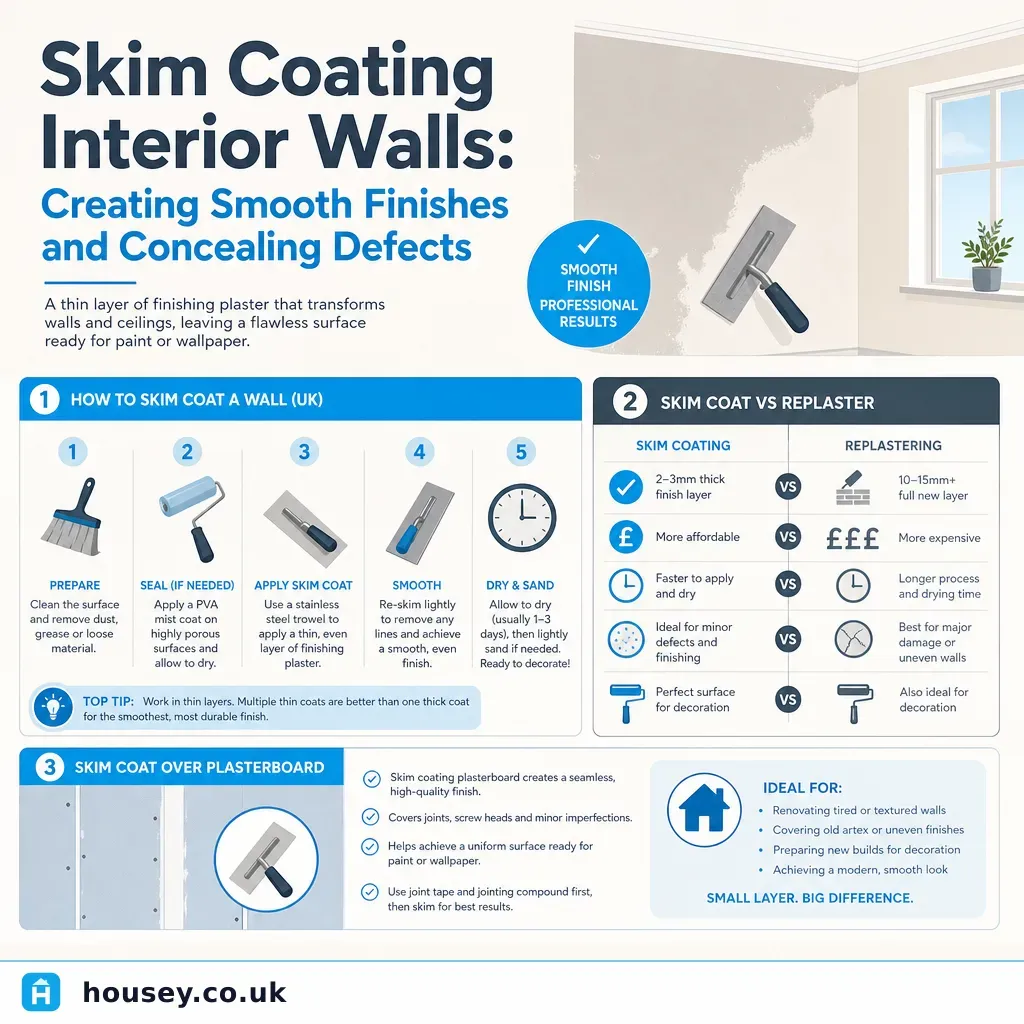
- Finish plaster (skim coat) is typically applied at 2–3 mm thickness over plasterboard or existing plaster backgrounds
- New plasterboard must be primed with a diluted PVA bonding agent (usually 1 part PVA to 4 parts water) before skimming to control suction and prevent shrinkage cracks
- British Gypsum Thistle Multi-Finish and Thistle Board Finish are the most widely specified skim products in UK residential projects
- Skimming directly over gloss-painted or tiled surfaces requires mechanical keying or a specialist bonding compound — adhesion will fail without proper preparation
- A qualified plasterer in the UK typically holds an NVQ Level 2 or 3 in Plastering and carries a CSCS card
What is skim coating and when is it needed?
Skim coating (finish plastering) creates a smooth, durable surface ready for decoration. It differs from base-coat or browning plaster, which is thicker and used to build out uneven walls or fill large areas before the finish layer is applied.
You will typically need skim coating when:
- New plasterboard has been installed during a conversion, extension, or loft room build
- Old plaster has hairline cracks, pitting, or a rough texture that will not accept paint cleanly
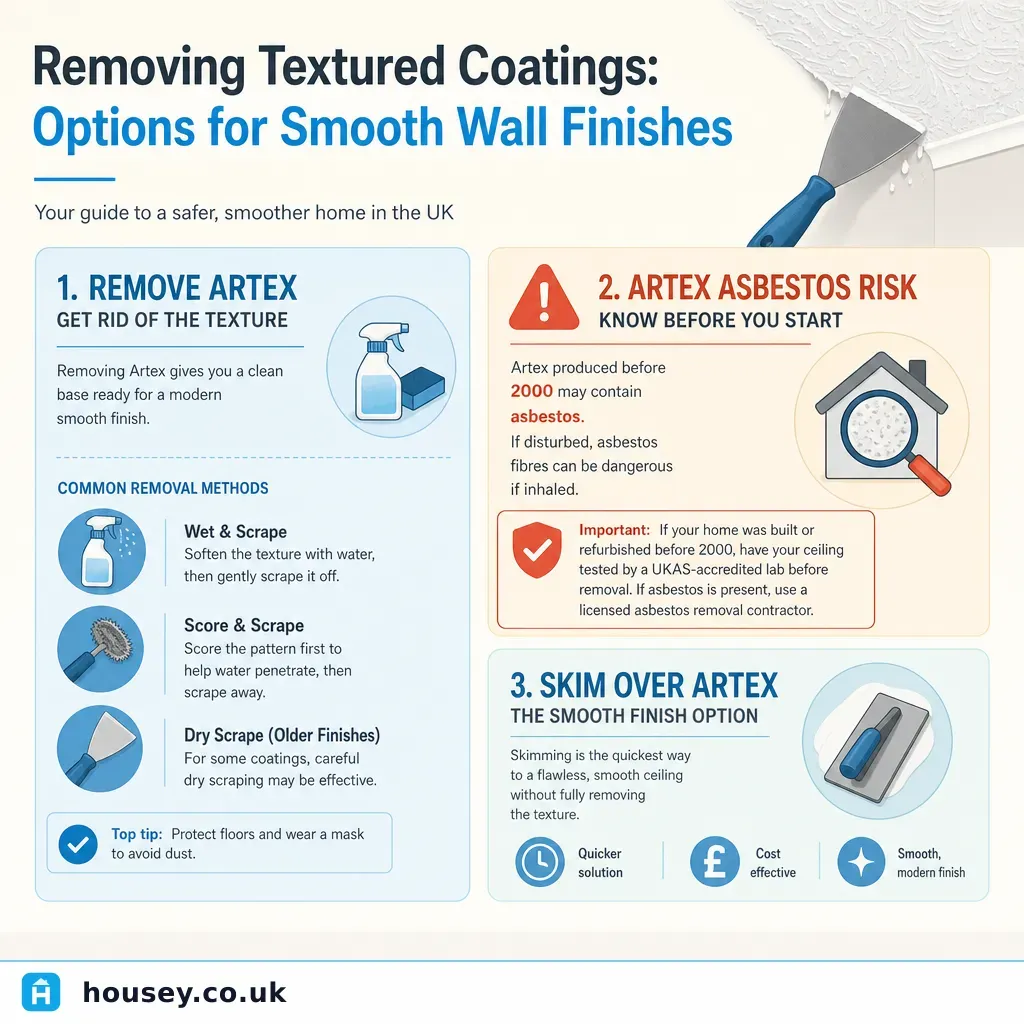
- Artex or textured coatings have been removed, leaving a roughened background
- Pipes or cables have been chased in and the chases filled with base coat — the finish coat ties everything into the surrounding wall
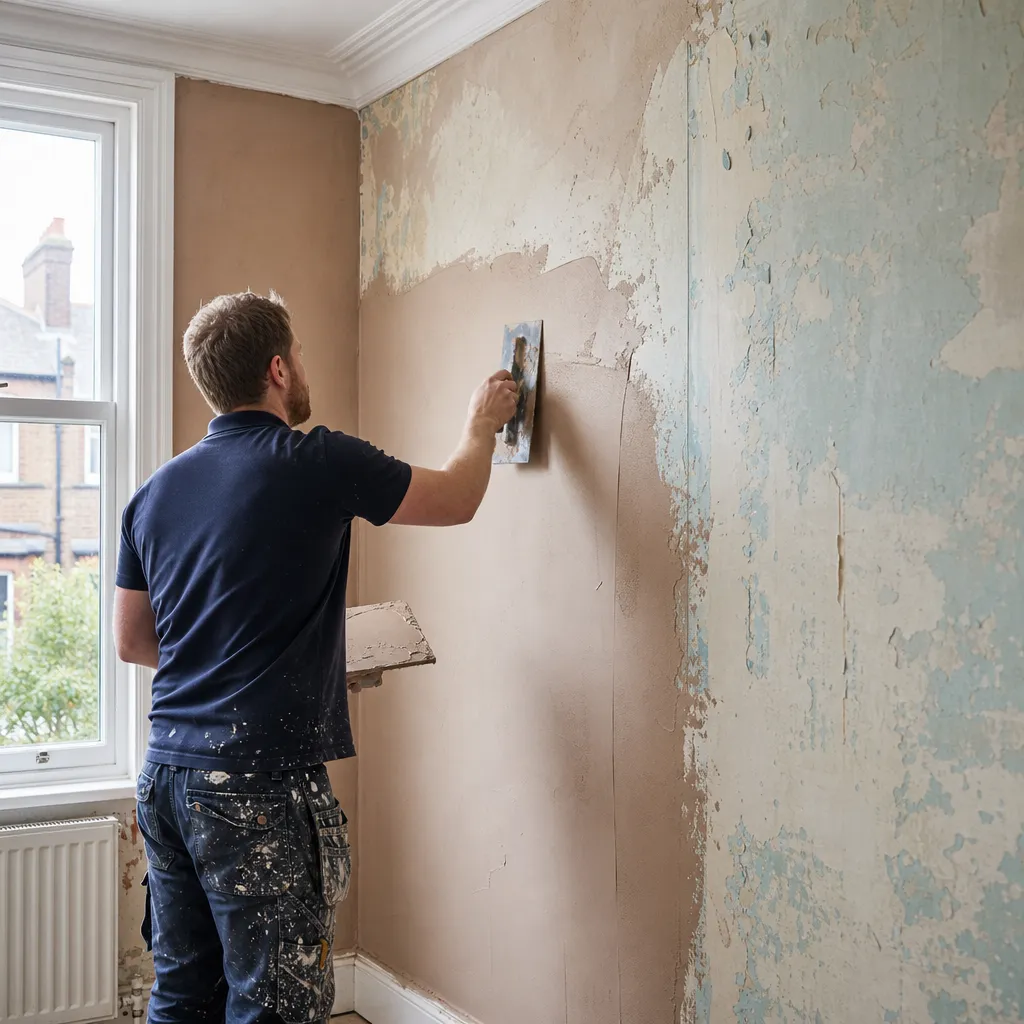
- A property has been stripped back for renovation and the underlying plaster is no longer sound
Skim coating is not always the right solution. Where plaster is significantly uneven — perhaps following damp treatment or previous poorly executed repairs — a full re-plaster using base coat and finish coat will give better results. A competent plasterer can advise after inspecting the substrate.
Substrate preparation: the step most DIYers skip
Correct preparation accounts for most of the difference between a finish that lasts and one that cracks or falls away within months.
PVA priming on plasterboard
New plasterboard is highly absorbent. Without priming, it draws moisture from the skim mix too quickly, causing uneven drying and shrinkage cracks. A diluted PVA solution — typically 1 part PVA to 4 parts water — applied the evening before, or a neat coat allowed to become tacky on the day, regulates suction. Products such as Unibond PVA or Bond It Building Adhesive are available from builders' merchants.
Keying impervious surfaces
Gloss-painted walls, tiles, or oil-saturated surfaces will not hold a skim without preparation. Options include:
- Mechanical keying: scraping or wire-brushing to create a rough profile on the surface
- Specialist bonding compounds: products such as British Gypsum Thistle Bonding Coat applied as an intermediate layer
- SBR bonding agents (styrene-butadiene rubber): diluted and applied before the skim coat
Damp surfaces
Never skim over active damp. Where walls are wet from rising damp, penetrating damp, or a recent leak, the source must be resolved first. Skimming over damp plaster will trap moisture and the finish will bubble or delaminate.
Choosing the right skim plaster
Product | Best for | Not ideal for | Notes |
|---|---|---|---|
Thistle Board Finish | New plasterboard backgrounds | Existing plaster backgrounds | Standard choice for new-build and extension work |
Thistle Multi-Finish | Both plasterboard and existing plaster | Salt-contaminated or damp backgrounds | Versatile; the most commonly specified finish plaster in UK residential work |
Knauf Finish Plaster | Plasterboard and backing coats | Damp-prone walls | Comparable to the Thistle range; widely available |
Moisture-resistant finish plasters | Walls near bathrooms, kitchens, or following damp treatment | Standard dry rooms | Higher sulphate resistance for problematic substrates |
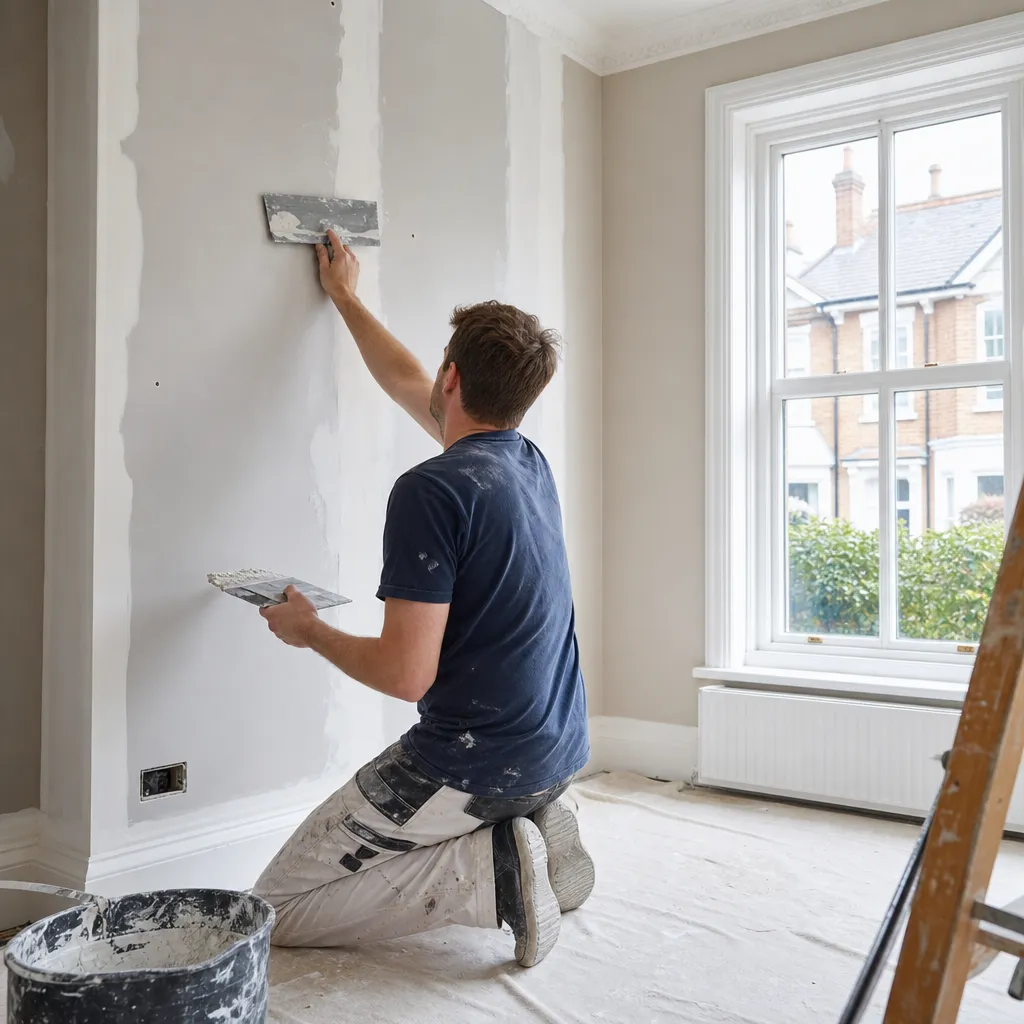
The skim coating process
A typical skim coat involves these steps:
- Surface preparation — prime, key, or treat the substrate as described above
- Mix the plaster — most finish plasters use approximately 11–12 litres of water per 25 kg bag; add plaster to water and mix to a smooth, creamy consistency with a paddle mixer
- First coat — apply with a plastering trowel to 1–1.5 mm, working from the top of the wall down
- Let it stiffen — the first coat needs to firm up before the second coat is applied
- Second coat — apply at 1–1.5 mm over the first, feathering into edges and corners
- Trowel up — once the plaster begins to set, work to a smooth finish in circular and figure-of-eight passes with a clean trowel
- Allow to dry — new skim turns from dark grey to pale cream as it dries; allow at least 2–3 days before priming and painting in normal conditions
Most finish plasters have a working time of 30–45 minutes from mixing, so only mix what you can apply within that window.
DIY vs hiring a plasterer
Skim coating is a skilled trade. Experienced DIYers can achieve a functional result on small areas, but professional plasterers develop the speed and trowel technique for a consistently paint-ready finish that is genuinely difficult to replicate without substantial practice.
Which approach should you choose?
- Choose DIY if the area is small (a patch repair or a single section), you have practised on offcuts, and the finish will be partially hidden by furniture or shelving
- Hire a plasterer if you are skimming a full room, multiple walls, or a ceiling; if the area is highly visible such as a hallway or living room; or if the substrate has complications such as mixed backgrounds or a damp history
- Hire a plasterer if this is part of an extension or major renovation — consistent quality matters when coordinating with decorators and other trades
- Always hire a specialist if the building is listed or if you need to match an existing lime-plaster finish — specialist materials and technique are required
What to ask a plasterer before instructing
- What preparation is included — does the quote cover PVA priming and making good of defects?
- What products will they use, and are those products suited to your substrate?
- Is the quote for skim only, or does it include base-coat work where needed?
- What is the expected drying time before decoration can begin?
- Do they hold a CSCS card and carry relevant public liability insurance?
- Is VAT included in the quote?
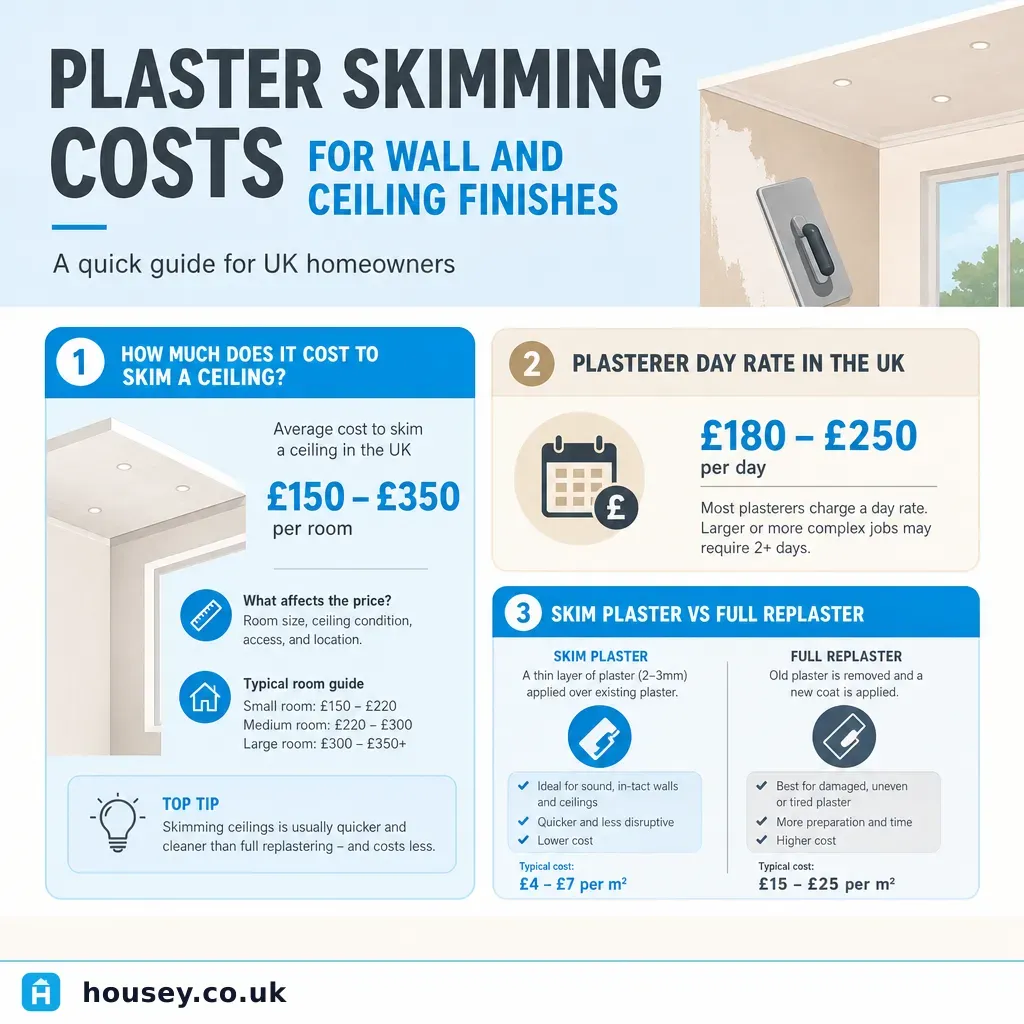
Indicative costs
Indicative UK costs, last reviewed 2026-05-18. Figures are approximate and vary by region, property condition, and scope. Always obtain at least three quotes.
Scope | Indicative cost range |
|---|---|
Single wall skim (average room wall) | £150–£300 |
Full room skim (walls only, approx. 15 m²) | £300–£600 |
Full room including ceiling | £400–£800 |
Patch repair (small area, typical call-out minimum) | £80–£150 |
Day rate for an experienced plasterer | £150–£300/day |
Costs sit at the higher end in London and the South East.
When to get professional help
For most skim coating on standard modern properties, a competent plasterer is the appropriate choice. Consider seeking specialist guidance when:
- The property contains pre-1980s Artex that has not been tested for asbestos — Artex applied before the mid-1980s may contain chrysotile fibres; do not sand, scrape, or disturb it without prior testing
- Persistent damp, staining, or salt crystallisation is visible on the walls — these indicate an underlying issue that must be resolved before any finishing work begins
- The existing plaster is delaminating in large sections or sounds hollow when tapped — this suggests adhesion has broken down and full re-plastering may be needed
- The property is listed or in a conservation area and you are considering replacing lime plaster with gypsum — seek specialist advice before proceeding
How Housey can help
If your skim coating project is part of a larger renovation — an extension, loft conversion, or whole-house refurbishment — Housey can connect you with vetted extension builders and renovation contractors who coordinate plastering alongside other trades. Request quotes, compare credentials, and manage your project in one place.
Frequently asked questions
How long does skim coat plaster take to dry before painting?
New skim plaster typically needs at least 2–3 days before mist-coat painting in normal conditions (15–20°C with reasonable ventilation). Cold weather or poor ventilation can extend this to a week or more. The plaster should be a consistent pale cream — grey patches indicate remaining moisture. Always apply a mist coat of diluted emulsion (roughly 3 parts paint to 1 part water) as the first coat to seal the porous surface.
Can you skim coat over existing painted walls?
Yes, but the surface needs preparation first. Matte paint in good condition can be lightly sanded and PVA-primed. Gloss paint requires more aggressive keying — mechanical scratching or a bonding agent. Paint that is flaking or soft must be removed, as the skim will follow any movement or weakness in the substrate beneath it.
Is skim coating the same as plastering?
In UK trade practice, plastering covers both base-coat work (browning, bonding coat) and finish plaster (the skim coat). Skim coating specifically refers to the thin 2–3 mm finish layer applied over a prepared background to create a smooth, paint-ready surface. Some tradespeople use the terms interchangeably when referring to finish work on plasterboard.
Does a skim coat need a mist coat before painting?
Yes — fresh plaster is porous and absorbs full-strength emulsion unevenly, leaving a patchy or powdery result. A mist coat of diluted emulsion (typically 3 parts emulsion to 1 part water) seals the surface and provides a consistent base for top coats. Proprietary new-plaster primers are also available from most decorating merchants.
Sources and further reading
- British Gypsum technical advice and product guides — British Gypsum
- Asbestos in textured coatings — Health and Safety Executive
- Plastering careers and qualifications — Construction Industry Training Board
- Asbestos in your home — GOV.UK
Useful next reads
 Improvement & Build
Drywall and Plasterboard Finishing Techniques for UK Interior Walls
In the UK, plasterboard finishing usually means either a full skim coat of finishing plaster — the traditional domestic approach — or tape-and-joint (drylining), which builds up a smooth surface with multiple coats of jointing compound.
 Improvement & Build
Plastering Over Existing Paint and Wallpaper: Surface Prep and Technique
Whether you can plaster over existing paint or wallpaper depends on surface condition and adhesion.
 Improvement & Build
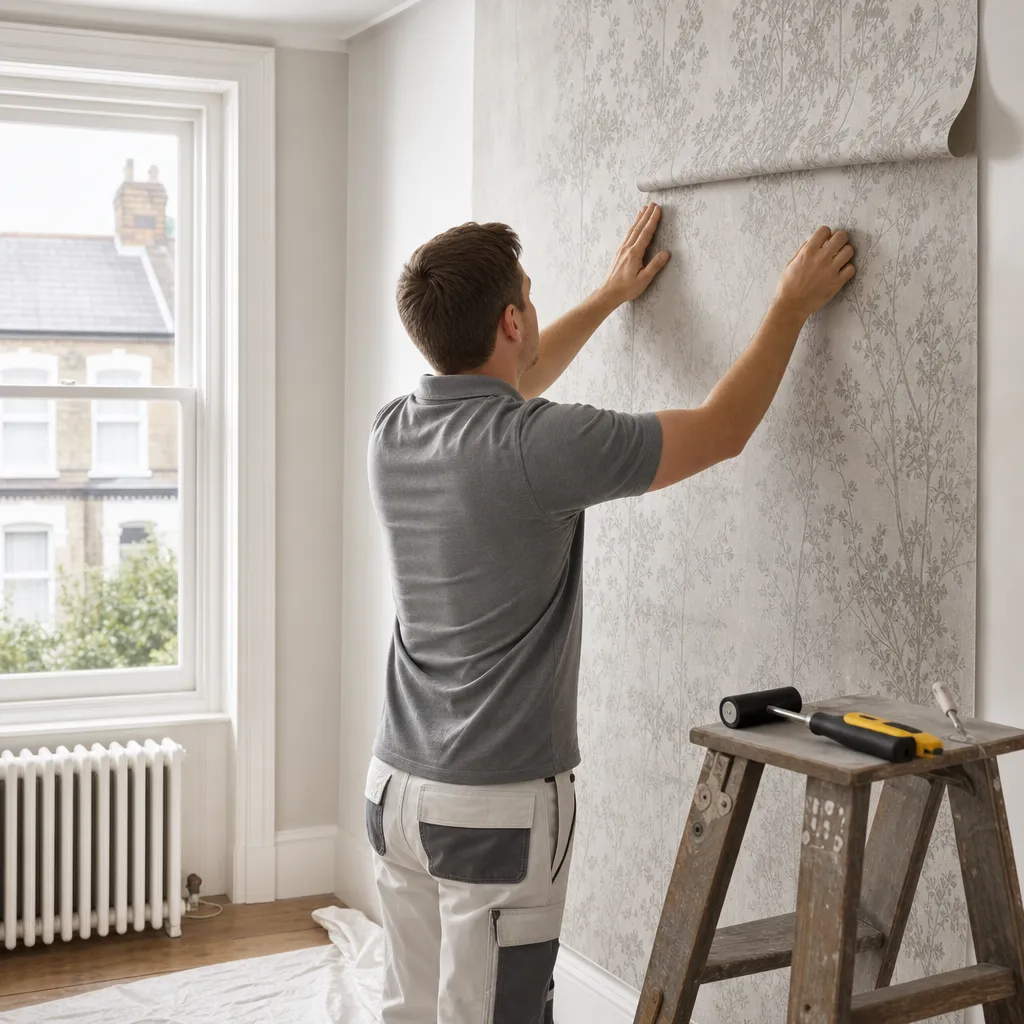
Installing Peel-And-Stick Wallpaper: Application Techniques
Peel-and-stick wallpaper works best on smooth, emulsion-painted walls cured for at least 30 days, in rooms between 13°C and 30°C.
 Improvement & Build
Plaster Skimming Costs for Wall and Ceiling Finishes
Skim plastering a typical bedroom costs £400–£750 for walls and ceiling combined; a single ceiling runs £150–£350 and a single wall £80–£180.
 Improvement & Build
Removing Textured Coatings: Options for Smooth Wall Finishes
Textured coatings in UK homes built before 2000 may contain asbestos and must be tested before disturbance.