Painting Brick Fireplaces: Preparation, Materials and Technique
By Housey · Last reviewed 8th of May 2026
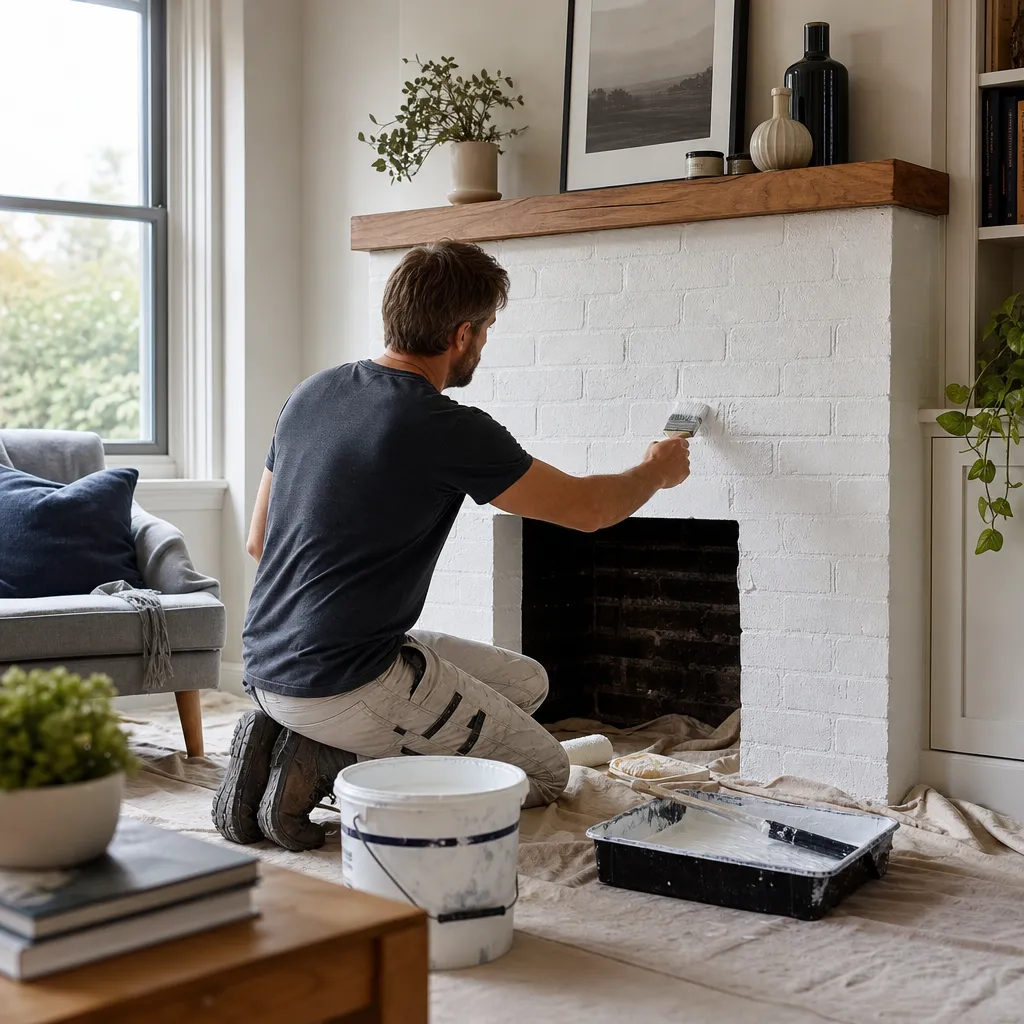
Painting Brick Fireplaces: Preparation, Materials and Technique
A brick fireplace that looked dated a decade ago has become one of the most sought-after cosmetic update projects for UK homeowners — particularly in Victorian and Edwardian terraces where original brick chimney breasts dominate a reception room. The appeal is understandable, but a poor paint job can be harder to reverse than most people realise, and the wrong materials in the wrong zone create genuine safety concerns. Understanding the decorative and heat-exposed areas before buying your first tin makes all the difference.
Key points
- Heat-resistant paint rated to at least 200°C is required for any surface inside the firebox or in close proximity to an open flame; standard masonry paint is not suitable for these areas and will blister when heated.
- Brick must be clean, dry, and structurally sound before painting — soot deposits, loose mortar, and efflorescence all cause paint to fail prematurely.
- A dedicated masonry primer is required on unpainted brick; skipping it leads to uneven absorption, poor adhesion, and a blotchy result.
- Painted brick is very difficult to reverse — removal may require chemical strippers, wire brushing, or professional soda blasting.
- Listed buildings and conservation-area properties may face restrictions on altering original internal fireplace fabric; check with your local planning authority before proceeding.
The two zones: decorative and heat-exposed
A brick fireplace has two distinct areas with very different material requirements.
Decorative zone — the outer surround, chimney breast face, and hearth trim — can be treated with standard exterior-grade masonry paint or specialist brick paint, provided the surface is correctly primed. Many homeowners dilute the first coat to a wash finish to retain the brick's natural texture.
Heat-exposed zone — the firebox interior, back panel, and inner sides — must only be treated with heat-resistant paint rated to at least 200°C. For solid fuel or wood-burning appliances, a rating of 600°C or above is preferable. Standard masonry paints will blister, crack, and potentially release fumes when heated. Products marketed as stove paint or grate paint are appropriate. Building Regulations Approved Document J governs combustion appliance installations; no treatment of the firebox should interfere with safe appliance operation.
Paint type comparison
Paint type | Suitable zone | Heat rating | Notes |
|---|---|---|---|
Masonry / brick paint | Decorative surround only | None | Requires primer; wide colour range |
Limewash | Decorative surround | None | Breathable; easier to reverse than film paints |
Chalk paint | Decorative surround | None | Quick coverage; needs sealant near a fireplace |
Heat-resistant stove paint | Firebox and inner panels | 200°C–600°C+ | Requires first-fire curing sequence |
High-temp spray enamel | Firebox, grate, metalwork | Up to 650°C | Fast application; limited colour choice |
Preparation: where most paint jobs succeed or fail
Preparation accounts for 70–80% of total project time and has far more effect on longevity than paint quality. Skimping here is the most common reason painted fireplaces look poor within 12–18 months.
Preparation checklist
Applying the paint
Use a medium-pile roller for brick faces and a 25–50mm brush for mortar joints first, then roll over the faces while joints are still wet to blend coverage.
Two-coat minimum: Apply thin coats with the manufacturer's recommended drying time between them (typically 4–6 hours). One thick coat will sag and dry unevenly.
Decorative wash: Dilute the first coat with up to 20% water for a translucent finish that retains brick texture. This works particularly well on Victorian or Edwardian brickwork where full coverage looks harsh.
Curing heat-resistant paint: Light a small fire, allow to cool, then build to normal temperature on subsequent uses. Do not light a full fire immediately after application — the paint needs graduated heat cycling to complete its chemical cure.
What not to assume
- Any white paint will work on a fireplace — Standard emulsion or masonry paint inside the firebox blisters within one or two uses and may release fumes. Only heat-rated stove paint belongs in the firebox zone.
- Washing with water is sufficient — Soot leaves an oily residue water alone does not remove. Use sugar soap or a specialist soot cleaner, then a stain-blocking primer.
- Painted brick is easy to reverse — On rough brickwork, paint penetrates deep into pores and mortar. Removal typically requires chemical strippers, wire brushing, or soda blasting.
- Primer is optional — Unprimed brick absorbs paint unevenly, requiring far more coats. A single primer coat saves time overall.
- Any fireplace can be painted — Listed buildings and conservation-area properties may restrict irreversible changes to original features. Check with your local planning authority first.
When to get professional help
Most brick fireplace painting is within a careful DIYer's reach. Seek professional help if:
- The flue or firebox shows cracking or deterioration — paint masks problems a HETAS engineer or chimney surveyor should assess first
- The fireplace has a gas fire or insert — a Gas Safe registered engineer must inspect or isolate the appliance before work starts
- Efflorescence (white salt deposits) is visible — this signals moisture movement behind the brickwork that should be investigated and treated before painting
- The property is listed or in a conservation area — changes may need listed building consent
How Housey can help
If your fireplace project is part of a broader home renovation, Housey can help you find and compare quotes from vetted local tradespeople across improvement and build services. Visit the Housey marketplace to explore specialists relevant to your project.
Frequently asked questions
Can I paint over a previously painted brick fireplace?
Yes, in most cases — provided the existing paint is sound and compatible with your new product. Lightly abrade the surface, clean thoroughly, and apply a masonry primer before your new top coats. If the existing paint is flaking significantly, strip back to bare brick first to avoid the new coat failing along the same lines.
How long should I wait after painting before using the fireplace?
For decorative masonry paint on the outer surround, most manufacturers recommend 7–14 days before exposing the area to normal room heat. For heat-resistant paint inside the firebox, follow the product's curing instructions — most require a graduated first-fire sequence before the appliance is used at full capacity.
What colour works best on a brick fireplace?
Colour choice depends on room context and personal preference. White and off-white shades are most common, lightening the room and contrasting cleanly with brick texture. Darker tones — charcoal, warm grey, or sage — suit more contemporary interiors. Apply a tester pot to primed brick before committing, as texture absorbs light differently from a flat wall.
Will painting a brick fireplace affect building regulations or home insurance?
Cosmetic painting of the decorative surround with appropriate materials does not normally trigger building regulations notification. Structural changes, flue alterations, or appliance replacement require the appropriate certification — Gas Safe, HETAS, or building control sign-off. Inform your home insurer of any significant changes to the fireplace installation.
Sources and further reading
- HETAS: Chimney sweep and appliance safety guidance — HETAS (Heating Equipment Testing and Approval Scheme)
- Building Regulations Approved Document J: Combustion appliances and fuel storage systems — GOV.UK / MHCLG
- HSE: Working with lead paint in older properties — Health and Safety Executive
- Gas Safe Register: Find a registered engineer — Gas Safe Register
Useful next reads
 Improvement & Build
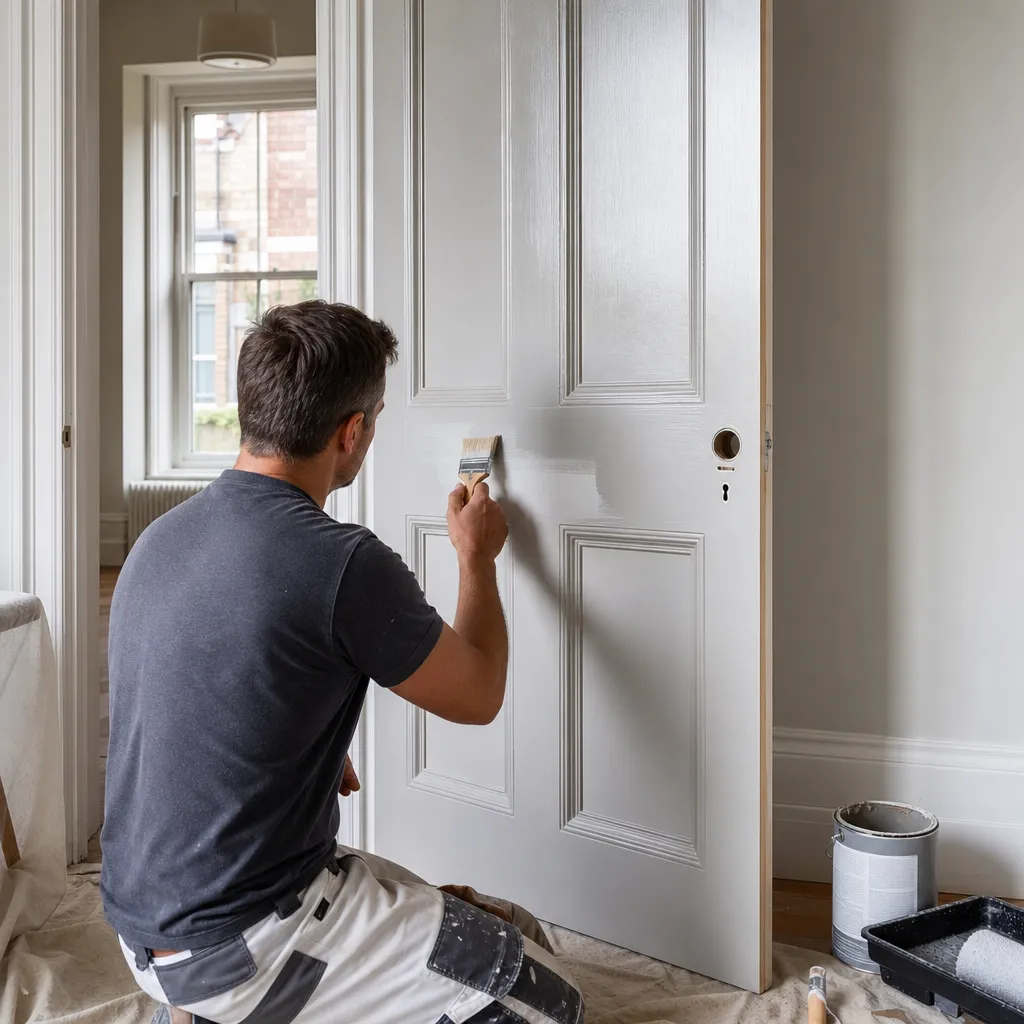
Painting Interior Doors: Preparation and Technique
Painting interior doors well depends on preparation rather than paint choice.
 Improvement & Build
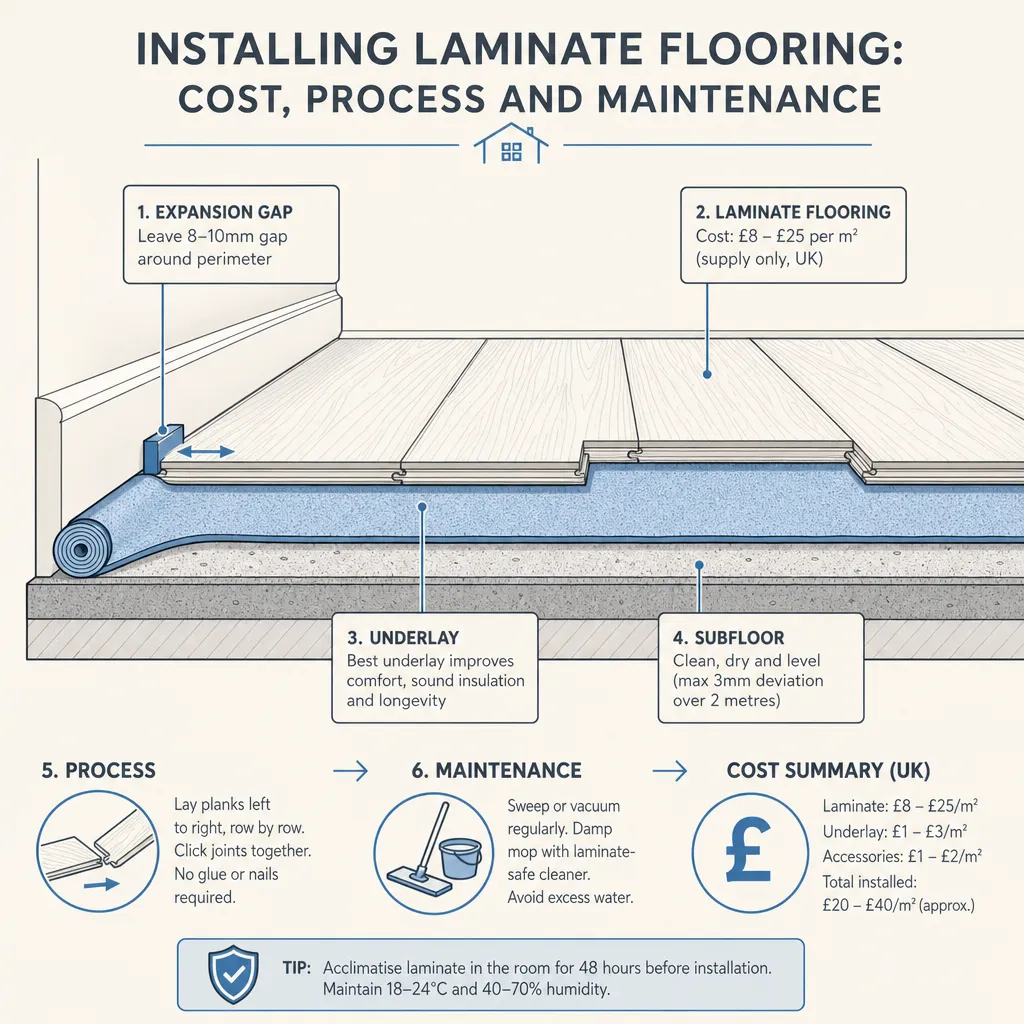
Installing Laminate Flooring: Cost, Process and Maintenance
Laminate flooring in the UK typically costs £15–40 per square metre for materials, plus £8–15 per square metre for professional fitting.
 Improvement & Build
When to Hire Professional Contractors vs. DIY Home Projects
Some home improvement work — including gas fitting, consumer-unit electrical work, structural alterations, and asbestos removal — is legally restricted to qualified professionals in the UK.
 Improvement & Build
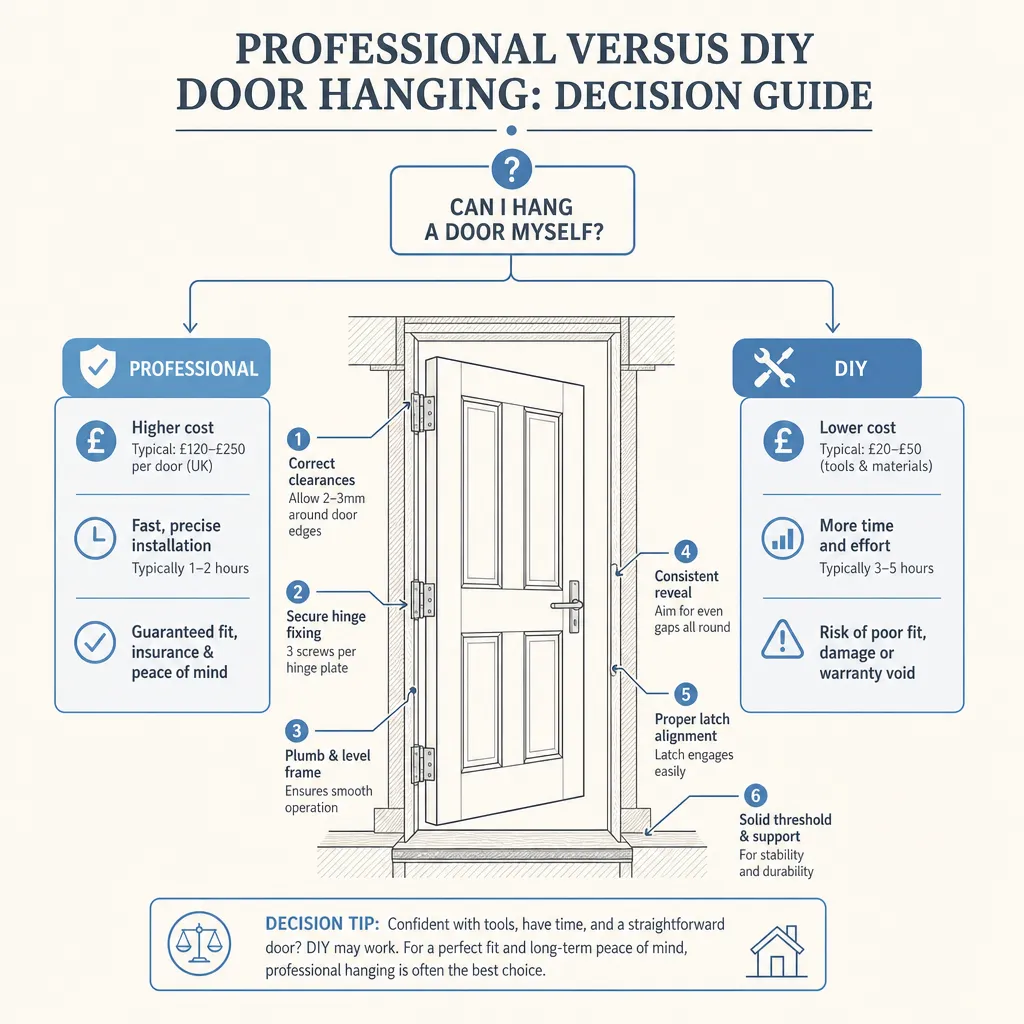
Professional Versus DIY Door Hanging: Decision Guide
Most internal doors can be hung by a competent DIYer with basic carpentry tools and patience, but external doors, fire doors, and out-of-square frames usually need a professional door fitter.
 Improvement & Build
Installing Replacement Windows in Your Home
Replacing windows in the UK requires compliance with Building Regulations Part L — a minimum centre-pane U-value of 1.