Rendering a Garden Wall: Techniques for Professional-Quality Finishes
By Housey · Last reviewed 18th of May 2026
Rendering a Garden Wall: Techniques for Professional-Quality Finishes
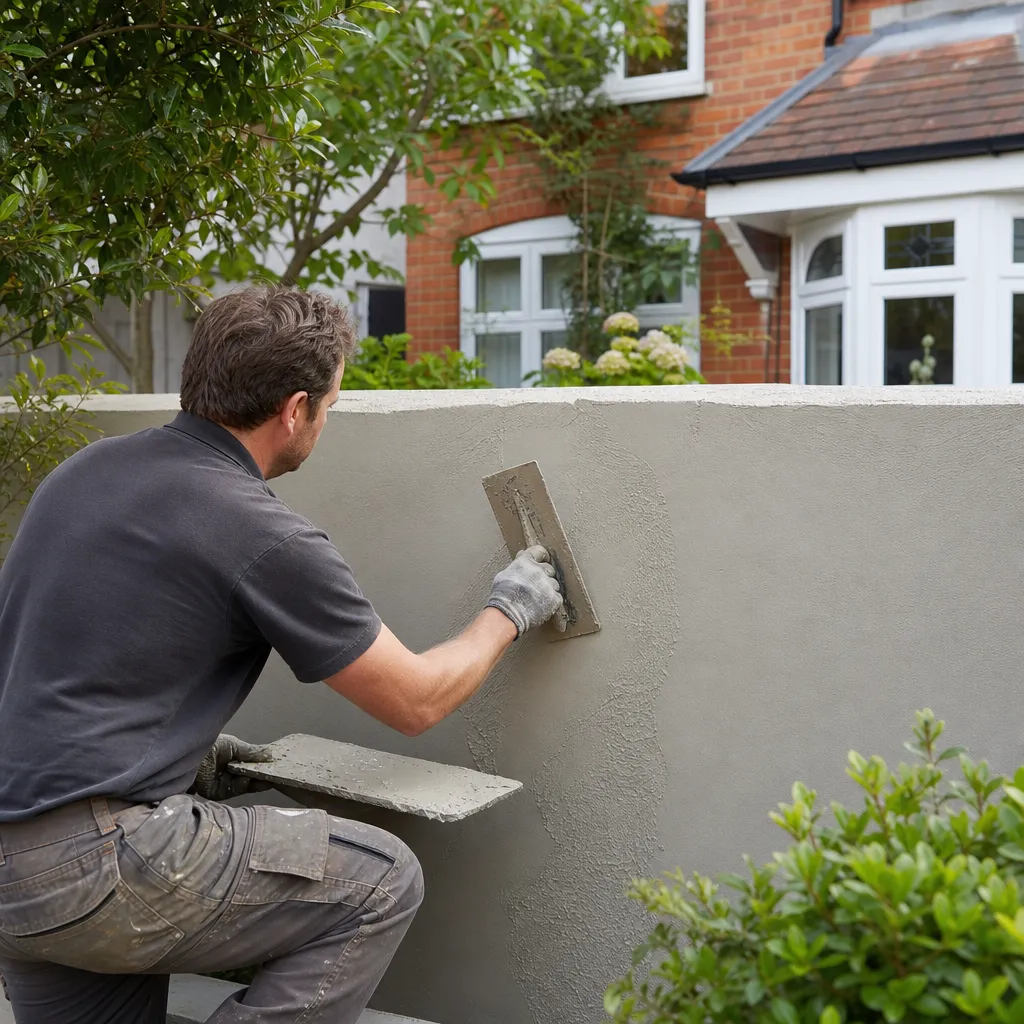
Rendering a garden or boundary wall protects masonry from frost, driving rain, and biological growth while giving a crisp, uniform finish that can transform the appearance of an outdoor space. The technique is achievable for a competent DIYer with some masonry experience, but the preparation, mix specification, and curing process determine whether the render bonds firmly for decades or begins to crack and delaminate within a few seasons.
Key points
- The standard two-coat system for an external garden wall uses a scratch coat at 10–12 mm depth followed by a topcoat at 6–8 mm; applying render in a single thick coat leads to differential shrinkage and cracking.
- A typical external scratch coat mix is 4 or 5 parts sharp sand to 1 part Portland cement, with a small measured addition of liquid plasticiser to improve workability and reduce shrinkage cracking.
- Render must not be applied when air or wall temperature is below 5°C, or when frost is forecast within 24 hours — cold conditions prevent proper cement hydration and cause the mix to fail.
- All masonry surfaces must be dampened with clean water immediately before applying render to reduce suction and prevent the wall drawing moisture too rapidly from the mix.
- Lime-based render using natural hydraulic lime (NHL 3.5 or NHL 5) must be used on soft, handmade, or reclaimed brick and natural stone — cement render traps moisture and causes freeze-thaw spalling and face-loss in older masonry.
Which approach should you choose?
Decision tree for garden wall rendering:
- Choose standard two-coat cement render if the wall is sound, built from modern brick or dense concrete block, and you want a durable, paintable finish — the most cost-effective approach for typical UK boundary walls.
- Choose a polymer-modified or through-colour render if you want reduced application time, better crack resistance, and a finish that does not need painting. Products such as proprietary Weber or Parex systems are widely available from builders' merchants.
- Choose lime render (NHL 3.5 or NHL 5) if the wall incorporates soft, handmade, or reclaimed brick, natural stone, or any pre-1919 masonry. Cement render over soft brick traps moisture and causes permanent damage.
- Hire a qualified renderer or groundworker if the wall is over 1.5–2 m tall, is showing structural cracking or movement, or is a retaining wall carrying lateral earth pressure.
Comparing render options for garden walls
Indicative material costs only, last reviewed 2026-05-18. Installation costs vary by access, contractor, and region.
Render type | Best for | Not ideal for | Approx. material cost per m² |
|---|---|---|---|
Sand-and-cement (4:1 to 5:1) | Modern brick, dense concrete block | Soft, reclaimed, or historic brick | £3–£6 |
Natural hydraulic lime (NHL 3.5 or NHL 5) | Pre-1919 masonry, soft brick, natural stone | Heavily frost-exposed sites (use NHL 5 for exposed locations) | £5–£9 |
Proprietary/polymer render | All modern masonry; faster to mix and apply | Listed or historic garden structures | £8–£15 |
Materials and tools
Item | Specification or note |
|---|---|
Portland cement | CEM I 52.5N; avoid rapid-hardening grades for large areas |
Sharp sand | Washed, well-graded; coarser grade for scratch coat |
Plasticiser | Liquid; follow manufacturer dosage — typically 75–150 ml per 50 kg cement |
Bonding agent (SBR) | Diluted 1:3 with water for low-suction or previously painted surfaces |
External angle bead | Galvanised steel or PVC; provides crisp, protected corners and returns |
Plasterer's hawk and trowel | Standard rendering tools |
Feather-edge rule (1.2–1.8 m) | For levelling and screeding off |
Comb scratcher | For keying the scratch coat before applying the topcoat |
Wall preparation:
- Tap across the wall; re-point any open or hollow joints with suitable mortar. Allow to cure 24 hours before rendering.
- Scrape off lichen, moss, and algae. Apply a biocide wash and allow to dry completely.
- Remove dust, loose material, and any flaking paint or previous render.
- Apply diluted SBR bonding agent (1:3 with water) to smooth, low-suction, or previously painted surfaces. Allow to become tacky — approximately 30–60 minutes — before applying the scratch coat.
- Fix external angle beads at all corners and returns using render dabs or screws into plugged masonry.
Applying the scratch coat
The scratch coat bonds to the masonry and provides a mechanical key for the topcoat.
- Wet the wall with clean water until evenly damp — not saturated.
- Mix the scratch coat to a firm, workable consistency.
- Apply with a hawk and trowel, pressing firmly into the masonry, working upward in approximately 1 m² sections to a consistent 10–12 mm depth.
- Screed flat using a feather-edge rule resting on angle beads or temporary timber screeds.
- Once the coat firms but before it hardens, scratch with a comb scratcher in horizontal passes to key the surface for the topcoat.
- Cure the scratch coat for at least 24 hours. In warm or windy conditions, lightly mist every few hours to prevent rapid drying and shrinkage cracking.
Applying the topcoat
- Lightly dampen the scratch coat with clean water.
- Apply a finer mix (5–6:1 sand:cement, or a ready-mix topcoat product) to 6–8 mm depth, screeding off against the angle beads.
- Float the surface using a plasterer's float in circular then cross-cutting motions to close the surface and create a consistent texture.
- For a smoother finish, close further with a steel trowel. For a textured external appearance, use a sponge float.
- Protect from rain for 24 hours and from frost for 48 hours after completion.
Red flags to watch for
If any of the following appear after rendering, investigate before painting or proceeding with further work:
- Hollow sounds when tapped after drying: adhesion has failed, usually due to a dry or dirty substrate, incorrect mix ratio, or applying render over a dusty or painted surface without a bonding agent.
- Map cracking across the surface: typically caused by a mix too high in cement relative to sand, a topcoat applied too thickly, or rapid drying in hot or windy conditions.
- Stepped or diagonal cracking following mortar joints: may indicate movement in the wall structure itself rather than a render defect — investigate the masonry before re-rendering.
- Damp patches appearing through dry render: suggests water ingress from the top of the wall, rising damp, or a bridged damp-proof course. Render will not seal a damp problem and can make moisture accumulation worse by trapping it inside the wall.
Finishing and painting
Newly rendered walls require at least 4–6 weeks of curing before painting (less for polymer systems — follow the manufacturer's guidance). Apply an alkali-resistant masonry primer before using any paint over fresh cement render, as the alkalinity of new cement can degrade oil-based coatings through saponification.
When to get professional help
Rendering a low garden wall is within reach of a capable DIYer with some masonry experience. Instruct a qualified professional if:
- The wall is over 1.5–2 m tall and requires scaffold or an elevated work platform
- Structural cracking or movement is present before rendering
- The project involves a retaining wall where failed render could allow water pressure to build up behind the structure
- The masonry is soft, reclaimed, or historic and you are unsure of the correct lime specification
You can find experienced extension builders and groundworkers through Housey to assess and carry out more complex garden wall rendering projects.
Frequently asked questions
Do I need planning permission to render a garden wall?
Rendering an existing garden wall is generally treated as a maintenance activity and does not usually require planning permission. However, if your property is in a conservation area or is listed, or if the wall borders a public highway, check with your local planning authority before proceeding — some councils impose specific controls on the appearance of boundary walls.
What is the correct render mix for an outdoor garden wall?
A 4:1 or 5:1 sharp sand to Portland cement ratio with a small addition of liquid plasticiser is suitable for most modern brick or block garden walls in the UK. For walls built with soft, handmade, or reclaimed brick, or incorporating natural stone, use a natural hydraulic lime (NHL 3.5 or NHL 5) mix instead of cement. Ready-mix polymer renders are a practical option for DIY use on modern masonry.
How long does render take to dry on a garden wall?
The scratch coat typically takes 24 hours to firm before the topcoat can be applied. Full cure for a two-coat cement render system is usually 4–6 weeks, though polymer renders cure faster — check the manufacturer's guidance. Avoid painting or sealing the surface before full cure, and protect the finish from frost for at least 48 hours after applying the topcoat.
Why is my render cracking?
The most common causes are an overly rich mix (too much cement relative to sand), a topcoat applied too thickly, inadequate substrate preparation, or rapid drying in hot or windy weather. Evenly distributed hairline map-cracks are usually a mix or drying issue. Wider cracks following mortar joints or running diagonally may indicate wall movement and require structural investigation.
Sources and further reading
- Technical advice on mortars, renders and plasters — Historic England
- Work at Height Regulations 2005 — legislation.gov.uk
- BS EN 998-1: Specification for mortar for masonry — BSI Group
Useful next reads
 Improvement & Build
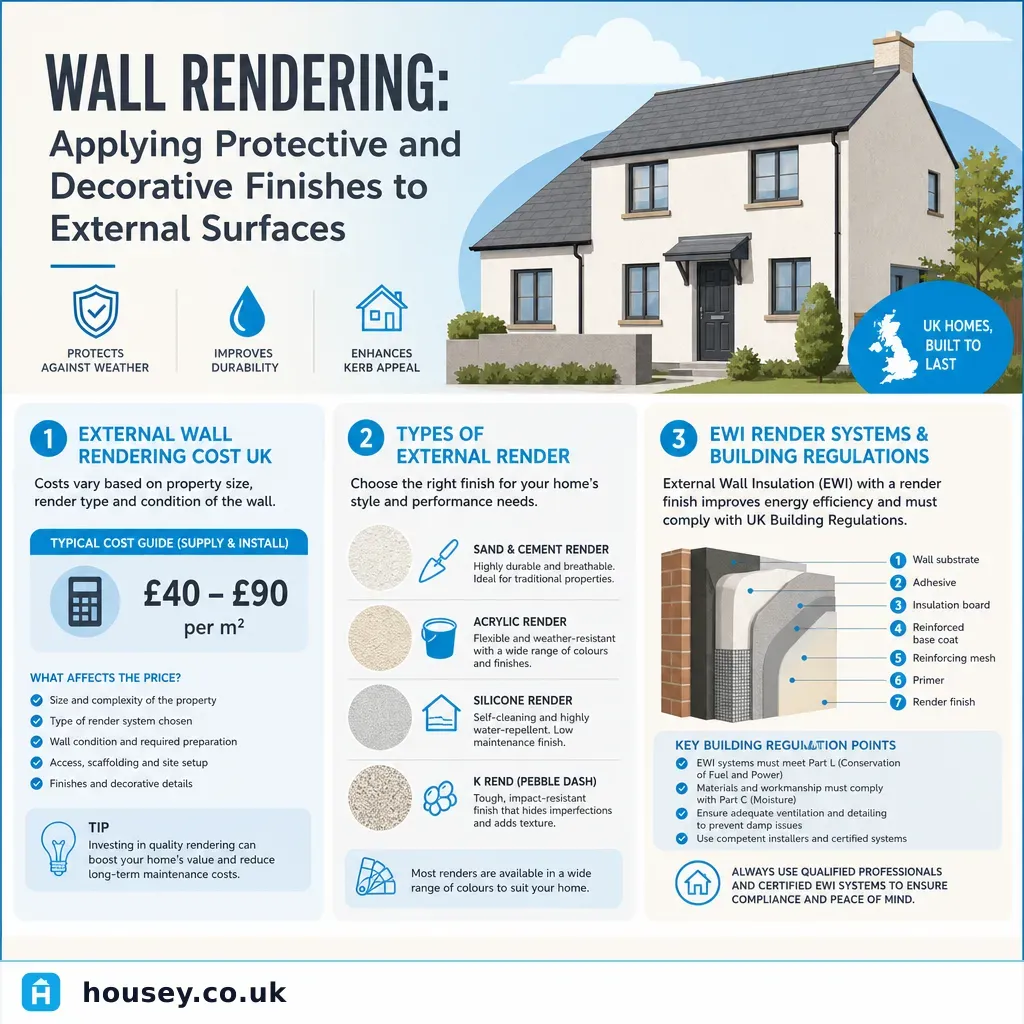
Wall Rendering: Applying Protective and Decorative Finishes to External Surfaces
External wall rendering protects masonry from weather and can improve energy efficiency when combined with an EWI system.
 Improvement & Build
Laundry Room Renovation and Fitting Costs
A basic UK laundry room fit-out typically costs £2,000–£6,000 where plumbing and electrics are already in place, rising to £8,000–£15,000 or more when structural work, new drainage connections, or new electrical circuits are needed.
 Improvement & Build
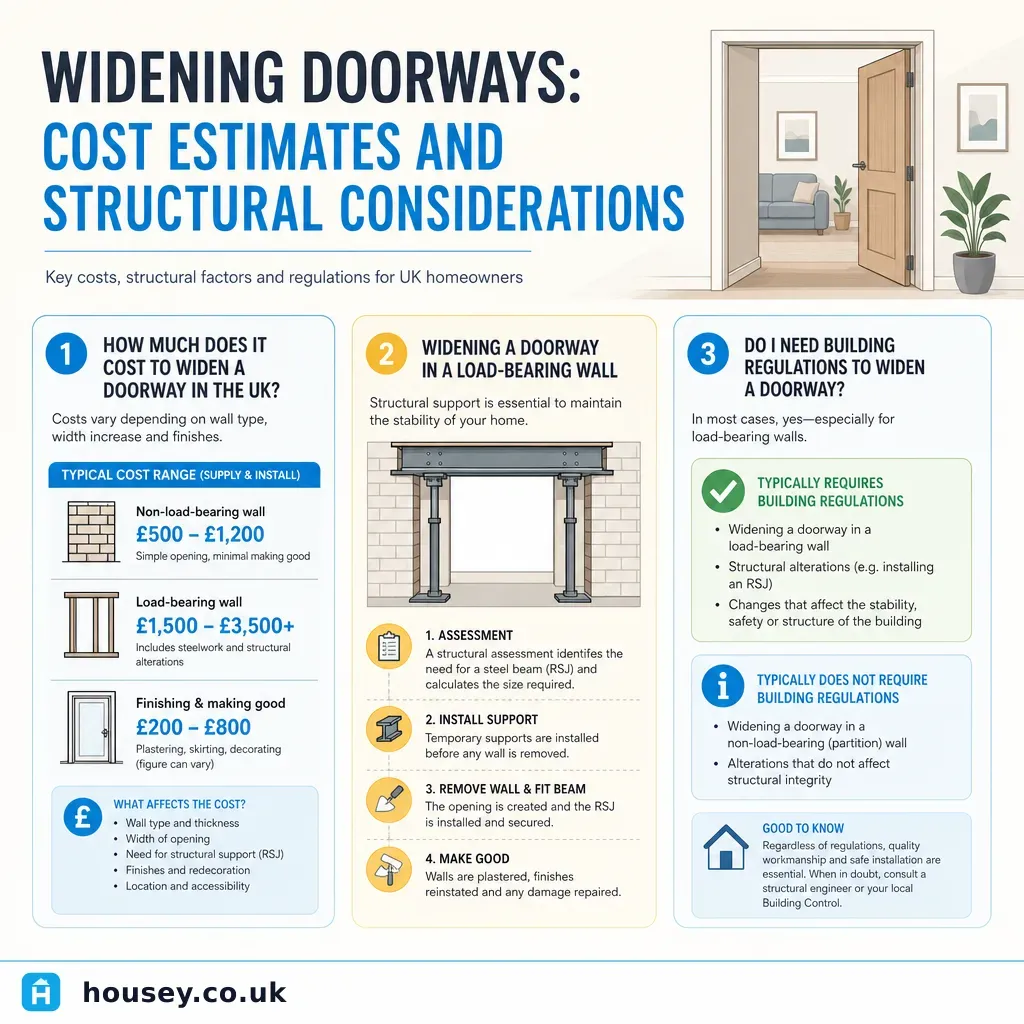
Widening Doorways: Cost Estimates and Structural Considerations
A doorway in a non-load-bearing partition can usually be widened for £500–£1,500.
 Improvement & Build
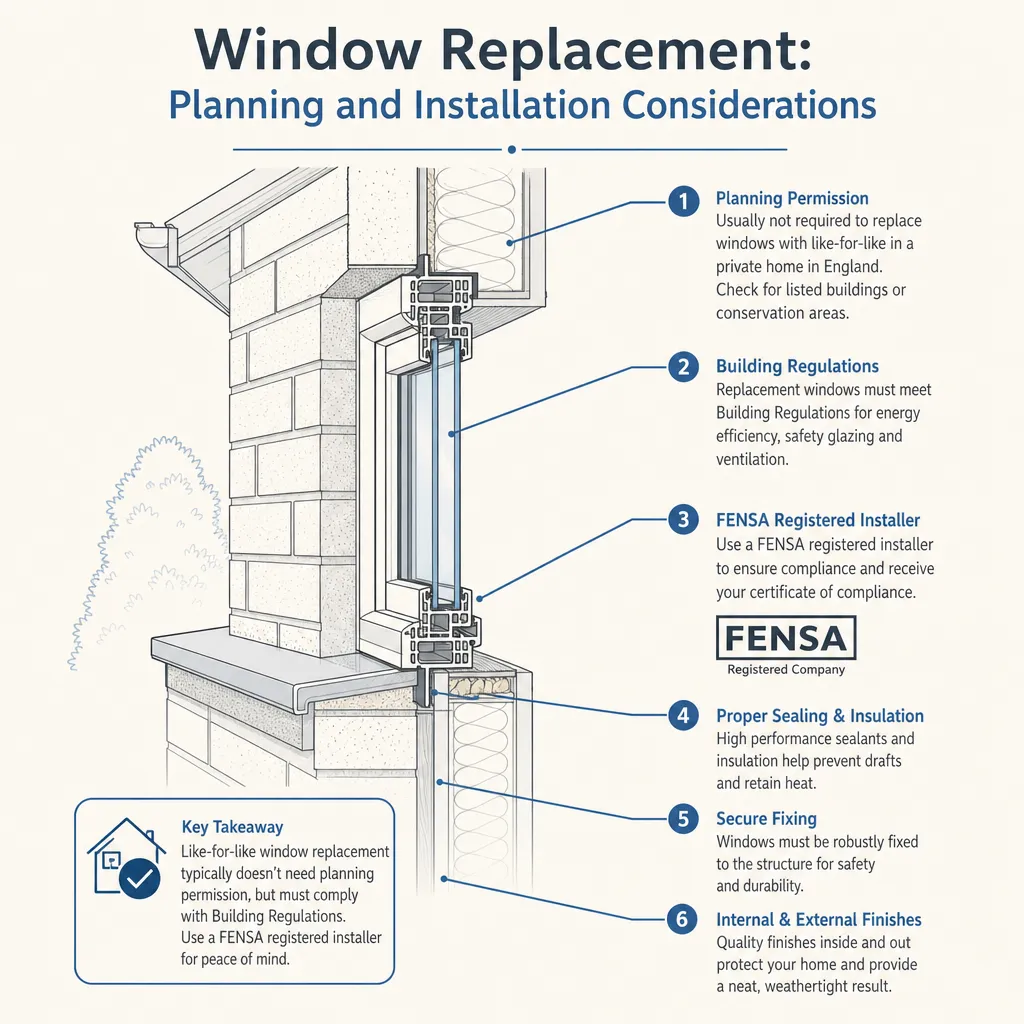
Window Replacement: Planning and Installation Considerations
Most window replacements in England fall under permitted development and do not need planning permission, though listed buildings, flats, and conservation areas are exceptions.
 Improvement & Build
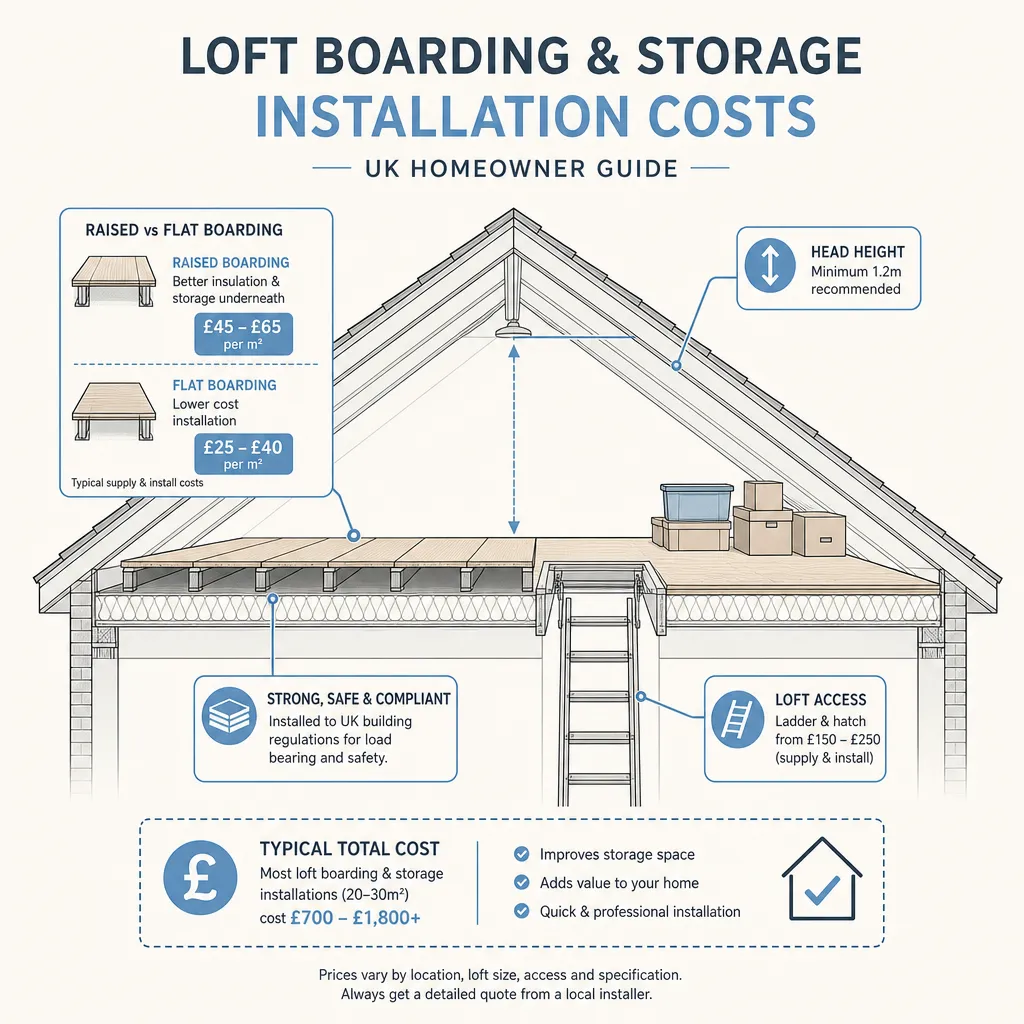
Loft Boarding and Storage Installation Costs
Basic loft boarding for an average semi-detached home costs £500–£1,500; a raised system that preserves insulation runs £800–£2,500.