Shiplap Wall Installation Ideas and Design Inspiration
By Housey · Last reviewed 18th of May 2026
Shiplap Wall Installation Ideas and Design Inspiration
Interior shiplap has moved well beyond its agricultural and cladding origins to become one of the most requested decorative wall treatments in UK home renovation. Whether you are refreshing a Victorian hallway, adding character to a new-build kitchen-diner, or panelling a garden room, the breadth of board profiles, finishes, and orientations means the possibilities are considerable. The challenge is selecting an approach that suits the room's proportions, humidity level, and your longer-term maintenance appetite.
Key points
- Interior shiplap boards are available in pine, MDF, moisture-resistant (MR) composite, and PVC-cored profiles; material choice depends on the room's humidity level and intended finish.
- Horizontal boards tend to make a room feel wider; vertical boards draw the eye upward and can make low-ceilinged rooms feel taller — orientation is a functional design decision as well as an aesthetic one.
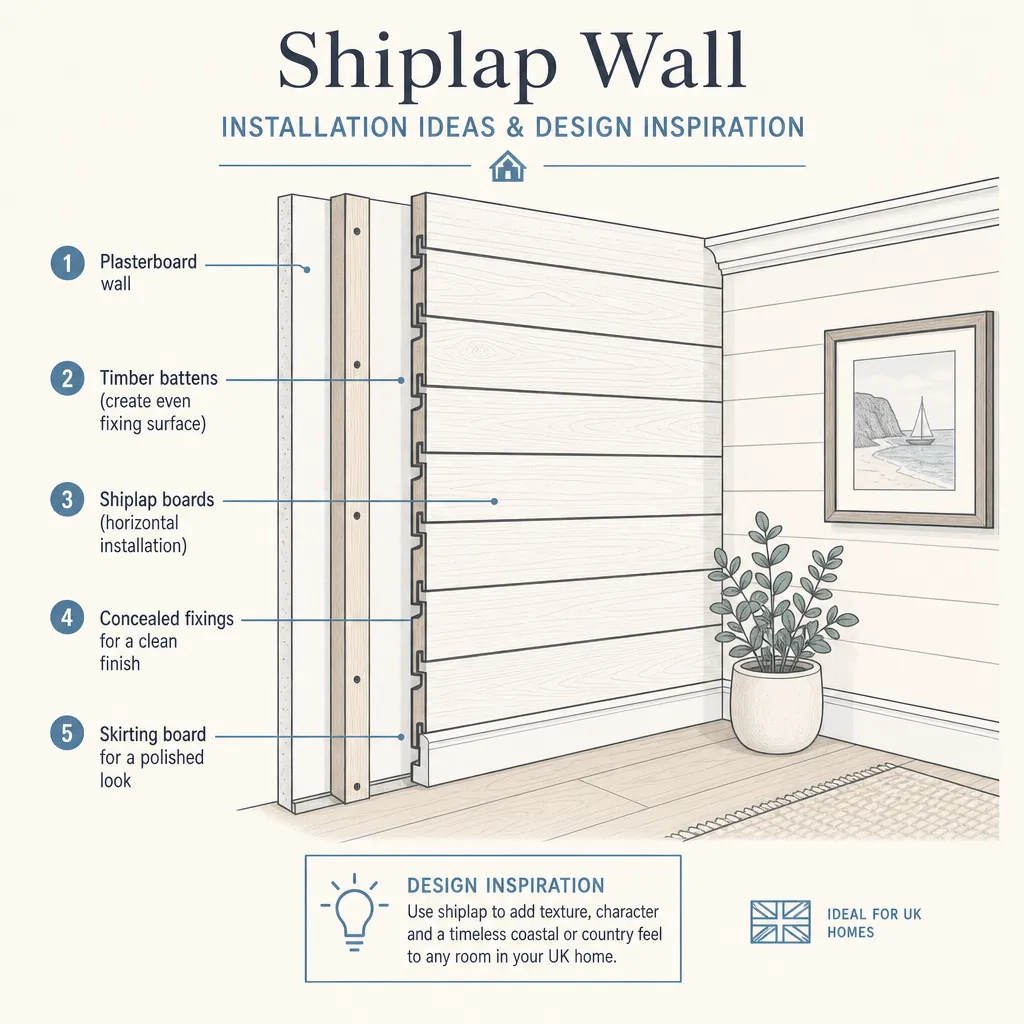
- A standard rebated or tongue-and-groove shiplap board is typically 95–145 mm wide and 12–18 mm thick; narrower boards (around 75 mm) suit compact hallways, while wider boards (145–170 mm) suit open-plan spaces and double-height walls.
- Priming all four sides of timber boards before installation — including the back face — significantly reduces warping and moisture movement; the back is the face most commonly overlooked on site.
- Eggshell paint on shiplap gives a semi-reflective finish that emphasises board edges; matte emulsion softens them; a two-tone scheme with boards in one shade and reveal strips in a slightly deeper tone adds visual depth.
Room-by-room shiplap design ideas
Hallways and stairwells
The hallway is arguably the most popular location for interior shiplap in UK homes. Both horizontal and vertical boards at dado height (roughly 900 mm) or full height can work well. A full-height vertical run in a narrow Victorian or Edwardian hallway can make the space feel taller and more defined, particularly in a pale warm white or off-white.
Practical consideration: hallways take significant impact from bags, pushchairs, and coats. Choose a hardwearing finish — eggshell or satinwood rather than matte emulsion — and seal any exposed cut edges to prevent chipping and moisture ingress.
Living rooms and snugs
A single shiplap feature wall behind a sofa or media unit anchors the room without overwhelming it. Horizontal boards in chalky off-white, muted slate, deep forest green, or terracotta all translate well. A recessed alcove clad in shiplap with floating shelves either side is a high-impact, relatively low-cost transformation that suits Victorian terraces and 1930s semis alike.
In open-plan kitchen-diners, shiplap used as half-height panelling on the dining side — running from the skirting to roughly 1,100 mm — creates visual zoning and a practical, wipeable surface that separates cooking from dining without building a wall.
Kitchens and utility rooms
Shiplap in a utility room adds warmth to a typically functional space. For kitchen walls, use MR composite boards or thoroughly sealed timber, and keep shiplap away from areas directly above hobs or sinks where steam and grease accumulate. A tiled splash zone can transition into shiplap at a higher level for a layered look.
Bathrooms and shower rooms
Moisture-resistant PVC-cored shiplap panels — marketed in the UK as bathroom cladding or wet-wall panels — are designed for high-humidity environments and can serve as a tile alternative. They are not the same product as standard timber shiplap: always check the humidity rating before installation. PVC bathroom cladding requires no grout, is easy to wipe clean, and can be cut with a fine-tooth saw.
Garden rooms and outbuildings
Internal shiplap in a garden office or summerhouse is both functional and visually effective — boards provide a modest insulation uplift when backed with mineral wool and give a finished look without needing a plasterer. Natural pine or larch boards left unfinished or treated with an oil or wax suit these settings particularly well.
Board orientation and proportion: quick reference
Orientation | Visual effect | Best for | Avoid when |
|---|---|---|---|
Horizontal | Widens the space | Hallways, living rooms, bathrooms | Very wide rooms — can make ceilings feel low |
Vertical | Raises the ceiling visually | Low-ceilinged rooms, stairwells | Very tall double-height spaces |
Diagonal | Bold and contemporary | Single feature wall, snug alcoves | Whole-room treatment — becomes visually busy |
Herringbone | Premium, formal character | High-budget feature walls | Beginner installs or budget-sensitive projects |
Homeowner installation checklist
Before starting a shiplap installation, work through this checklist:
What to ask before hiring a joiner or decorator
If you are not fitting the shiplap yourself, these questions help you compare quotes and assess contractor experience:
- What board profile and material are you recommending, and why is it appropriate for this room?
- How will you deal with obstacles such as sockets, switches, and window reveals?
- Will you prime the backs of boards before installation?
- How will you handle the junctions at skirting and cornice?
- What paint system do you recommend for this room's use and traffic level?
- Is the quote inclusive of materials, or is it labour only?
- Do you have photographs of previous shiplap or panelling installations you have completed?
- What is your process if boards warp or gap after the job is complete?
When to get professional help
Most interior shiplap on a decorative feature wall in a habitable room is within reach of a confident DIYer. Consider using a qualified joiner or experienced carpenter if:
- The installation spans an entire room, with complex mitres at external corners and window or door reveals.
- The wall contains services — pipes or cables — that need to be safely worked around.
- You want a built-in look: shiplap integrated with alcove shelving, a media unit, or under-stair panelling.
- The room is a bathroom or wet room, where product selection and moisture management need careful attention.
How Housey can help
If your shiplap project is part of a broader room renovation or home improvement, Housey can connect you with vetted local joiners and decorators who provide itemised quotes, making it straightforward to compare costs and credentials before committing to a contractor.
Frequently asked questions
Do I need to prime shiplap before painting?
Yes — and prime all four faces, not just the front. The back face is in contact with the wall and subject to the room's humidity cycle. Unprimed backs are the most common cause of board cupping and warping after installation. Use a water-based or oil-based primer appropriate to the board material; MDF requires a dedicated MDF primer to seal the absorbent end grain before any topcoat is applied.
Can shiplap be installed over existing wall tiles?
In some cases, yes — if the tiles are firmly adhered and the surface is reasonably flat. However, the extra board depth can create complications at door frames, window reveals, and socket boxes. Removing tiles and making good the wall first usually gives a cleaner and more durable result. Always confirm that the additional weight is adequately supported by fixings into the structural substrate behind the tiles.
What is the difference between shiplap, tongue-and-groove, and V-groove panelling?
All three are interlocking timber board systems. Shiplap boards have a rebated edge so each board overlaps the next, leaving a shadow gap. Tongue-and-groove boards slot together tightly with no visible gap. V-groove panelling is a tongue-and-groove system machined to create a V-shaped groove at each joint. Shiplap reads as more rustic; V-groove is crisper and more formal.
How much does shiplap installation cost in the UK?
A joiner fitting shiplap to a standard bedroom feature wall of approximately 10–15 m² typically charges £300–£700 for labour, with materials adding £120–£300 depending on board type (Indicative UK costs, last reviewed 2026-05-18). Always get at least three comparable quotes and confirm whether materials, priming, and painting are included in the price.
Sources and further reading
Useful next reads
 Improvement & Build
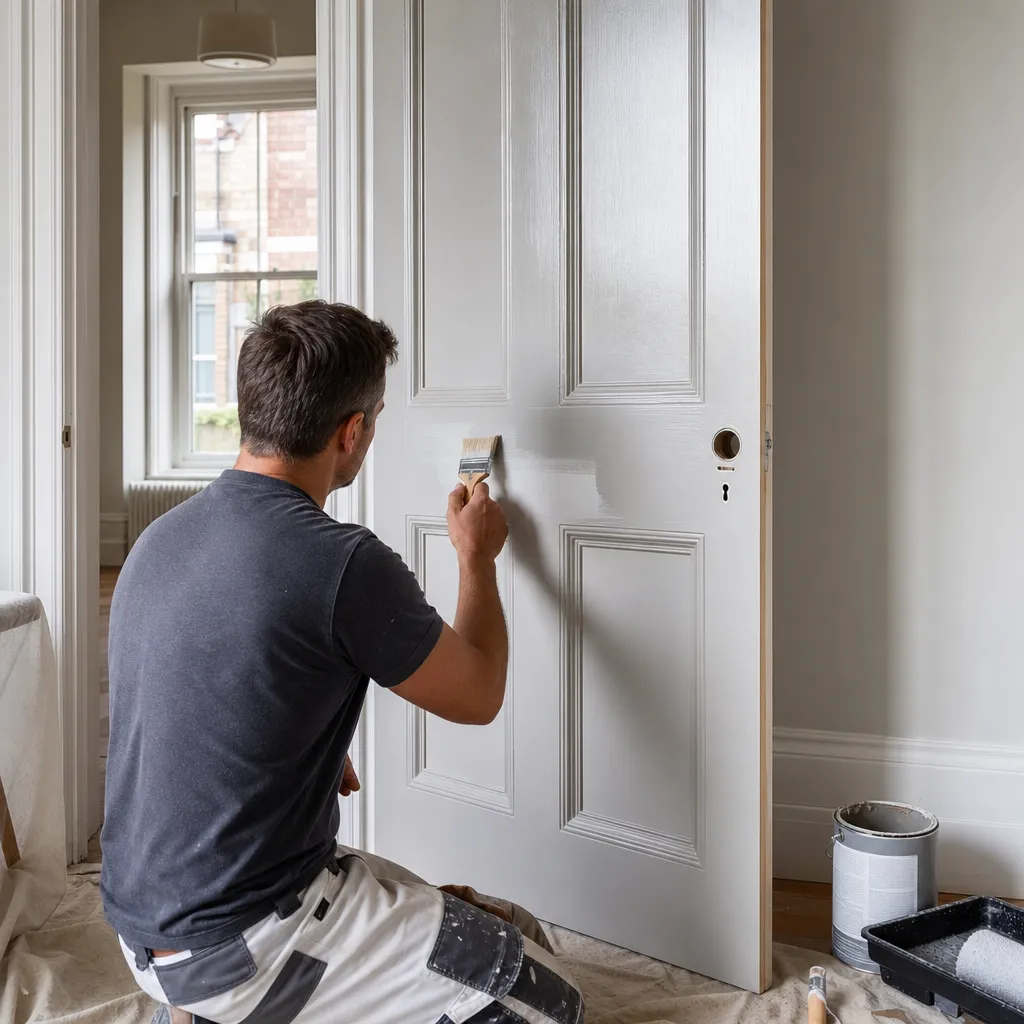
Painting Interior Doors: Preparation and Technique
Painting interior doors well depends on preparation rather than paint choice.
 Improvement & Build
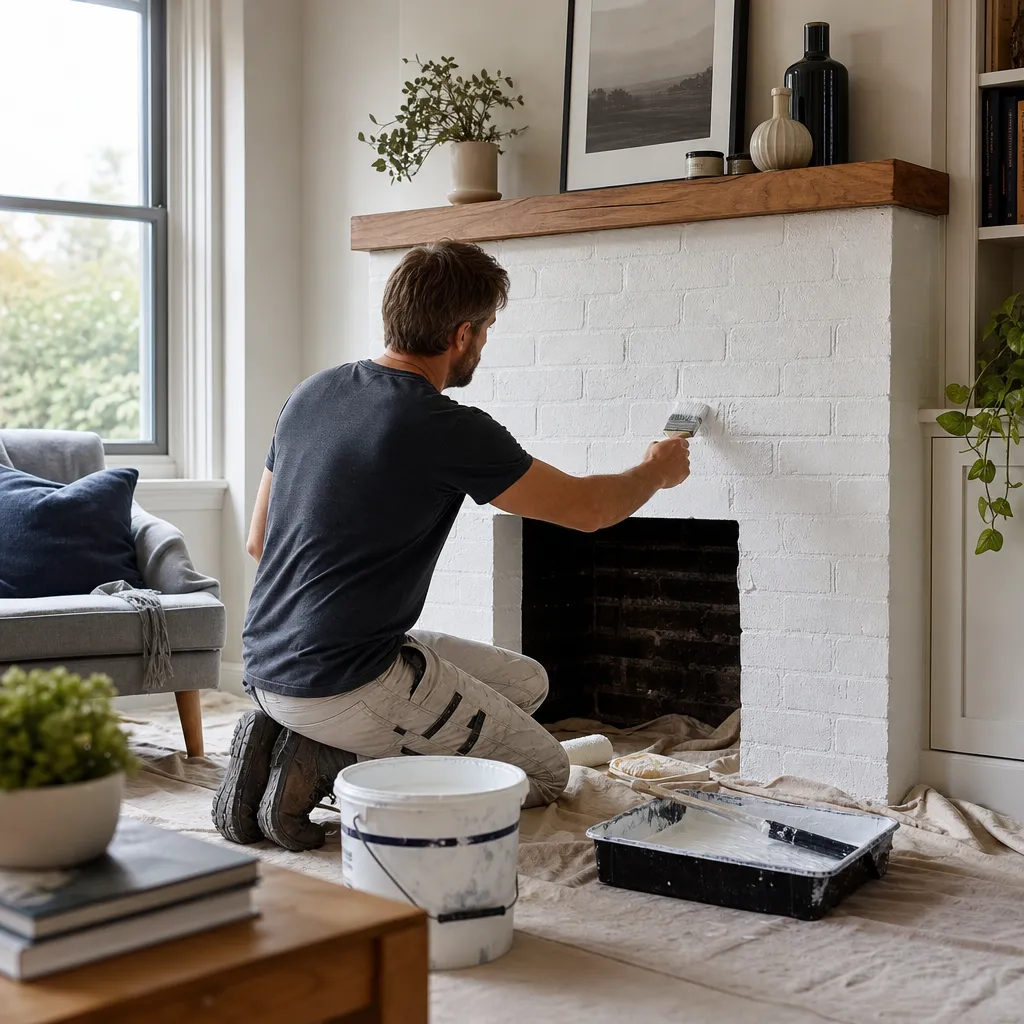
Painting Brick Fireplaces: Preparation, Materials and Technique
Painting a brick fireplace requires thorough cleaning, a masonry-specific primer, and heat-resistant paint rated to at least 200°C for the firebox area.
 Improvement & Build
Professional Advice on Home Interior Design and Decoration
In the UK, interior designers typically handle space planning, material specification, and contractor coordination, while decorators focus on surface finishes and styling.
 Improvement & Build
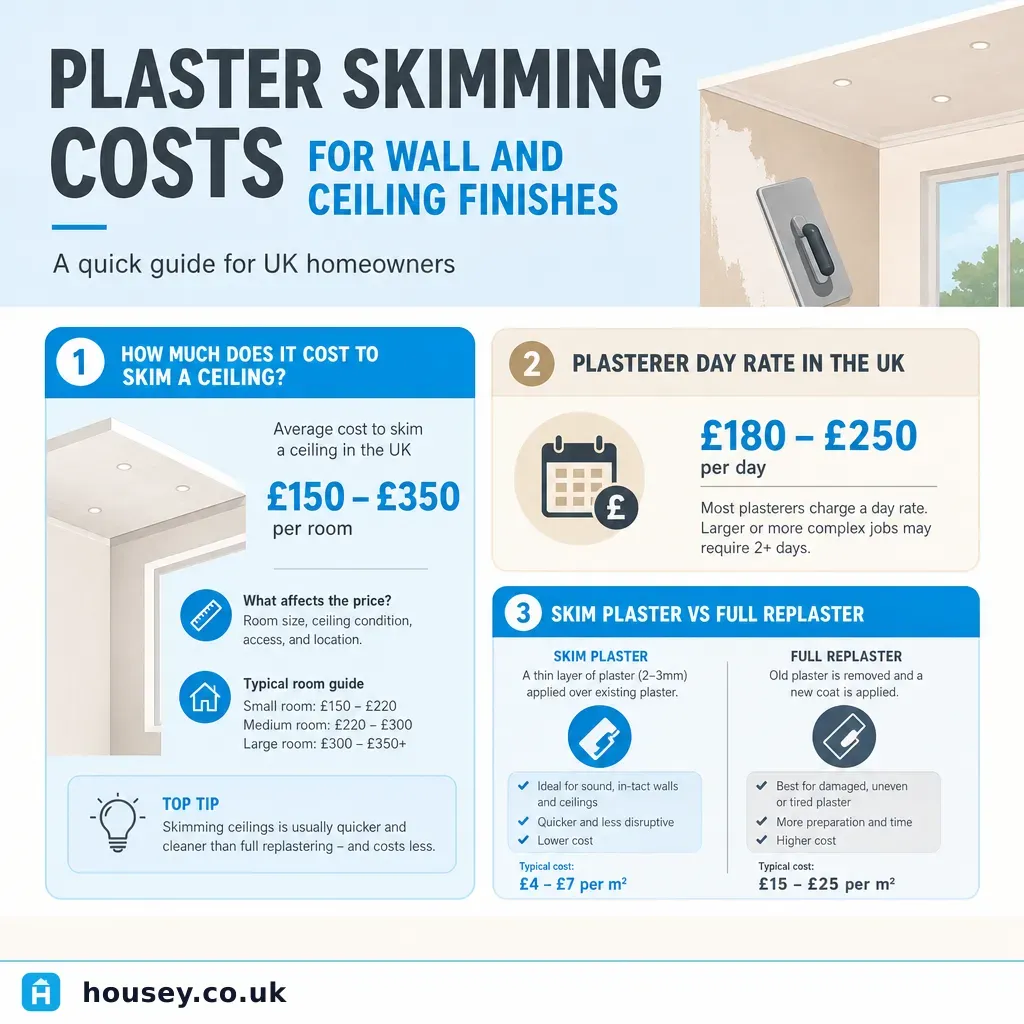
Plaster Skimming Costs for Wall and Ceiling Finishes
Skim plastering a typical bedroom costs £400–£750 for walls and ceiling combined; a single ceiling runs £150–£350 and a single wall £80–£180.
 Improvement & Build
Renovation Scheduling: Should You Paint Before or After Laying Flooring?
In most UK renovation projects, paint the walls first, then lay the flooring.