Weatherstripping Replacement: Sealing Gaps to Improve Efficiency
By Housey · Last reviewed 31st of May 2026
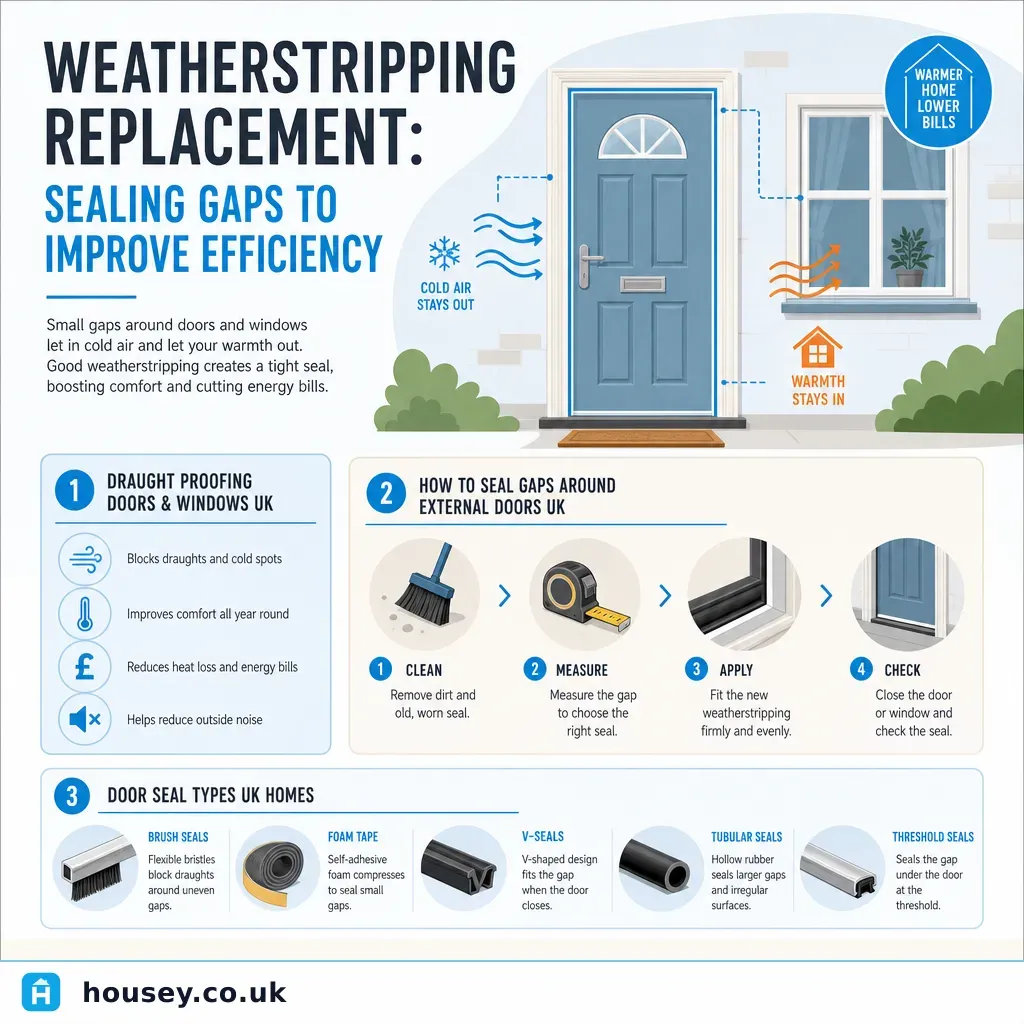
Weatherstripping Replacement: Sealing Gaps to Improve Efficiency
Draughts creeping under external doors or around window frames are a common complaint in UK homes of every era — from Victorian terraces with ill-fitting timber sashes to 1990s estate houses where original door seals have perished with age. The question of whether to replace worn weatherstripping typically arises when energy bills climb, when cold air moves noticeably across the floor in winter, or when condensation patterns suggest uncontrolled air infiltration around frames. Getting the right seal type for each opening matters: the wrong profile compresses too quickly, lifts from the adhesive backing, or leaves the gap it was meant to close.
Key points
- The Energy Saving Trust estimates that draught proofing saves a typical UK household around £45–£60 per year on heating bills.
- EPDM rubber and silicone foam weatherstrips outlast basic polyurethane foam tape, which compresses and degrades within one to two heating seasons.
- Brush pile seals (fin seals) suit larger or irregular gaps — particularly letterboxes, threshold gaps, and older sash window channels.
- Older timber sash windows require specialist mohair pile (woven) seals, not standard foam or rubber strip.
- Building Regulations Part L (conservation of fuel and power) applies when new doors or windows are installed; it does not mandate replacing seals on existing frames, but good-quality weatherstripping supports compliance with thermal performance targets.
Types of weatherstripping: which suits your home?
Choosing the right weatherstrip type depends on the frame material, the size of the gap, and how much the door or window moves in use.
Type | Best for | Not ideal for | Expected lifespan | Notes |
|---|---|---|---|---|
Self-adhesive foam tape (polyurethane) | Small gaps on infrequently used doors | High-traffic external doors, large gaps | 1–2 years | Lowest cost; compresses quickly |
EPDM rubber strip | External doors, uPVC frames, moderate gaps | Very large gaps, sash window channels | 5–10 years | Good compression resistance and frost tolerance |
Silicone strip | Metal and timber frames, external doors | Rough or uneven rebates | 5–10 years | Flexible; handles temperature swings well |
Brush pile / fin seal | Sash windows, sliding doors, letterboxes, threshold gaps | Compression-fit rebates | 5–8 years | Allows movement while sealing; available in mohair for sash windows |
Door threshold seal (drop-down or automatic) | External door bottom edges with large gaps | Interior doors | 5–15 years | Drops when door closes; suits accessible thresholds |
Excluder draught strip (silicone wiper) | French doors, bi-fold doors | Pivot doors | 5–10 years | Often fitted to the door face rather than the frame rebate |
Indicative product lifespans, last reviewed 2026-05-31. Actual performance depends on exposure, fitting quality, and frequency of use.
How to identify where seals have failed
Before buying replacement weatherstripping, locate every draught point. Useful inspection methods include:
- The paper test: close a door or window on a sheet of paper. If you can pull the paper out without tearing it, the seal at that point is inadequate.
- Hand test on a cold day: run your hand slowly around door and window edges during cold, breezy weather. Air movement is easy to feel close to the frame.
- Candle or incense stick: hold a lit stick near a closed door or window in still indoor conditions; smoke deflection shows where air is moving. Keep away from curtains and flammable materials.
- Thermal imaging camera: some councils offer loan schemes and energy auditors may include this in a home energy assessment. Cold spots and air infiltration show up immediately on a thermal image.
Focus checks on: external door frames (top, sides, and bottom edges), letterbox flaps, keyhole covers, window compression points, sash window meeting rails, cat flaps, and service penetrations through external walls.
DIY replacement: what's involved
Replacing most weatherstripping is a practical DIY task requiring no specialist tools beyond a tape measure, scissors or craft knife, and possibly a screwdriver for frame-mounted strip holders.
Step 1 — Prepare the frame: Remove old seals carefully. Clean off adhesive residue with white spirit or an appropriate adhesive remover; new product will not bond to a contaminated surface.
Step 2 — Measure accurately: Measure each frame section and buy 10–15% more material than needed to allow for mitred corners and any errors.
Step 3 — Choose the correct profile: Match the compressed thickness of the strip to the actual gap size. Most manufacturers provide a gap-size guide.
Step 4 — Fit without over-stretching: Adhesive foam and rubber strips should not be stretched around corners — they will shrink back and lift over time.
Step 5 — Test the closure: The door or window should close firmly but without excessive resistance. If it fails to close properly, the strip profile may be too large for the rebate.
When a door is badly misaligned, warped, or the frame itself is damaged, seals alone will not resolve the draught. The frame or door requires adjustment or replacement before new seals will be effective.
Costs for weatherstripping in the UK
Indicative UK costs, last reviewed 2026-05-31:
- DIY materials only: £5–£30 per external door or window, depending on strip type and quality
- Professional draught proofing service: £80–£200 per door or window set; whole-house packages typically £200–£500
- Specialist sash window draught proofing: £150–£350 per window (often includes brush channels, meeting rail seals, and minor frame repairs)
- Automatic door threshold seal (supply and fit): £80–£250 depending on door width and mechanism
Obtain at least two to three quotes for professional work; prices vary by region and the extent of preparation required.
Homeowner checklist before replacing weatherstripping
When to get professional help
Most weatherstripping can be replaced without a tradesperson. Professional involvement is worth considering when:
- The door or window frame itself is warped, rotted, or structurally compromised — seals alone will not hold
- Composite or hardwood doors have specialist factory seals that are not readily available as aftermarket products
- Sash windows have extensive deterioration requiring combined draught proofing and frame repair
- You want a whole-house draught audit with thermal imaging and a written energy report
- The property is listed or in a conservation area, where frame modifications may require consent from the local authority
How Housey can help
If failing seals are a symptom of doors or windows that have reached the end of their useful life, or if you want a professional whole-house draught survey and energy assessment, Housey can connect you with vetted window and door installers and energy-efficiency consultants in your area.
Frequently asked questions
How long does weatherstripping last on external doors?
It depends on the material. Basic self-adhesive foam tape may last only one to two heating seasons on a frequently used external door. EPDM rubber and silicone strips typically last five to ten years. Brush pile seals for sash windows generally last five to eight years. Exposure to UV, rain, and repeated compression all accelerate degradation.
Can I draught-proof a door without removing it?
Yes. Most weatherstripping is applied to the frame rebate or door stop with the door in place. Threshold drop seals are fitted to the door bottom edge. Only frame-channel brush strips on sash windows require partial disassembly. In most cases this is a straightforward DIY task needing only a tape measure, scissors, and possibly a screwdriver.
Does draught proofing cause condensation problems?
Reducing uncontrolled air infiltration can change how moisture moves through a home. If a property relies on draughts for background ventilation, improving seals without ensuring adequate controlled ventilation — trickle vents, intermittent extract fans — may increase condensation risk. Never block purpose-provided ventilators such as trickle vents or background ventilators serving habitable rooms.
Sources and further reading
- Draught proofing — Energy Saving Trust
- Approved Document L: Conservation of fuel and power — GOV.UK
- ECO4 scheme guidance — Ofgem
Useful next reads
 Improvement & Build
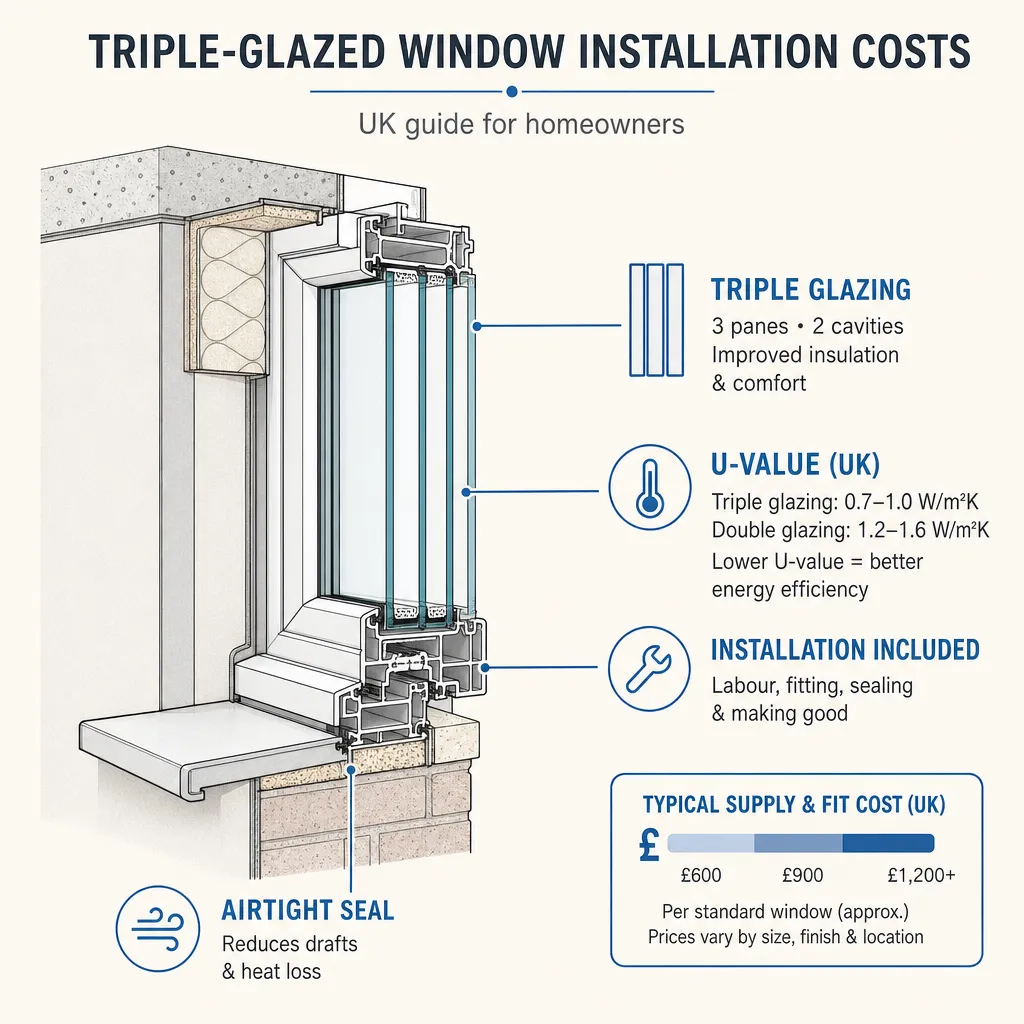
Triple-Glazed Window Installation Costs
Triple-glazed window installation in the UK typically costs £800–£1,800 per window, depending on size, frame material, and glazing specification.
 Improvement & Build
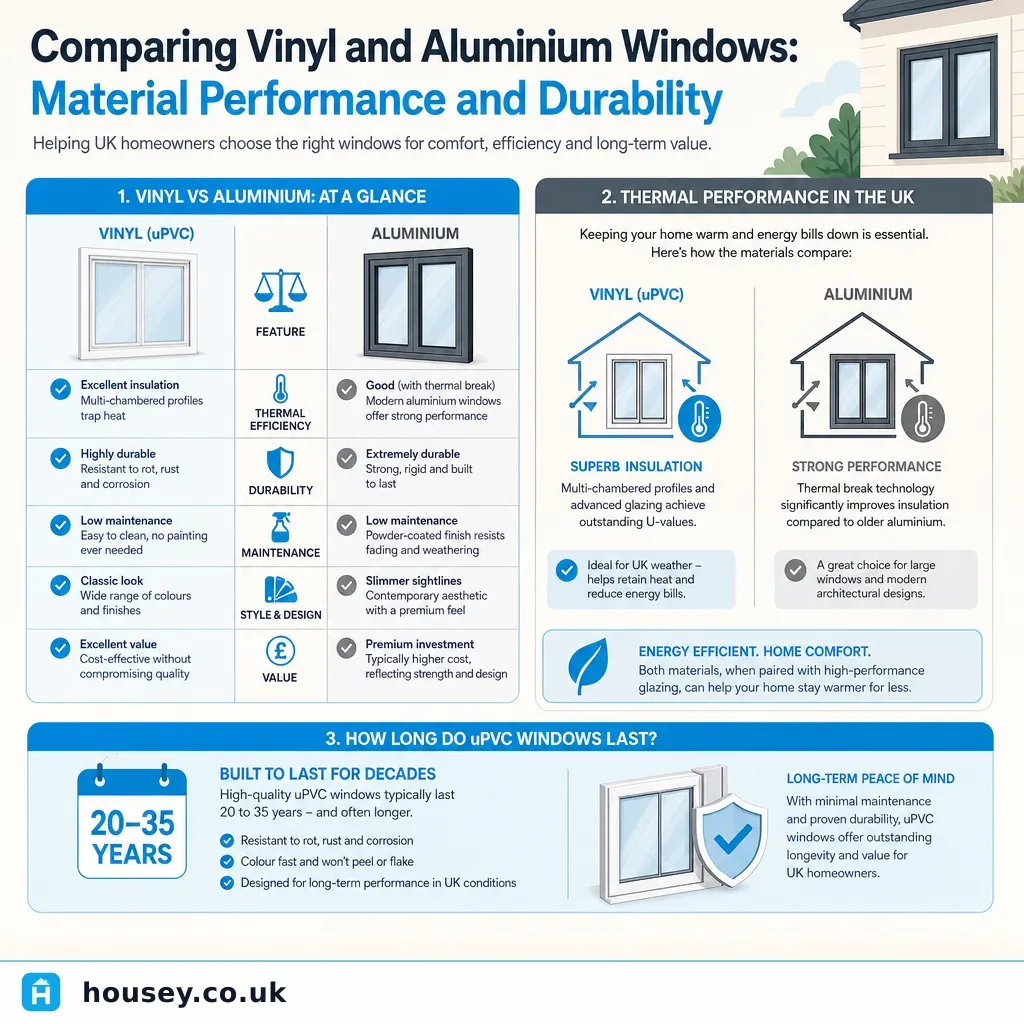
Comparing Vinyl and Aluminium Windows: Material Performance and Durability
uPVC (vinyl) and aluminium windows both meet UK Building Regulations Part L when properly specified.
 Improvement & Build
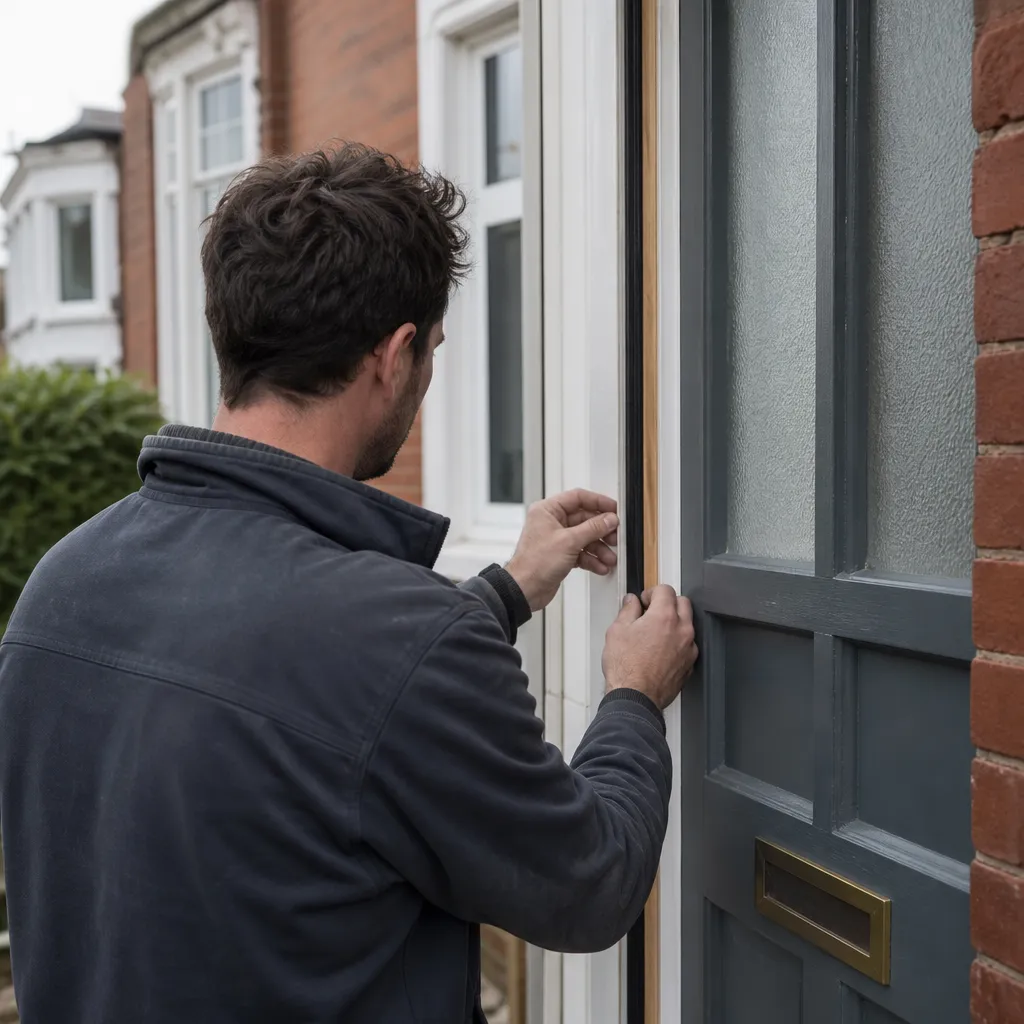
Door Weatherproofing And Sealing: Window And Door Contractors
Door weatherproofing involves fitting draught seals, threshold strips, letterbox brushes, and door sweeps to stop cold air and rain entering around the frame and threshold.
 Improvement & Build
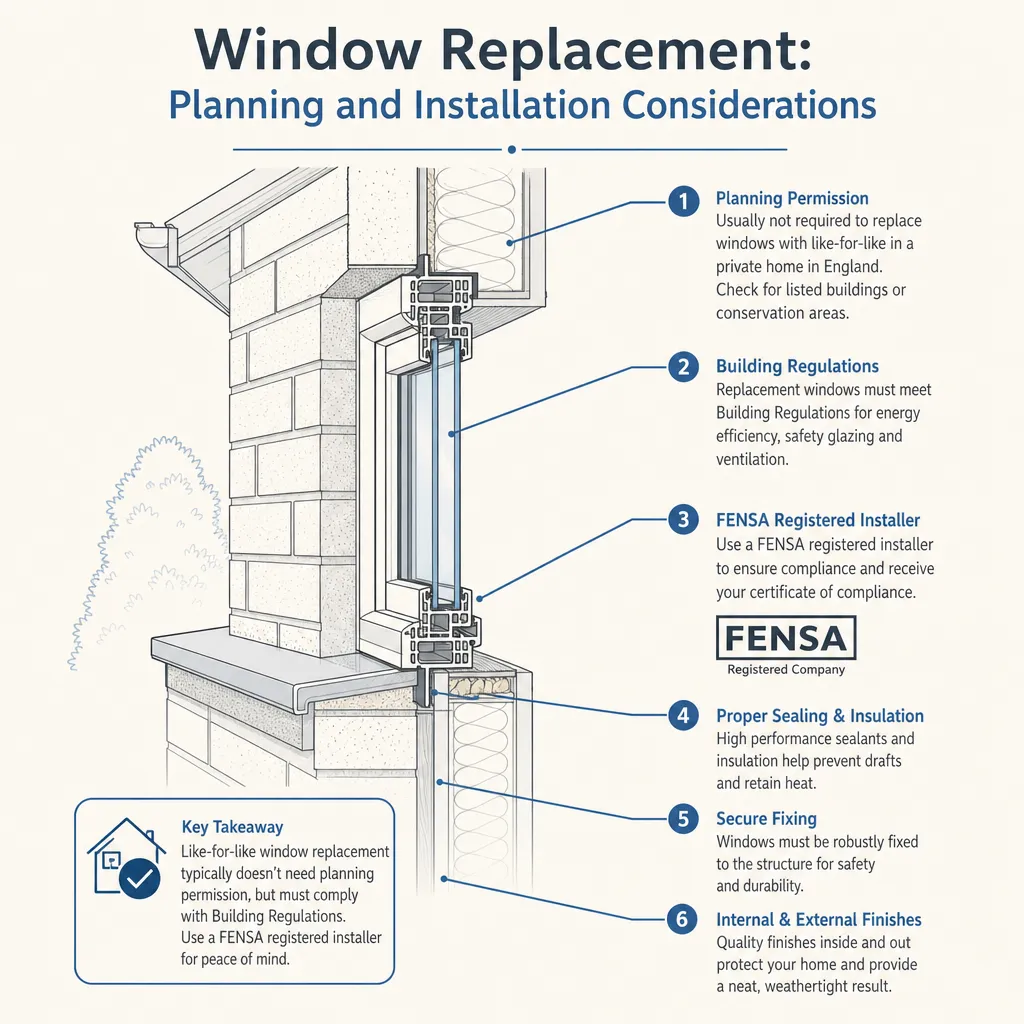
Window Replacement: Planning and Installation Considerations
Most window replacements in England fall under permitted development and do not need planning permission, though listed buildings, flats, and conservation areas are exceptions.
 Improvement & Build
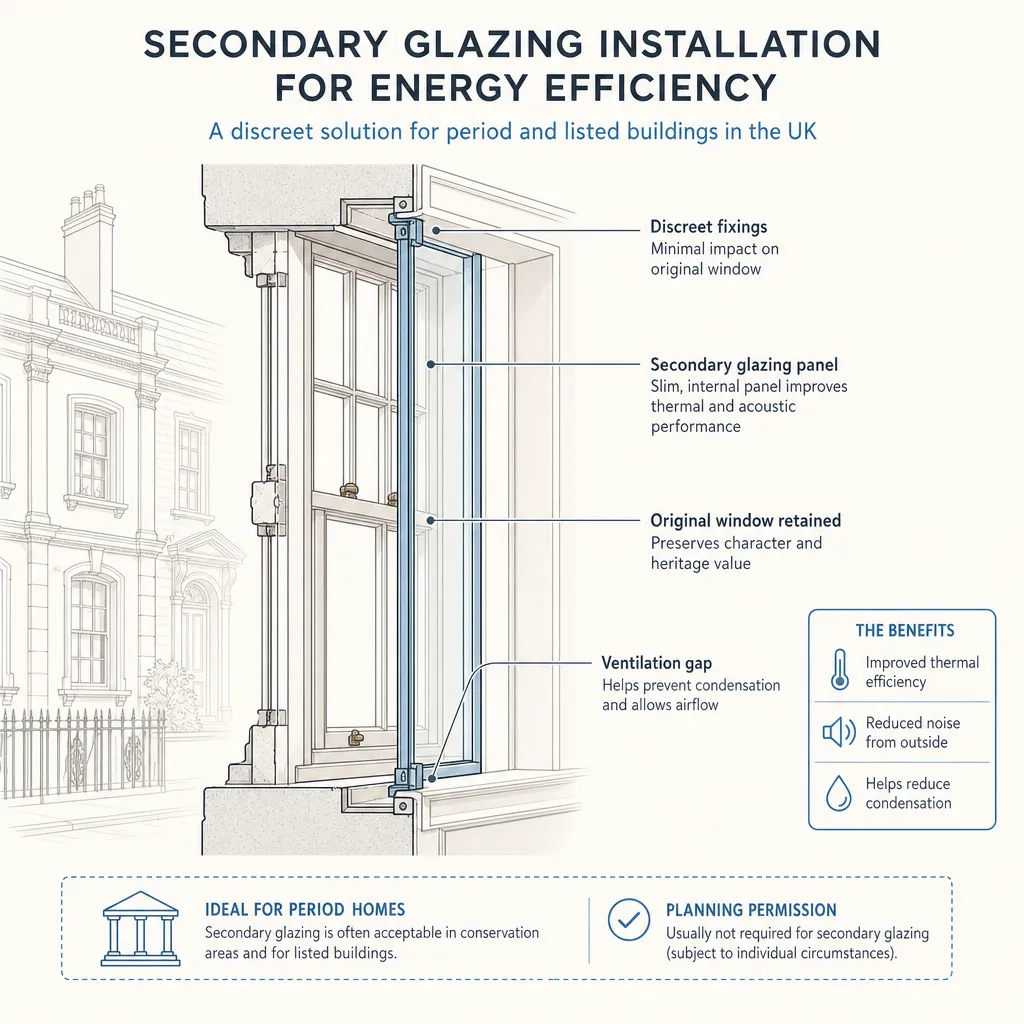
Secondary Glazing Installation for Energy Efficiency
Secondary glazing adds a separate inner pane to an existing window, improving thermal performance without replacing the original frame.